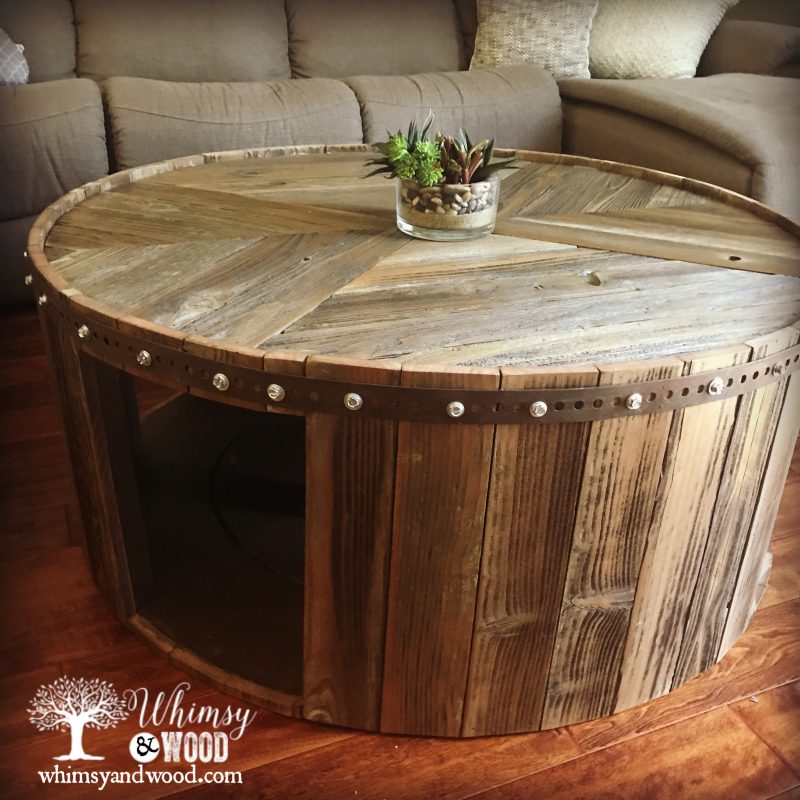
This reclaimed wood coffee table was definitely worth the wait!
Sometimes it feels like there are a million options for a furniture piece! Google search “coffee table” and scroll for days…none of them quite right.
I was wrestling with that very thing. We bought a new couch, picked the style, the fabric, and the ways it would recline. Waited 6 weeks for delivery. All set up in our living room, we settled in and tested the recliner seats…Clunk kicked right into our coffee table.
The table was an average rectangle shape & our new couch was more of a U shape. They weren’t working together. The table was functional, but not special….so, I wheeled it out to the curb & marked it FREE.
I kept an eye out for a great fit but didn’t want to settle…Meanwhile; my husband is dragging a chair from our dinette to host his morning coffee.
THEN, on a weekend trip to Napa California. I found a gorgeous reclaimed wood drum table on the patio at Jamieson Winery. I wanted to load it up and bring it home. Their table wasn’t for sale & I was pretty sure they would have noticed if my wine drunk self, tried to sneak it into my truck.
I settled for snapping some inspiration pics. This began the plan for our reclaimed wood coffee table. I will never be giving our new reclaimed wood coffee table away!

To build this table you will need:
Post contains affiliate links. If you purchase after clicking them I make a small commission at no cost to you.
Tape measure
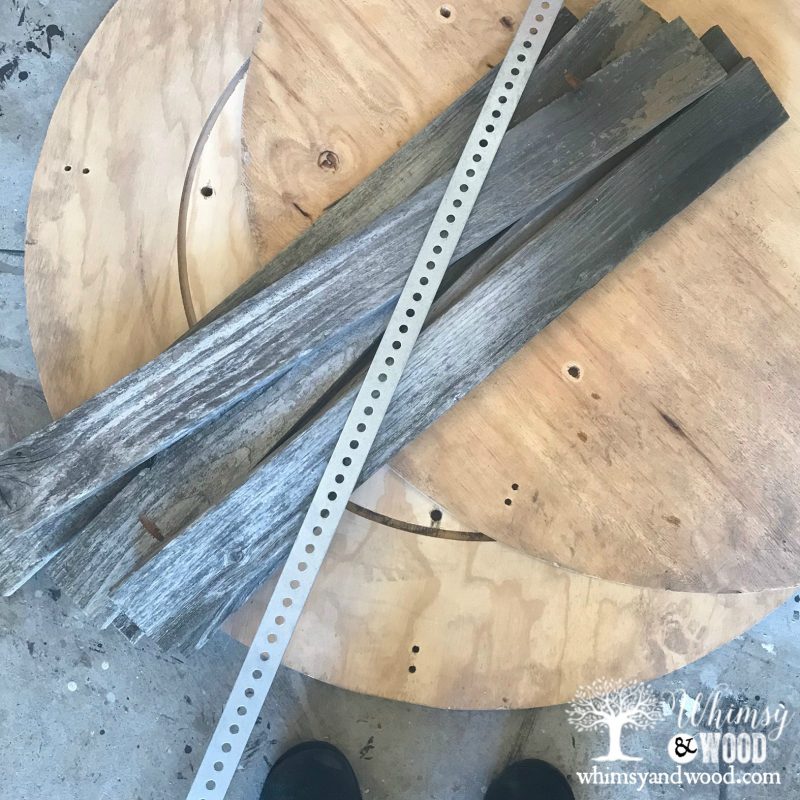
plywood cut into a circle (Ours was a recycled cable spool)
Reclaimed Wood pieces (We used old redwood fence posts)
Are you able to see the vision from this pile of scraps? Do you see my reclaimed wood coffee table?
How To Build this Reclaimed Wood Coffee Table
This table starts with plywood taken from a cable spool. Both the top & bottom circles. If you cannot find a company that discards them, you can cut your shapes from plywood. Remember the shape is up to you. A circle worked best for my space.
Next, I gathered wood from my reclaimed wood stock. The weathered boards were from an old fence a neighbor had replaced. Then two 2×4’s.
The average coffee table height is about 18″ tall, so I took 18″ & subtracted the thickness of my top & bottom wood pieces. I also subtracted the thickness of the reclaimed wood I planned on adding to the top of this plywood circle. (YAWN I know, but I hope it’s helpful to you)
Next, I cut my 2x4s to the height needed to bring my table to 18″.
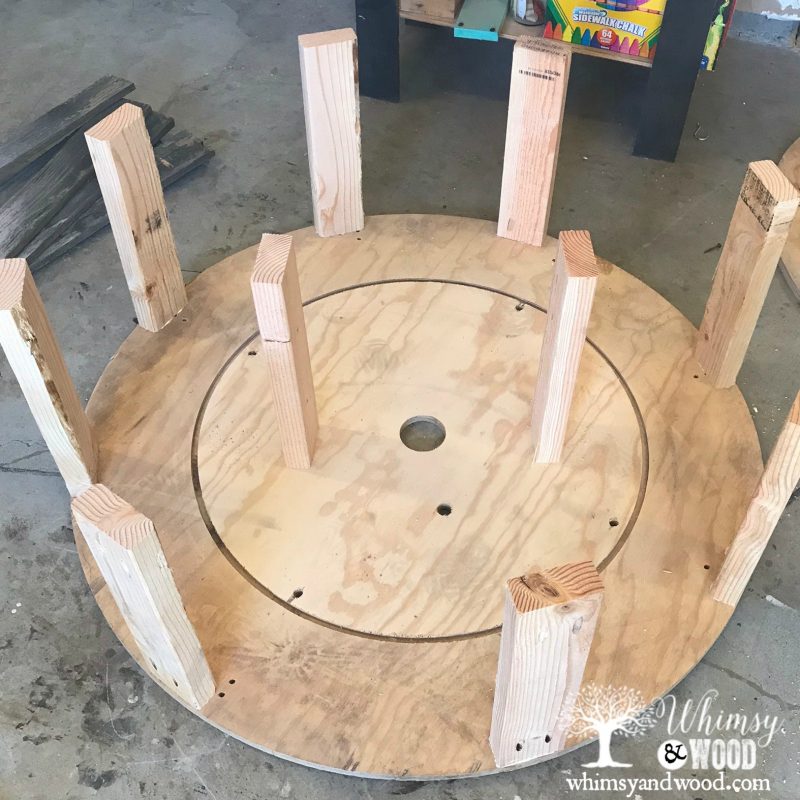
Using my Kreg Jig, I added pocket holes to the top & bottom of my 2x4s.
Using 1.25″pocket hole screws (make sure to use the correct size for your materials).
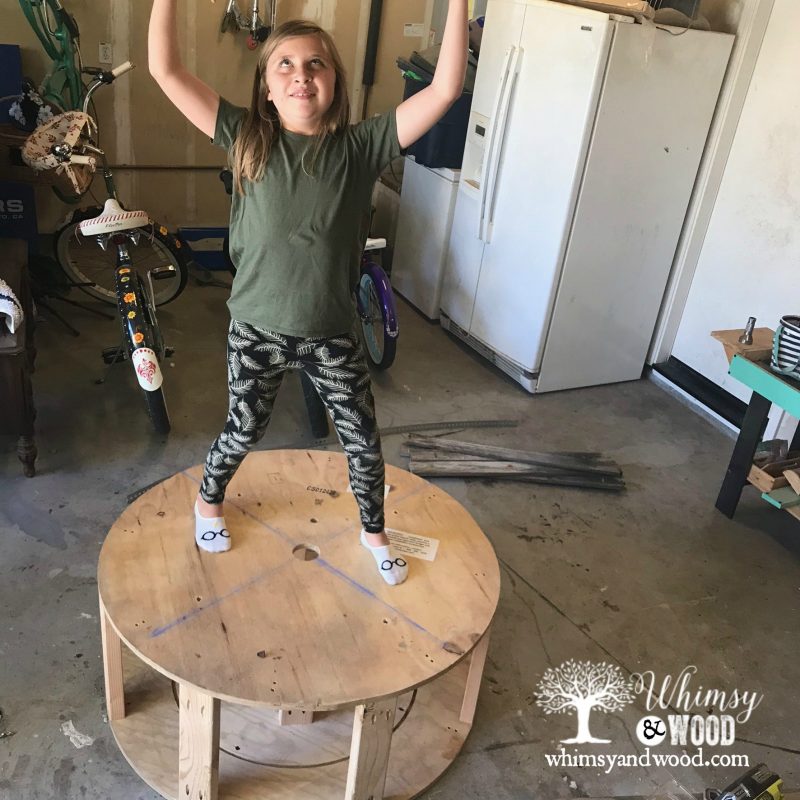
I put plenty of 2×4’s screwed in place and then had my mini-me stand on the table and dance to make sure our table would be sturdy. She is silly and makes every job much more fun!
Creating the Planked Top for our Reclaimed Wood Coffee Table
You can choose to run straight boards across in the all the same direction. Your table your rules.
I wanted the planked top with the pieces creating an interesting design. I started by snapping a chalk line across the center in 2 directions.
It turned out the circles were imperfect, but this gave me a good straight start line. Start by cutting 2 pieces of wood with a 45-degree angle on the end so 2 pieces fit together to make a 90-degree angle.Like 1 corner of a photo frame. Your ends will overhang your circle base. We will fix them later.
Then fill in this section by following with the same cut and laying them behind the first.
I lucked out. When I got to the last piece I was able to grab one of the triangle scraps from my earlier cuts.
Lay these pieces in place and repeat the pattern on the opposite side. This created an arrowhead pattern.
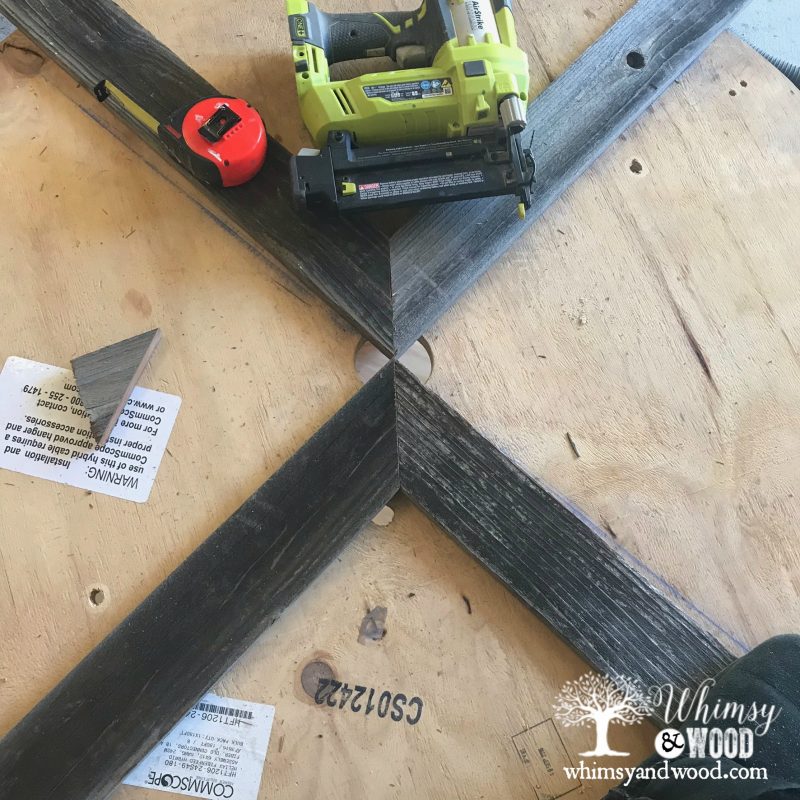
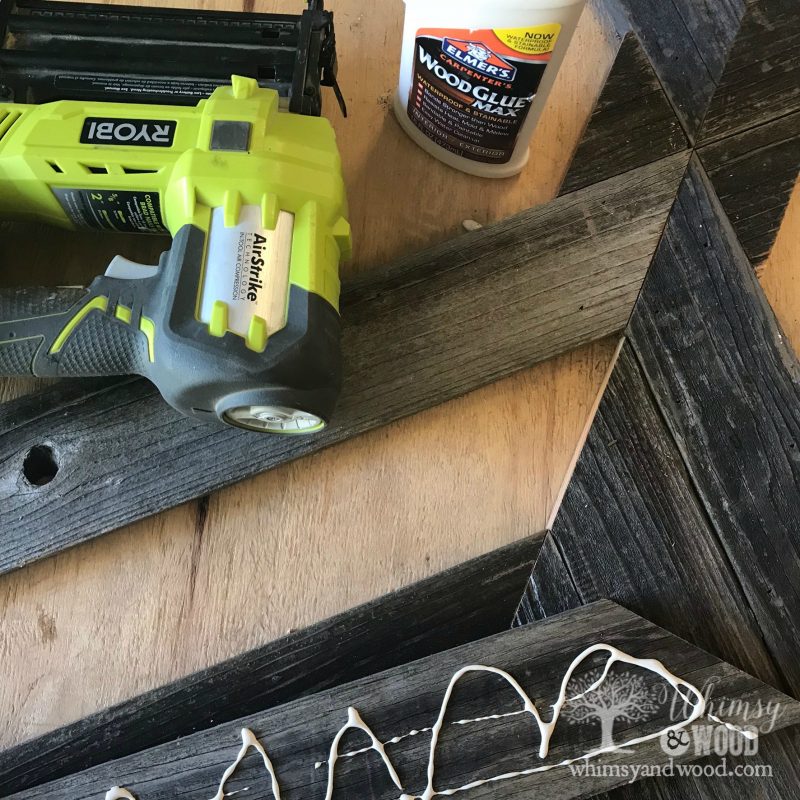
Once the pieces are dry fitted, you can grab your glue and your nail gun and secure them to your plywood top.
For this project, I wanted a rustic industrial finish. I left the nail holes unfilled. For a clean finish fill your nail holes with wood filler and sand when dry.
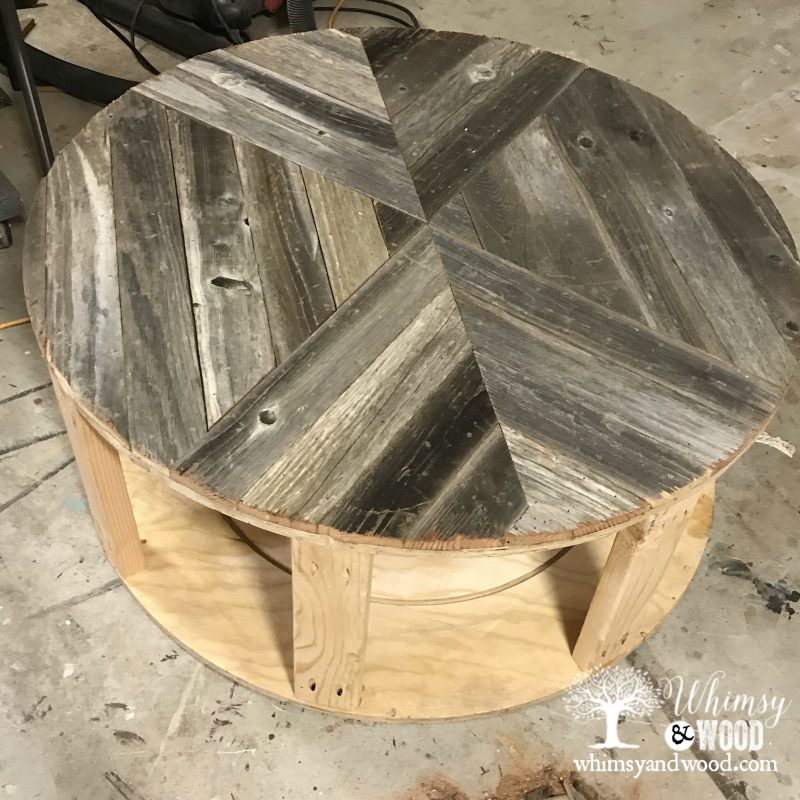
Next start mapping out the pattern in the 2 open sections. I chose boards running straight across with 45-degree angles cut on the ends. These laid evenly against my existing pattern. Again, build the section out by cutting and putting the pieces in place. When you are happy with the layout, glue & nail gun in place.
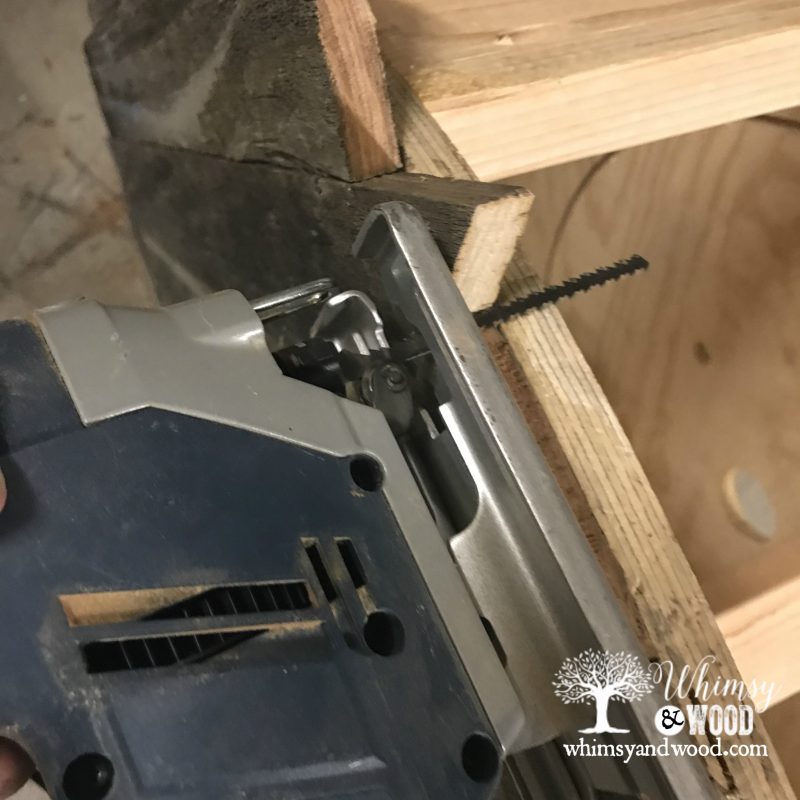
How to trim your pieces down
After gluing the pieces in place and allowing some dry time.
Grab your jigsaw, or your router, and trim the ends down to line up with the plywood base. The picture looks sideways because I had the table on its side as I cut the section. Note: I used a blade that will but both backward and forward. I love these blades on a project like this. You can find the set I purchased here.
Run your sander around the edges for a cleanup of the rough ends.
Building The Sides of the Reclaimed Wood Coffee Table
The original plan was to put wood pieces around the entire outside, like my inspiration piece. My husband made the suggestion to leave part of the base open for storage. I loved this idea and it would break up some of the wood.
This table was a huge 43″ across & breaking it up made it feel less heavy in the space.
Bonus, the cutouts created a great den for our small dogs. They love to curl up with a blanket inside the table!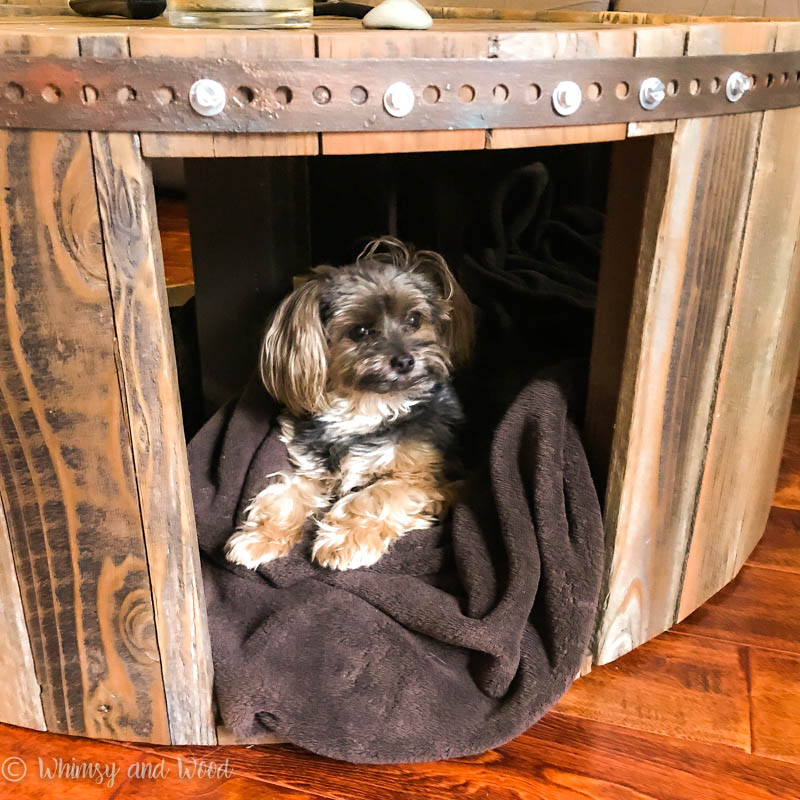
Reclaimed wood boards were cut tall enough to sit a half inch above the top wood plank pattern.
Put your adhesive in place on the plywood top and bottom edges.
Line the board up placing it in the glue and using a level on the edge to get in place straight.
Glue, and nail the first board in place & continue with the next board. I only checked for level on the first board and then trusted the others against the first one. I repeated the process after each space opening.
In the sections where an opening was created, small wood pieces were cut and the same glue and nail process was used to put them in place. These pieces hid our plywood base edges and created a finished look. Without them, it might look like a first graders picture with a missing tooth.
Side by side you can see the difference of old fence posts straight from the yard, and sanded old wood showing the beautiful grain.
Ready For Top Coat
Choose your sheen and your products. This table is for indoors so a matte indoor polyurethane was perfect. IF for outdoors I would use a spar urethane. Also, consider top coating your plywood insides before adding your redwood slats. Redwood does well outdoors, but the pine ply would not hold up as well.
Adding Character to our Reclaimed Wood Coffee Table
My inspiration piece had gorgeous metal accents I wanted to include. I chose a metal I had on hand & liked the look of. These metal strips are easy to get at your local hardware store.
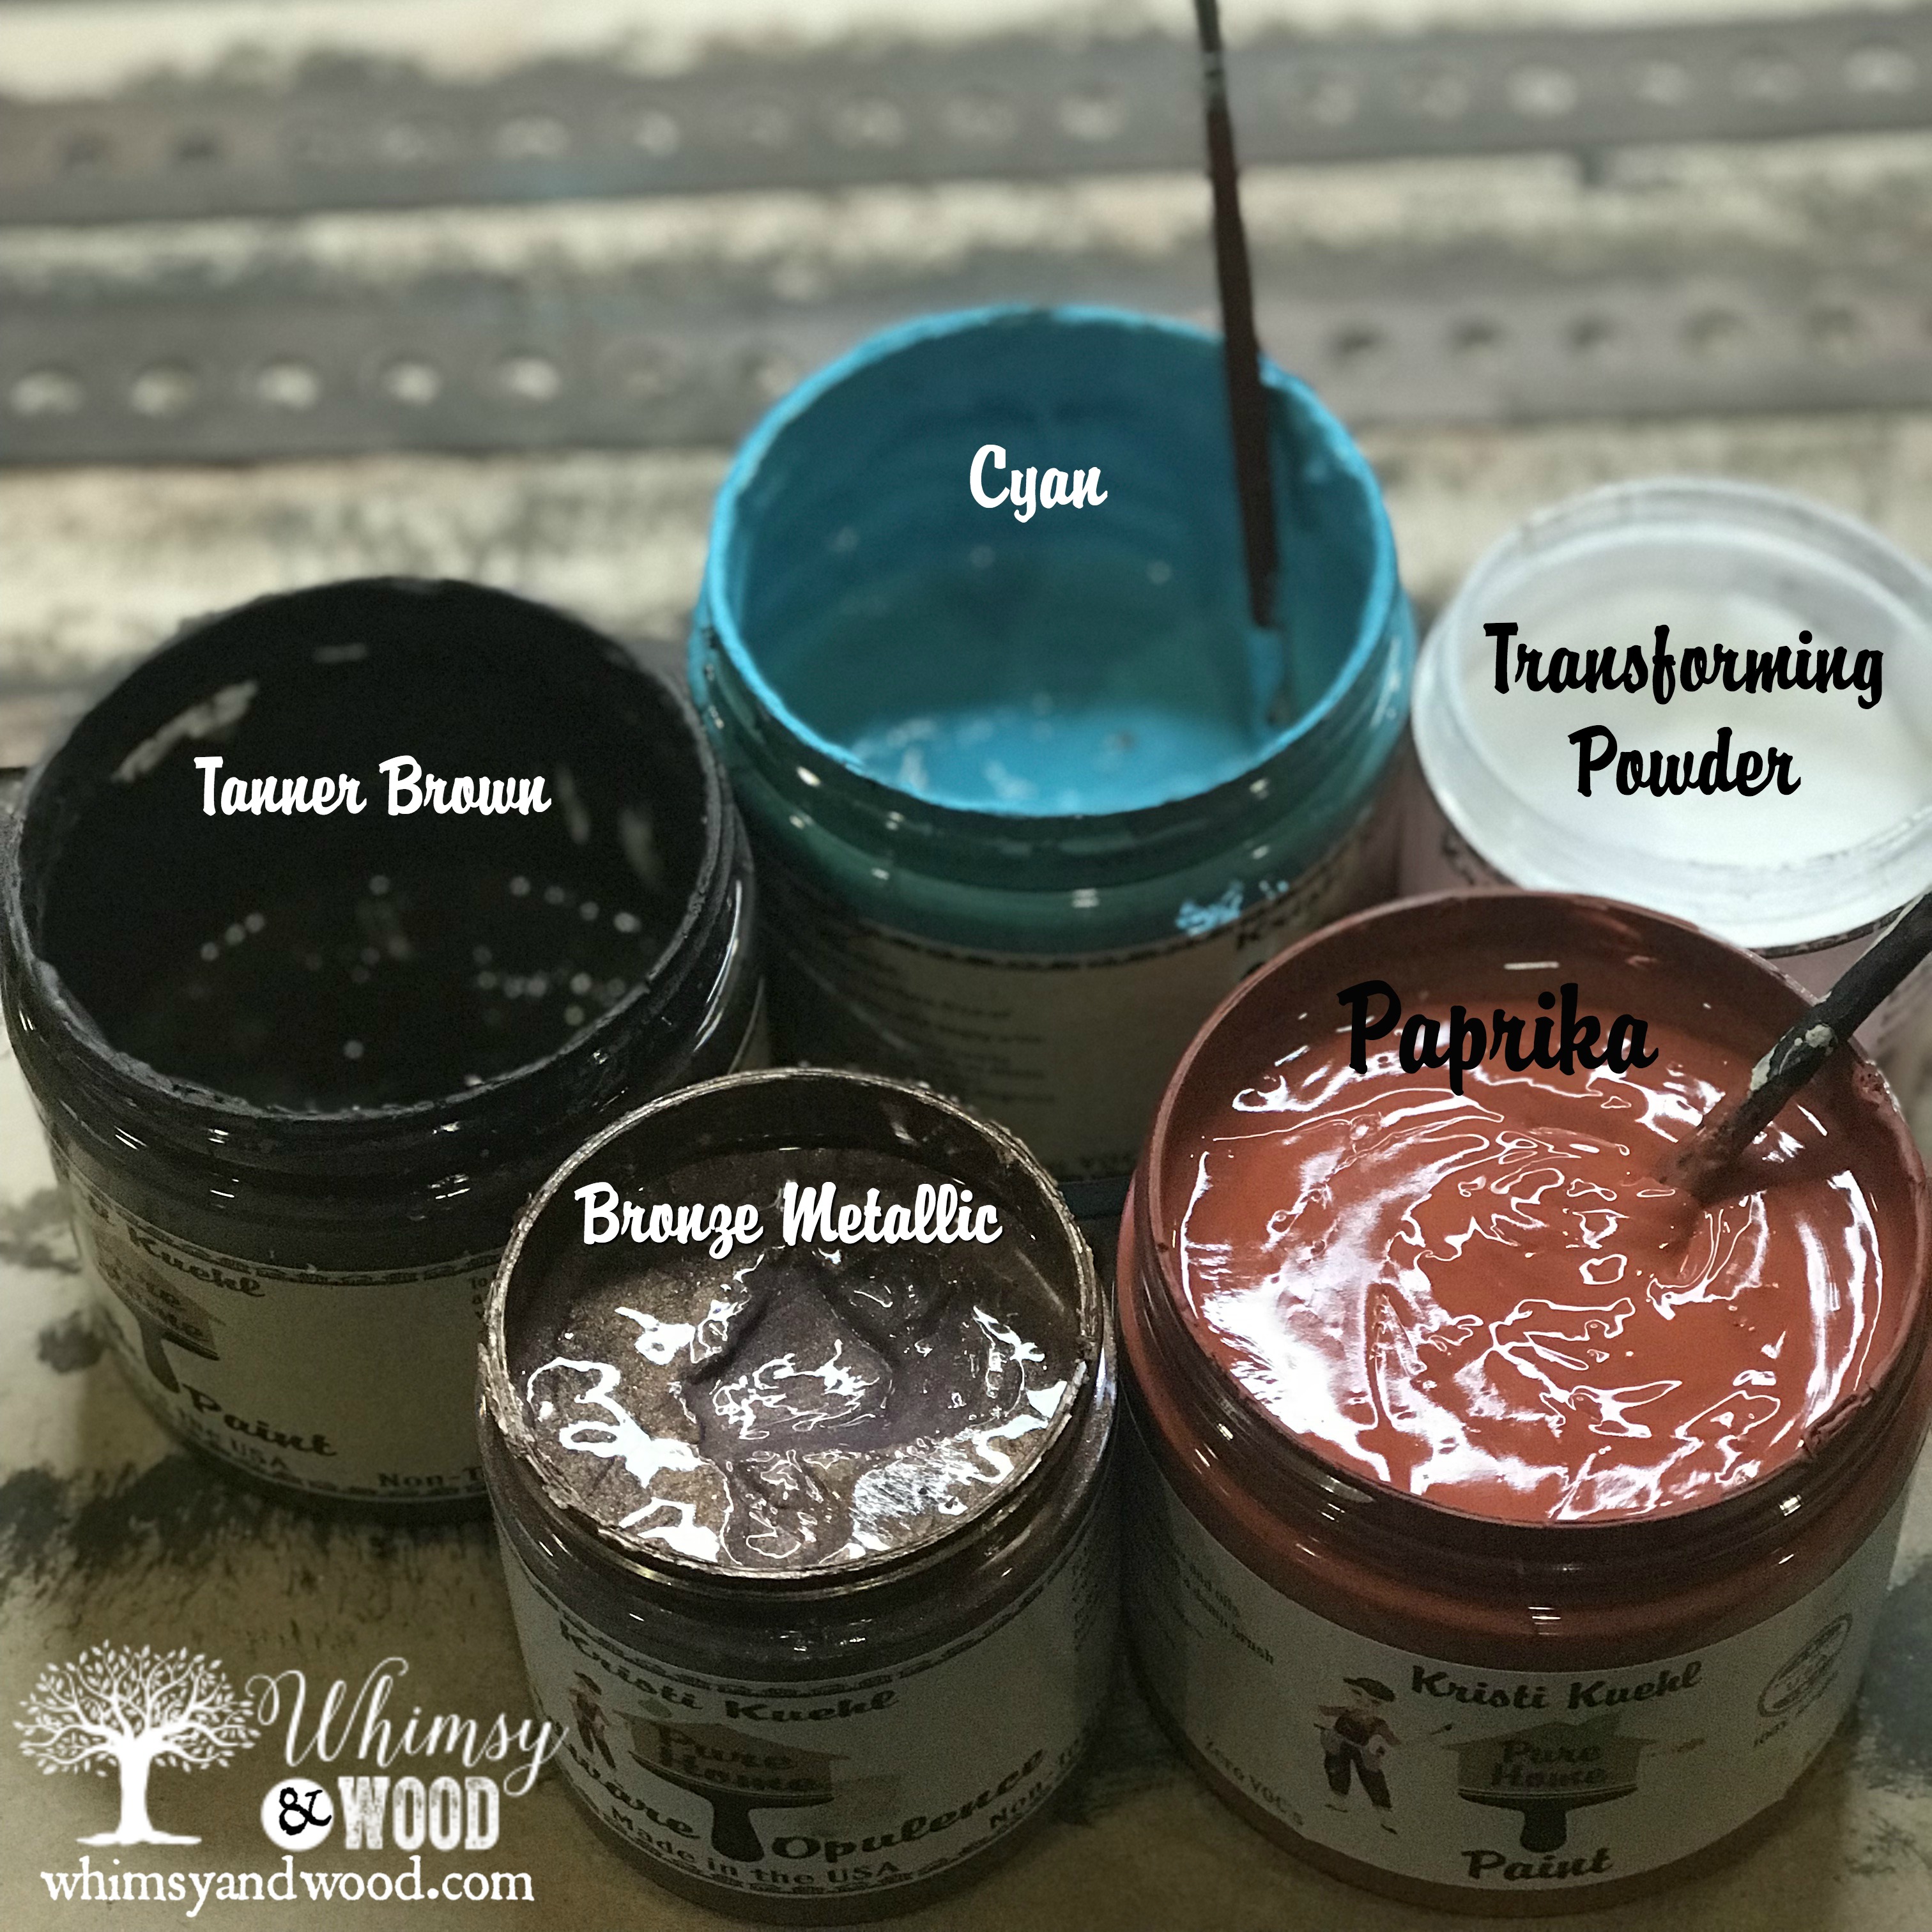
I loved the circle cut into the strips. The steel look was beautiful, but I wanted the patina of old rusty metal. I used my favorite colors for creating this look. All from the Pure Home Paints line; Tanner Brown, Cyan, Smoked Paprika, Bronze Metallic, and also our Transforming powder. You can see a little more on the process in this video. (coming soon…I forgot to hit record)
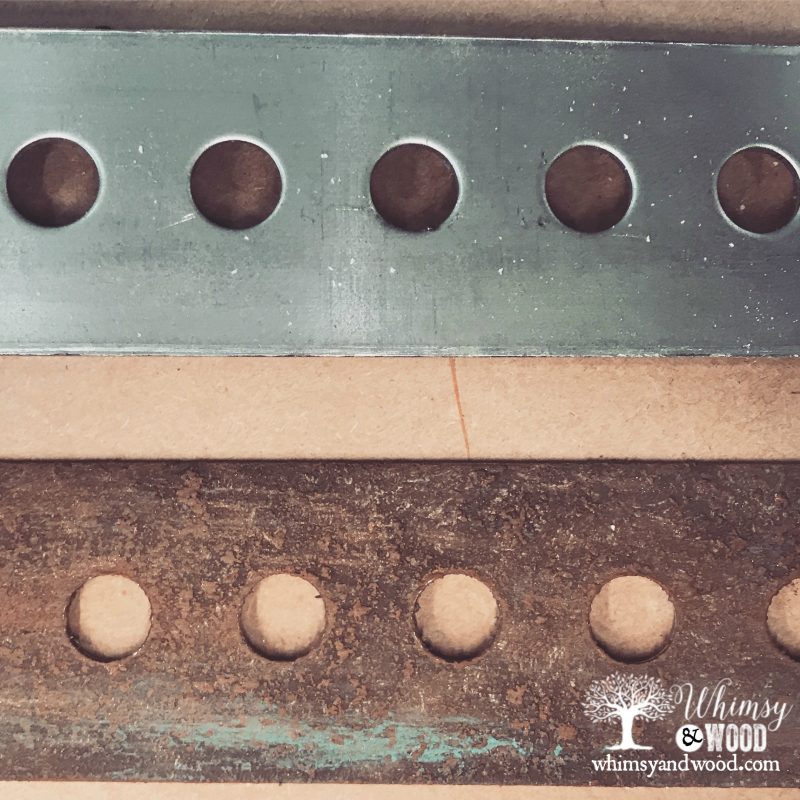
To fasten the metal to the table, use a large slotted hex bolt with washers.
Be sure to pre-drill holes a little smaller than your screw. This old wood splits easily if you do not pre-drill.
The original plan was to patina the screws. But once in place, I liked the contrast of the steel with the rusty looking straps.
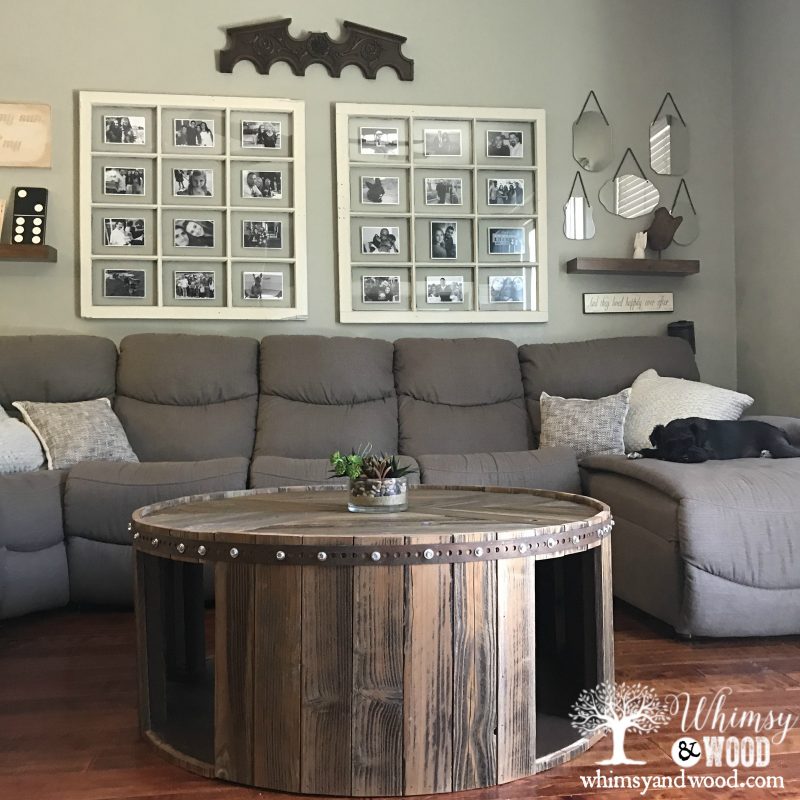

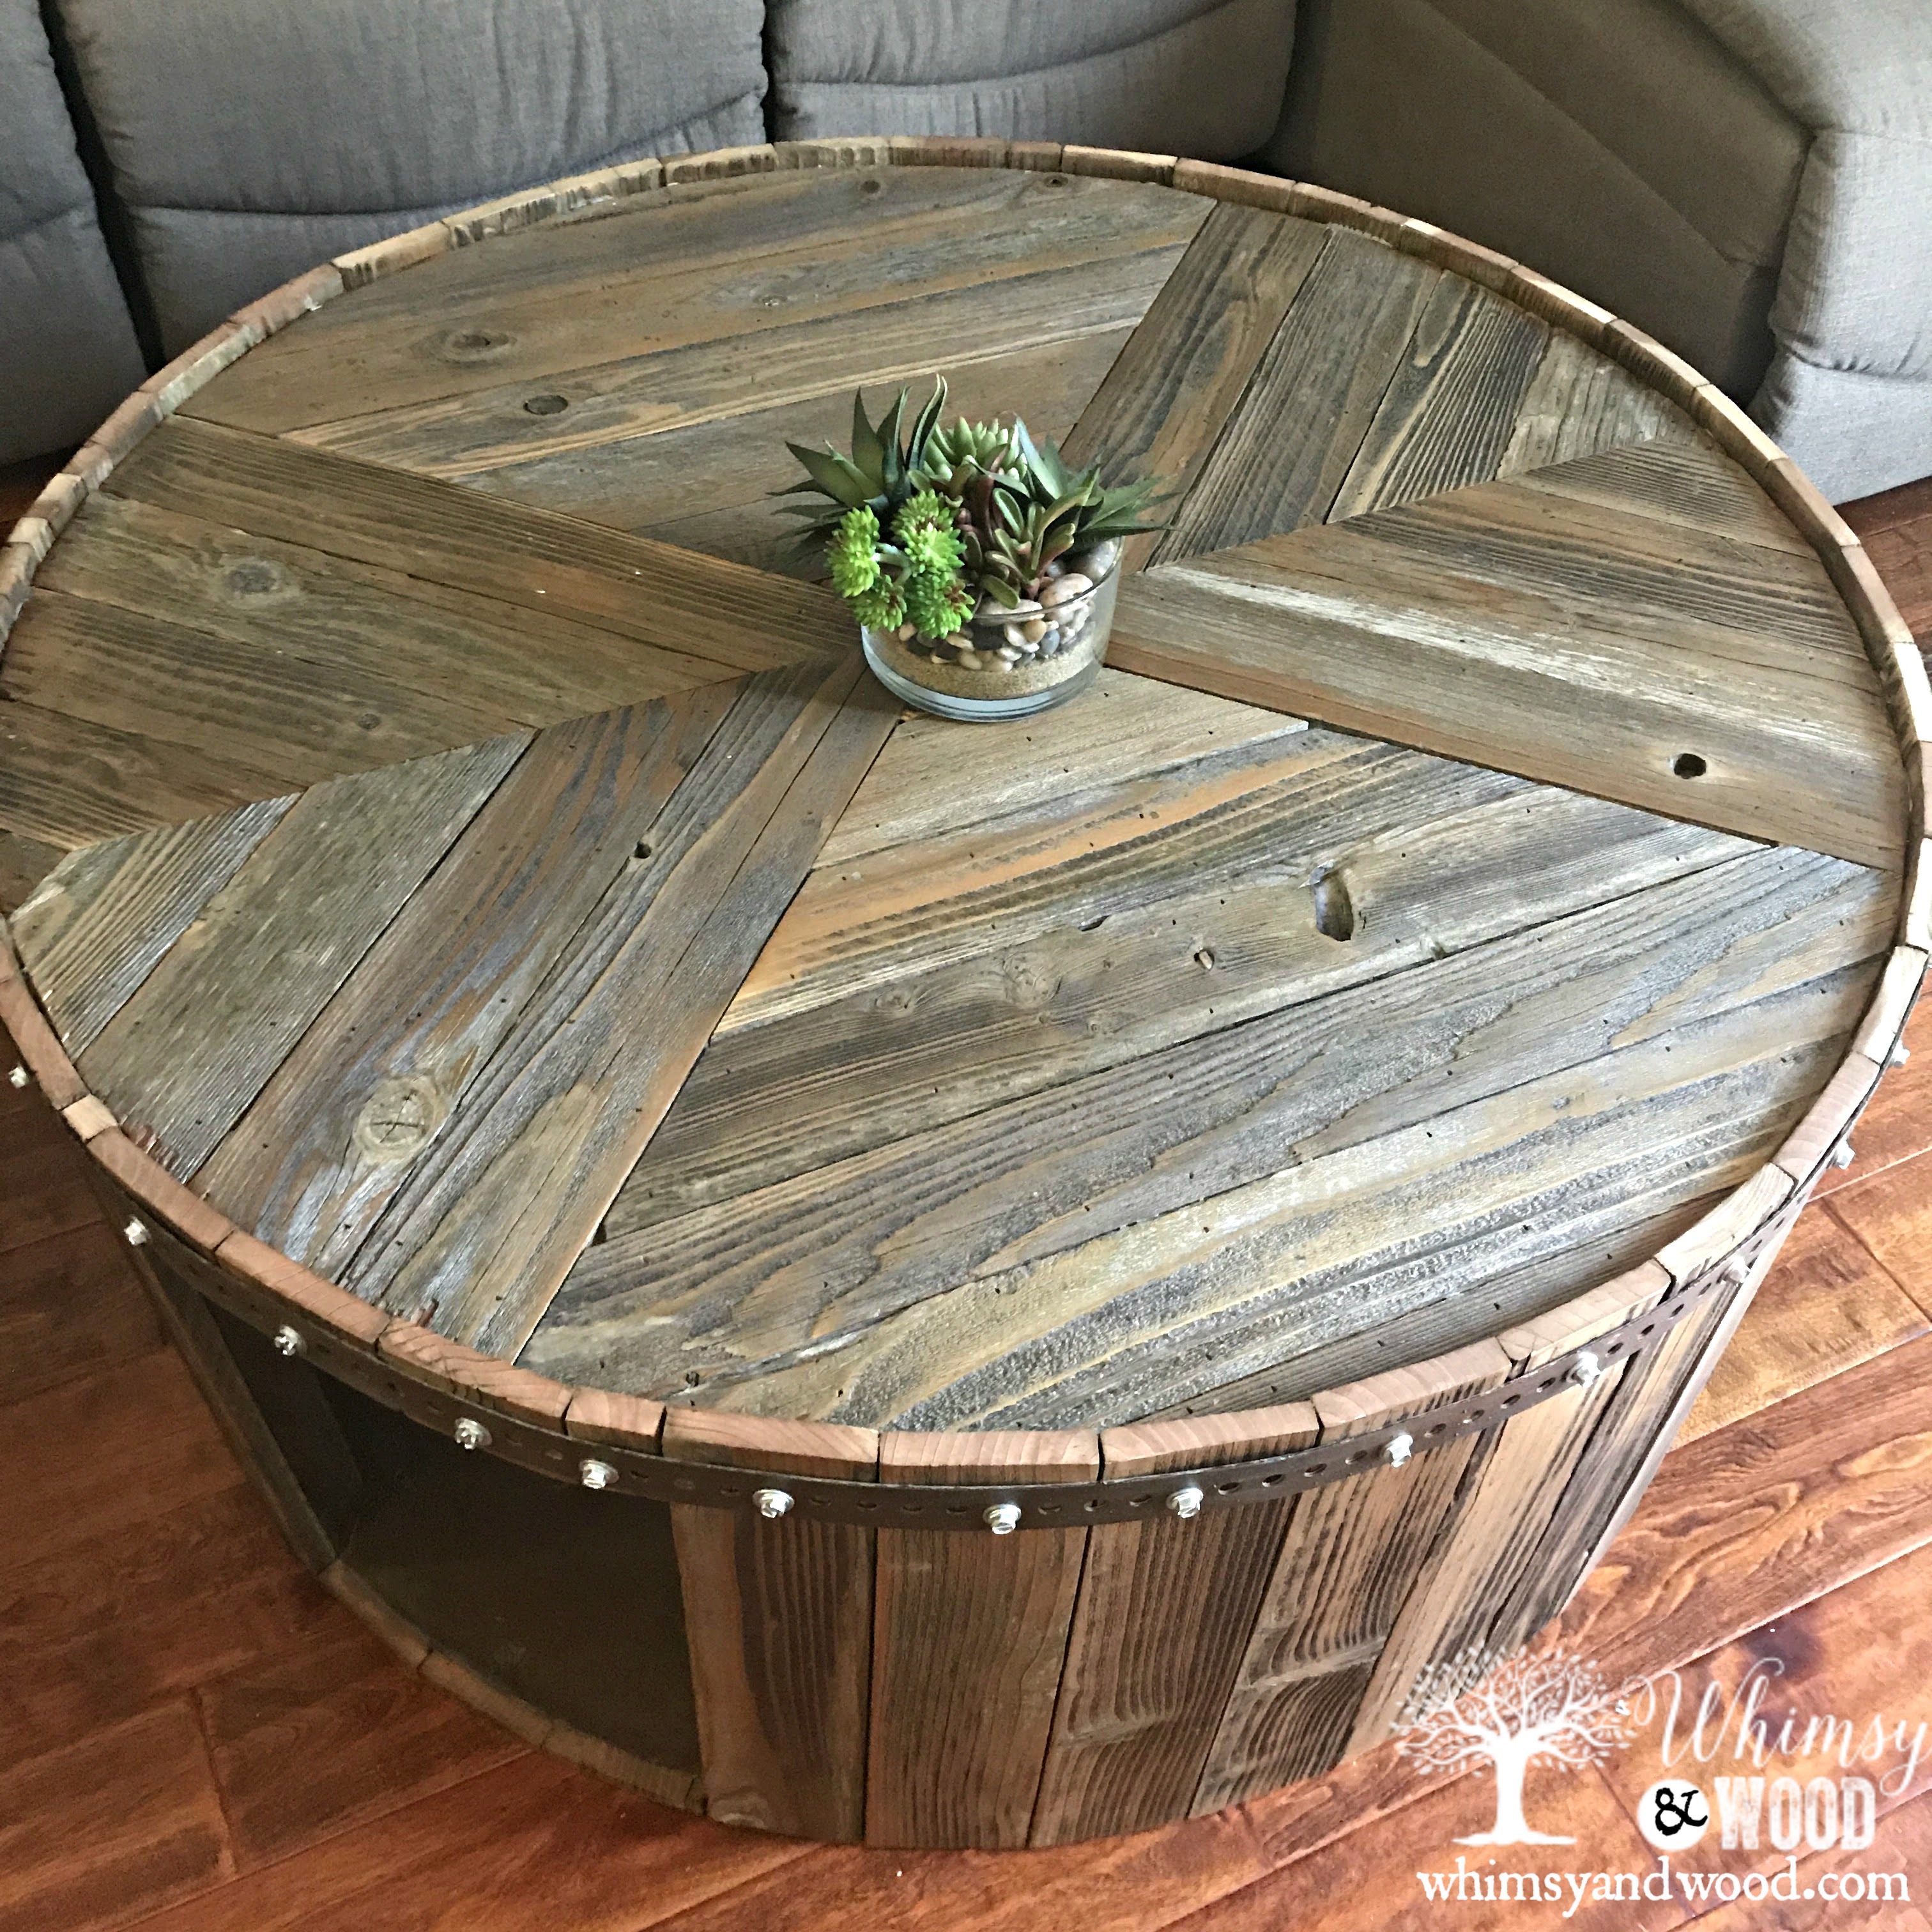
I am surprised at how nice your coffee table looks even though it is made out of a reclaimed material! My spouse and I are looking into ways to give our home more of a rustic vibe, so we are both doing research to find avenues to do just that. I think that I will get into contact with a lumber company to inquire about their reclaimed wood.
Thank you LLoyd. I hope you both have fun filling your home over time! Thanks for visiting.
Great looking table. I think you need a metal strip on the bottom also to give it balance.
Thanks for sharing your project.
Great project!
One point of help…take the screws out paint them then put them back in. You can also get strips of metal (aluminum) from the hardware and paint and tap screws into it also if you wanted thicker metal. Aluminum bends easily and tap screws will penetrate without pilot holes…but you do need to punch a hole set mark to keep the self tapping screws in the right spot.