Post contains affiliate links. Purchases made from these links support this website. Full disclosure here.
Do you love things like Window Picture Frames as much as I do? I am a sucker for all types of architectural salvage! I assume if you are here, you do too.
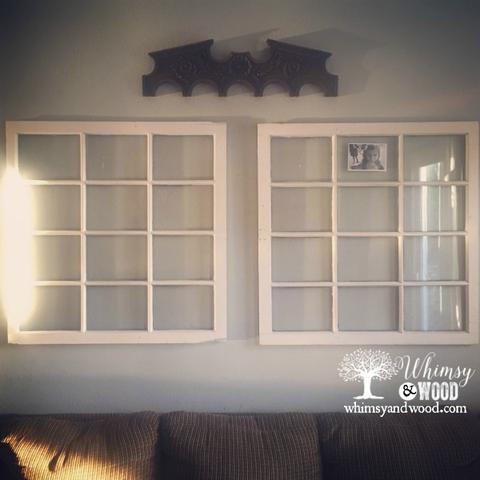
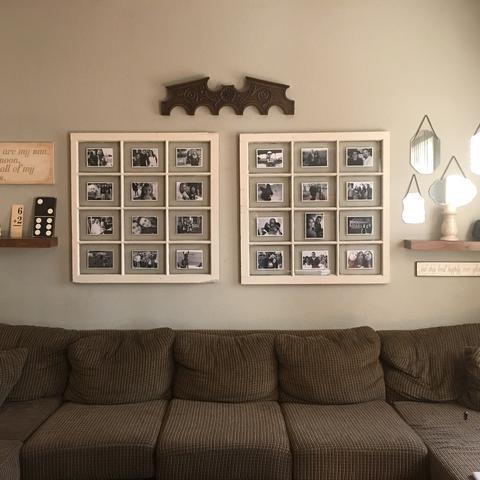
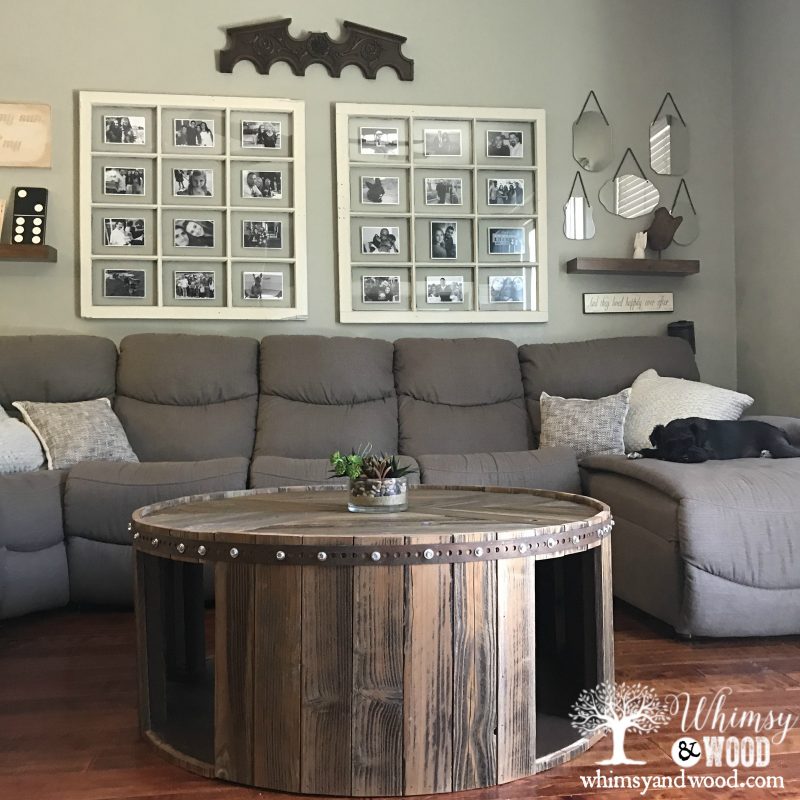
There is something about sitting at my computer punching these keys that makes me feel like I am chatting with a friend. I see you there on the other side, coffee in hand (maybe it's evening and you've moved on to wine no judgement). I am going to show you how I took the most boring blank ginormous wall, which happened to be my living room wall & turned it around using an old Window as a Picture Frame in my gallery wall. I had scooped these windows up without knowing what I was going to do with them. They came from the demolition of an old house in San Francisco.
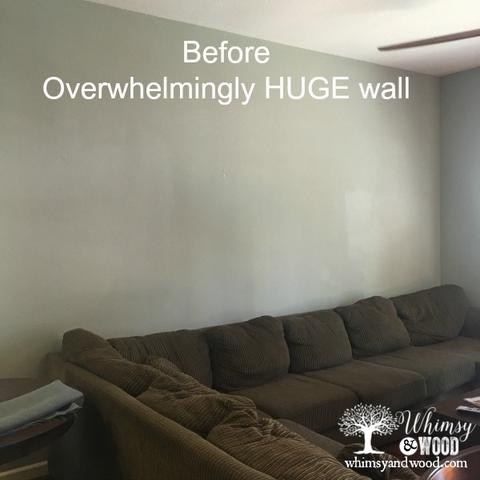
I cannot even believe I am sharing my before pics, I seriously lived with this blank slate for about 8 years before making it a priority. I had slapped a few random art pieces there over the years but hated them all. I even had a contractor out to discuss putting in windows to break the space up. He got to talking to my husband and told him it would create a glare on the TV. Not cool, I love windows & don't watch TV.
Start with a plan for your Window picture Frame
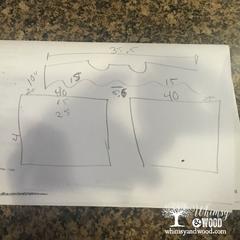
I start most projects with a vague idea of what I want & then sketch it out. You know how it is when you are self taught to do things. I have to plan, measure 87 times, draw it on paper, draw it on my wall and then execute and patch the oopsie holes as I go. It's a process, some have on the job training others have Blogs, YouTube, and blind determination.
Plan Window Picture Frame Placement
- First I measured the entire wall space & divided by 2 to find the center.
- Next I measured my windows and decided how far apart I wanted them.
- I measured half of the distance I wanted them from each other and marked that off from center
- Before I forget. I used D ring hangers rated at more than my windows weighed. I also used a Bulldog brand anchor to hang them from. I want to make sure they are not easily coming down.
POSITIONING PHOTOS CENTERED IN yOUR WINDOW Picture FRAME
Like with most projects each step is it's own project
Part of what I loved about these windows was that they were clear. I wanted my photos to float in the center of the window picture frame without any matting. It can be a challenge to get each photo perfectly centered. But, it is important to create those straight lines. I made what is called a jig in wood working. I assume it is called the same in paper working. It is just a measuring tool to simplify a repeatable process.
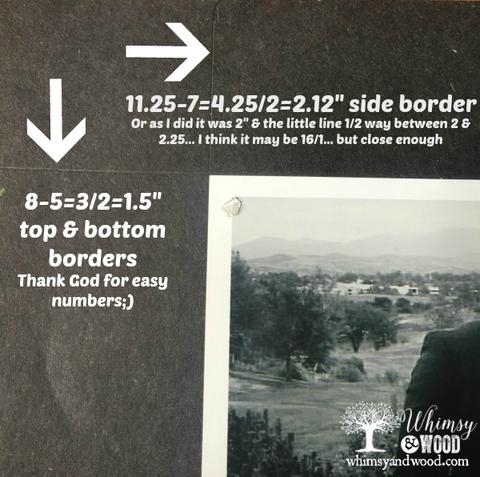
First, I measured my window picture frame panes (8.25″h x11.25″w). Next I subtracted the size of my photos (5″h x 7″w). Then I divided the differences by 2 to get the center border for the photo. Once I had my numbers I mapped out my border onto a piece of card stock.
With the jig set up
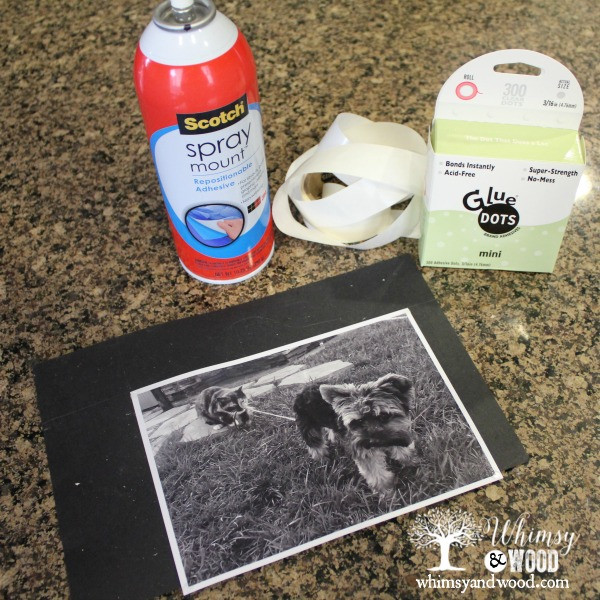
- Spray re-positionable adhesive spray on to the card stock
- Use the guidelines to line your photo up on the jig
- Add clear, acid free glue dots on the corners of your photos
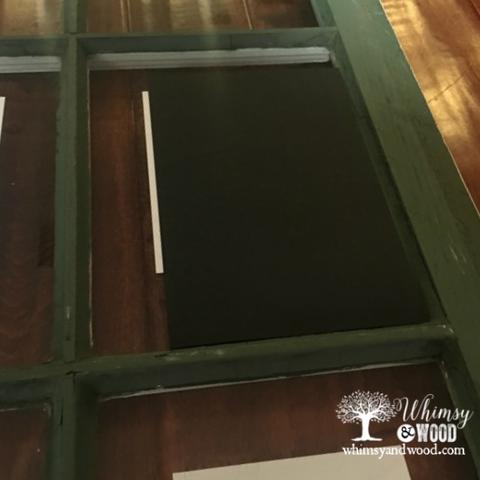
- Line the outer corner of your card stock jig up with the back of your window picture frame glass.
- Put pressure from the back side of your card stock jig. The front of your photo and the glue dots will adhere to your frame glass.
- Slowly peel your jig off of your photo.
Tada! It is centered and you can do that 23 more times in this case.
We did also end up getting a new couch, and I built that coffee table. It is amazing how when you find the right pieces it all starts to fall into place. Come see how I built the coffee table here.
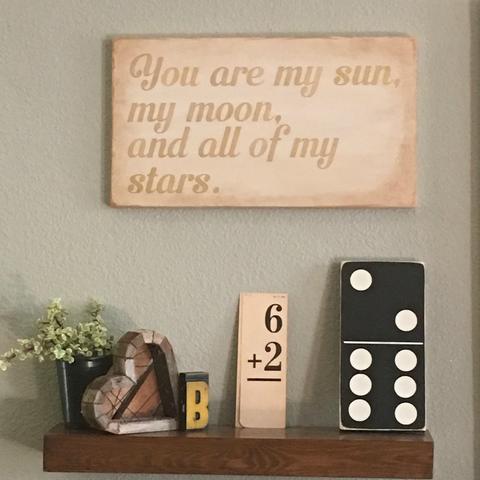
I love so many things in the space! Some are found treasures & a few are pieces I made. You can shop those here.
I hope you found useful information and maybe a little inspiration from seeing how we did our window picture frames! Share in the comments below, I love hearing from you & know that I am likely sitting here with my coffee or wine in a coffee cup depending on the time of day {WINK}.
Leave a Reply