Strawberries and lemonade, Popcorn and butter, Champagne and Orange Juice, Peas and Carrots...am I the only one that loves a perfect combination?
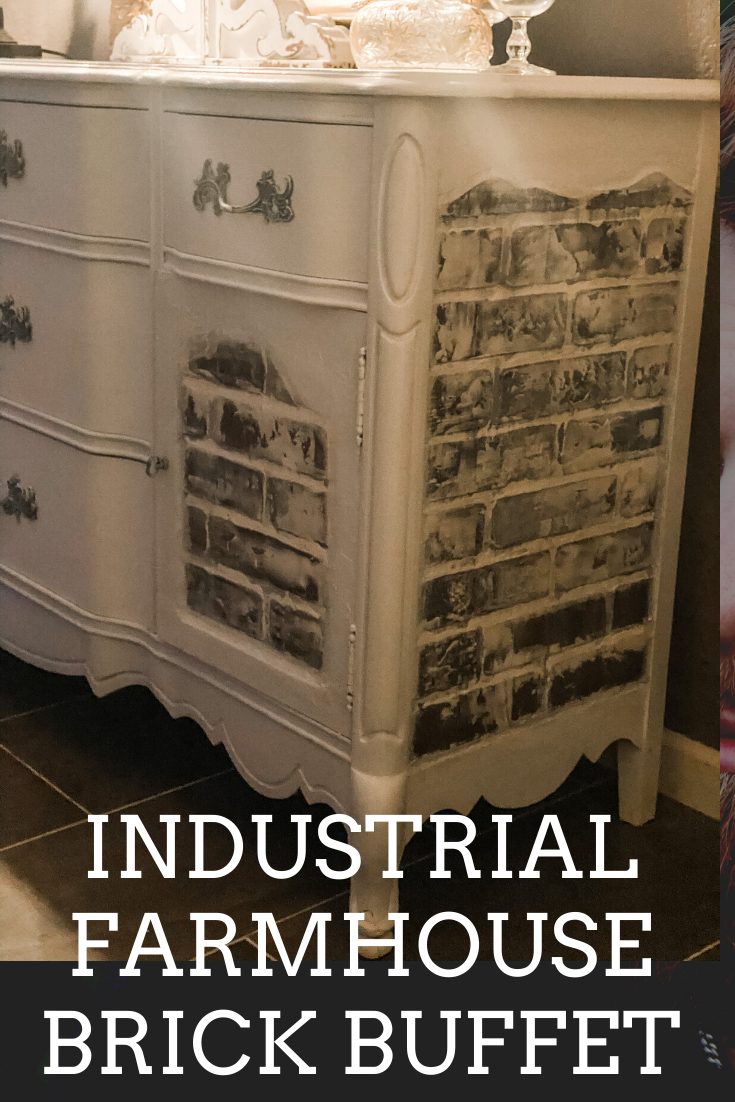
Industrial Farmhouse Brick Buffet-How to get this look. I hope you agree that this vintage Bassett Buffet was perfected when it was combined with brick look inlays! It turned it into one of my favorite combos of all Industrial and Farmhouse. Below you can get the details on how this look was pulled together.
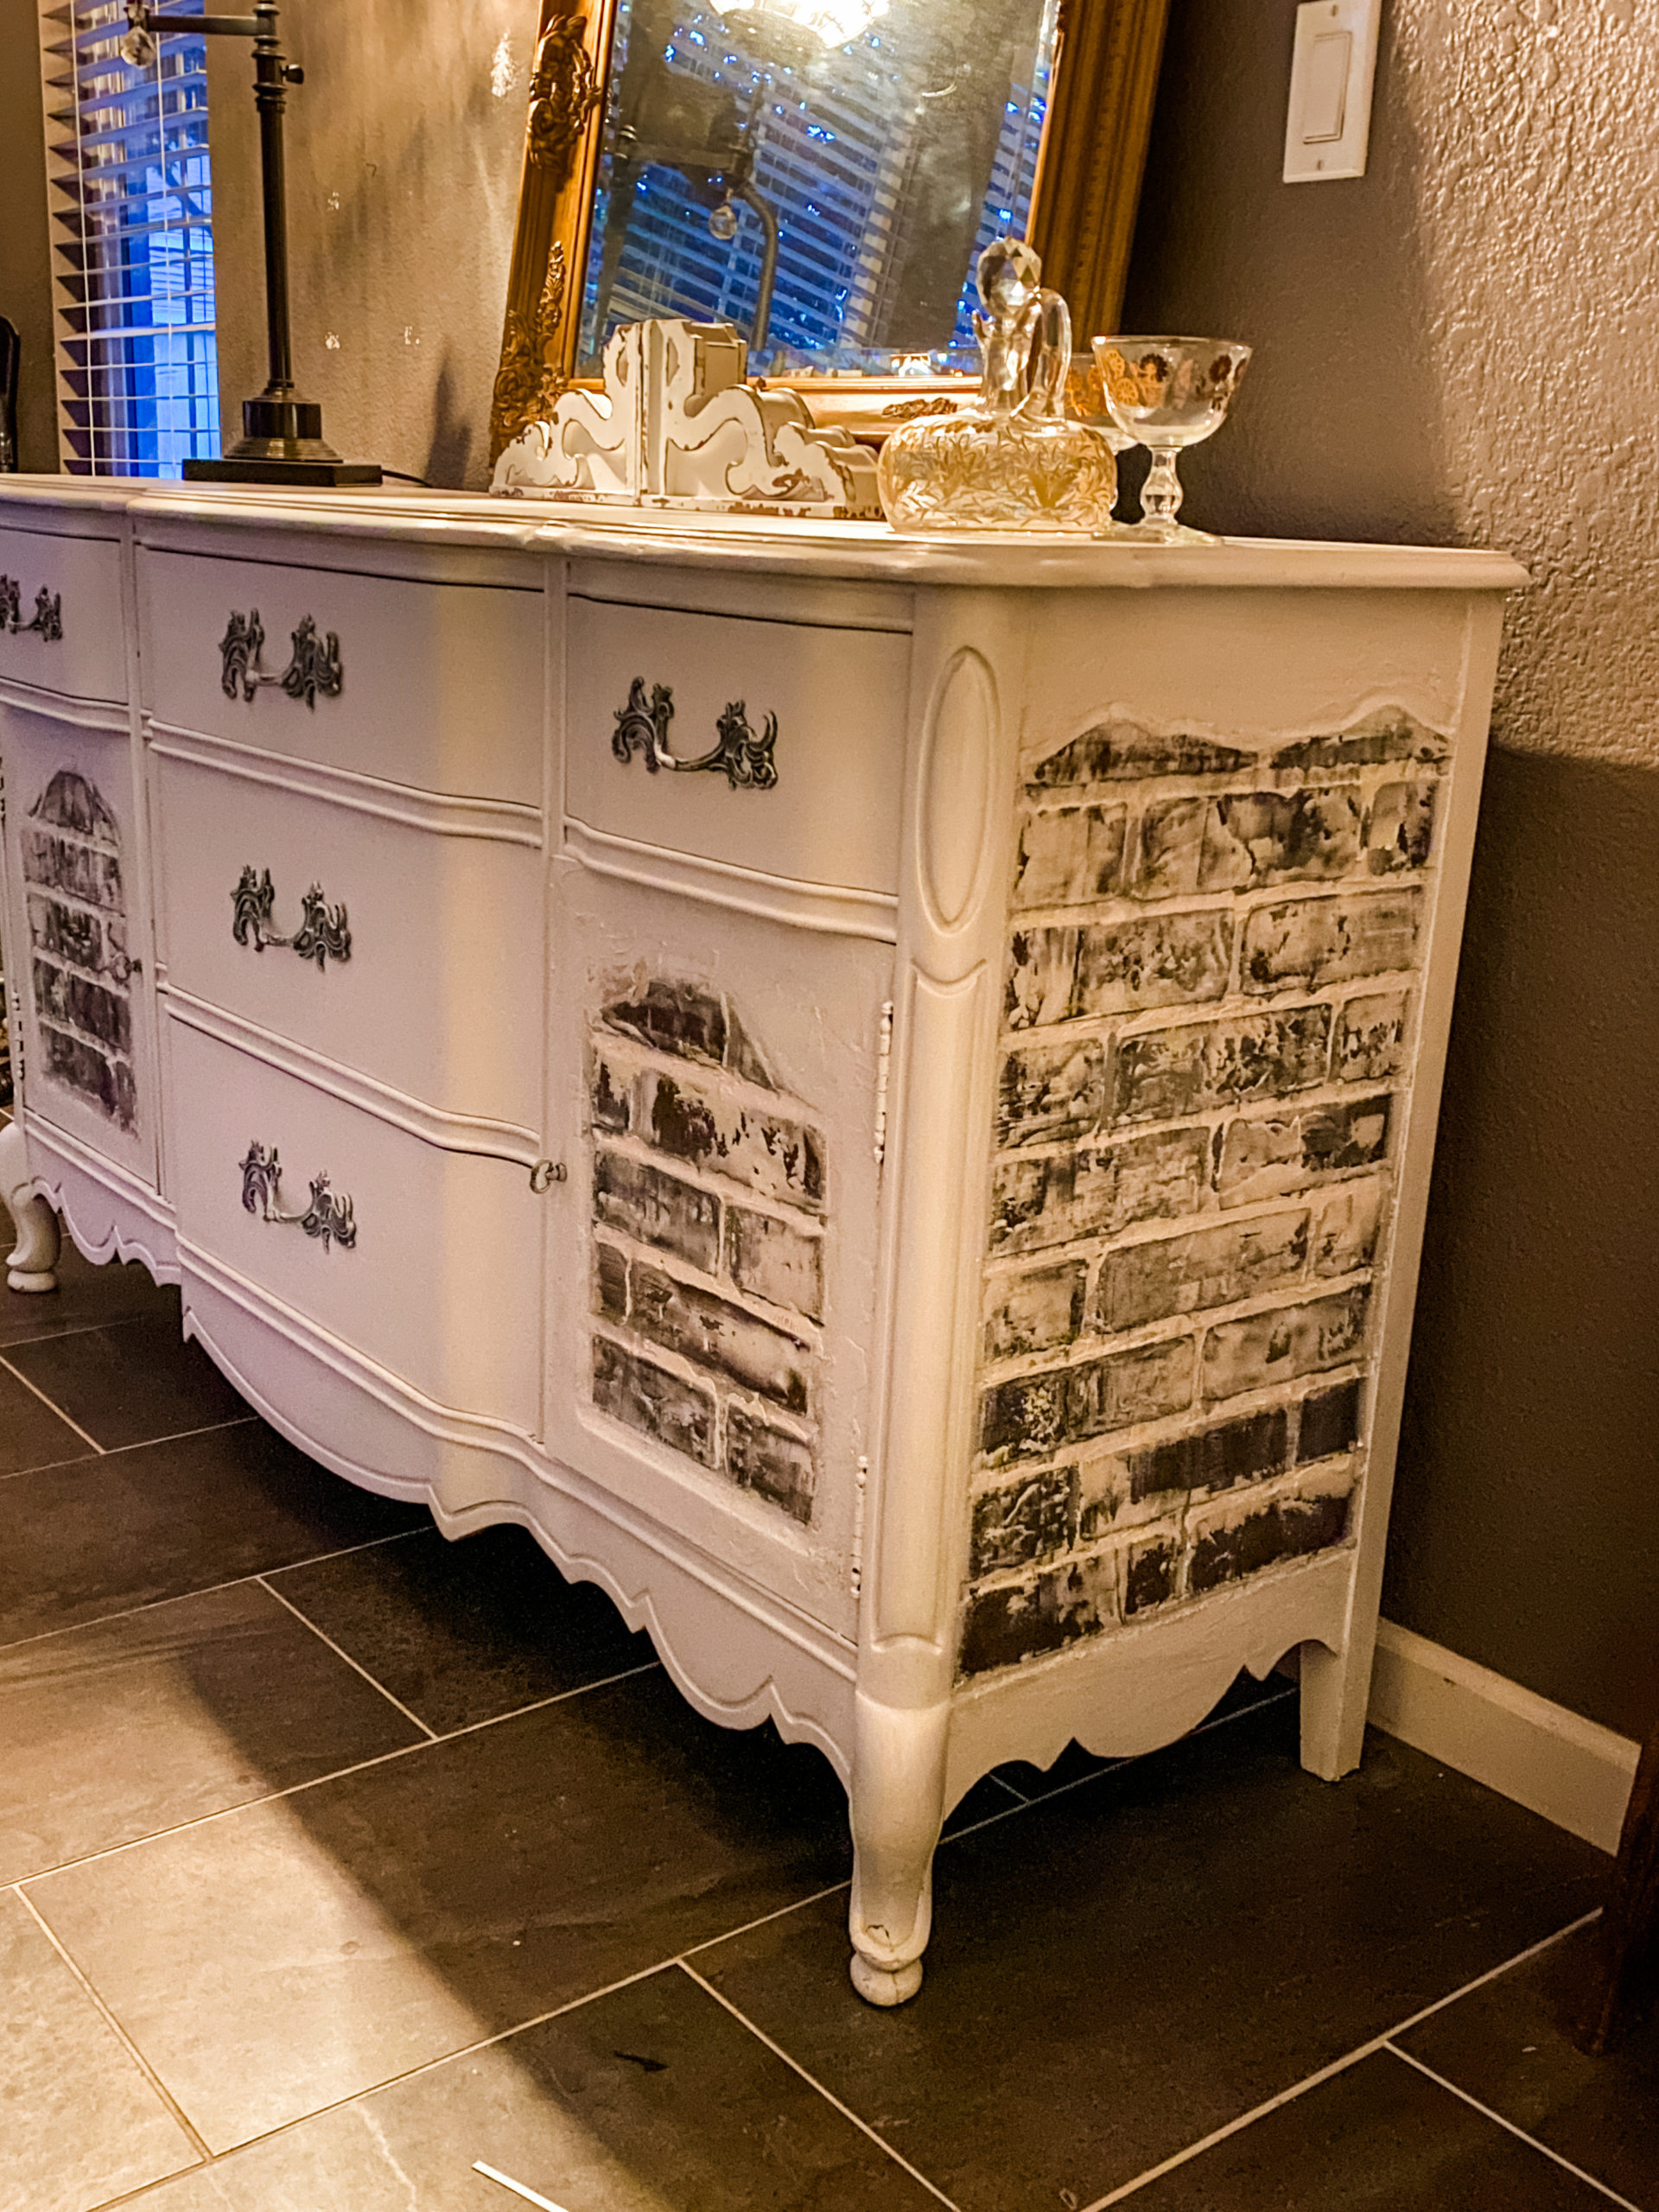
Some projects have to approached 1 step at a time and let the next step reveal itself as you go. There are a few different materials and process you could use to create a similar look. I will be sharing the process I used. Most of the products I chose because I had them on hand in the shop.
Supplies we used
Choosing a piece that will work for this finish.
It is important to choose the right piece to get this Industrial Farmhouse Brick buffet look! I think it could work in various situations. I wanted the brick to fit into the natural insets of this piece. The faux brick panel that I used for this was .22" thick. The buffet I chose had insets on the side that were .25". This gave me enough space to put down adhesive, the brick panel, and then later add a little plaster. If you try this look on other types of furniture you may want to add trim pieces to create a finished transition. (side note, if you use this DIY post and make your version, please let me know how it turns out and send me a photo!!)
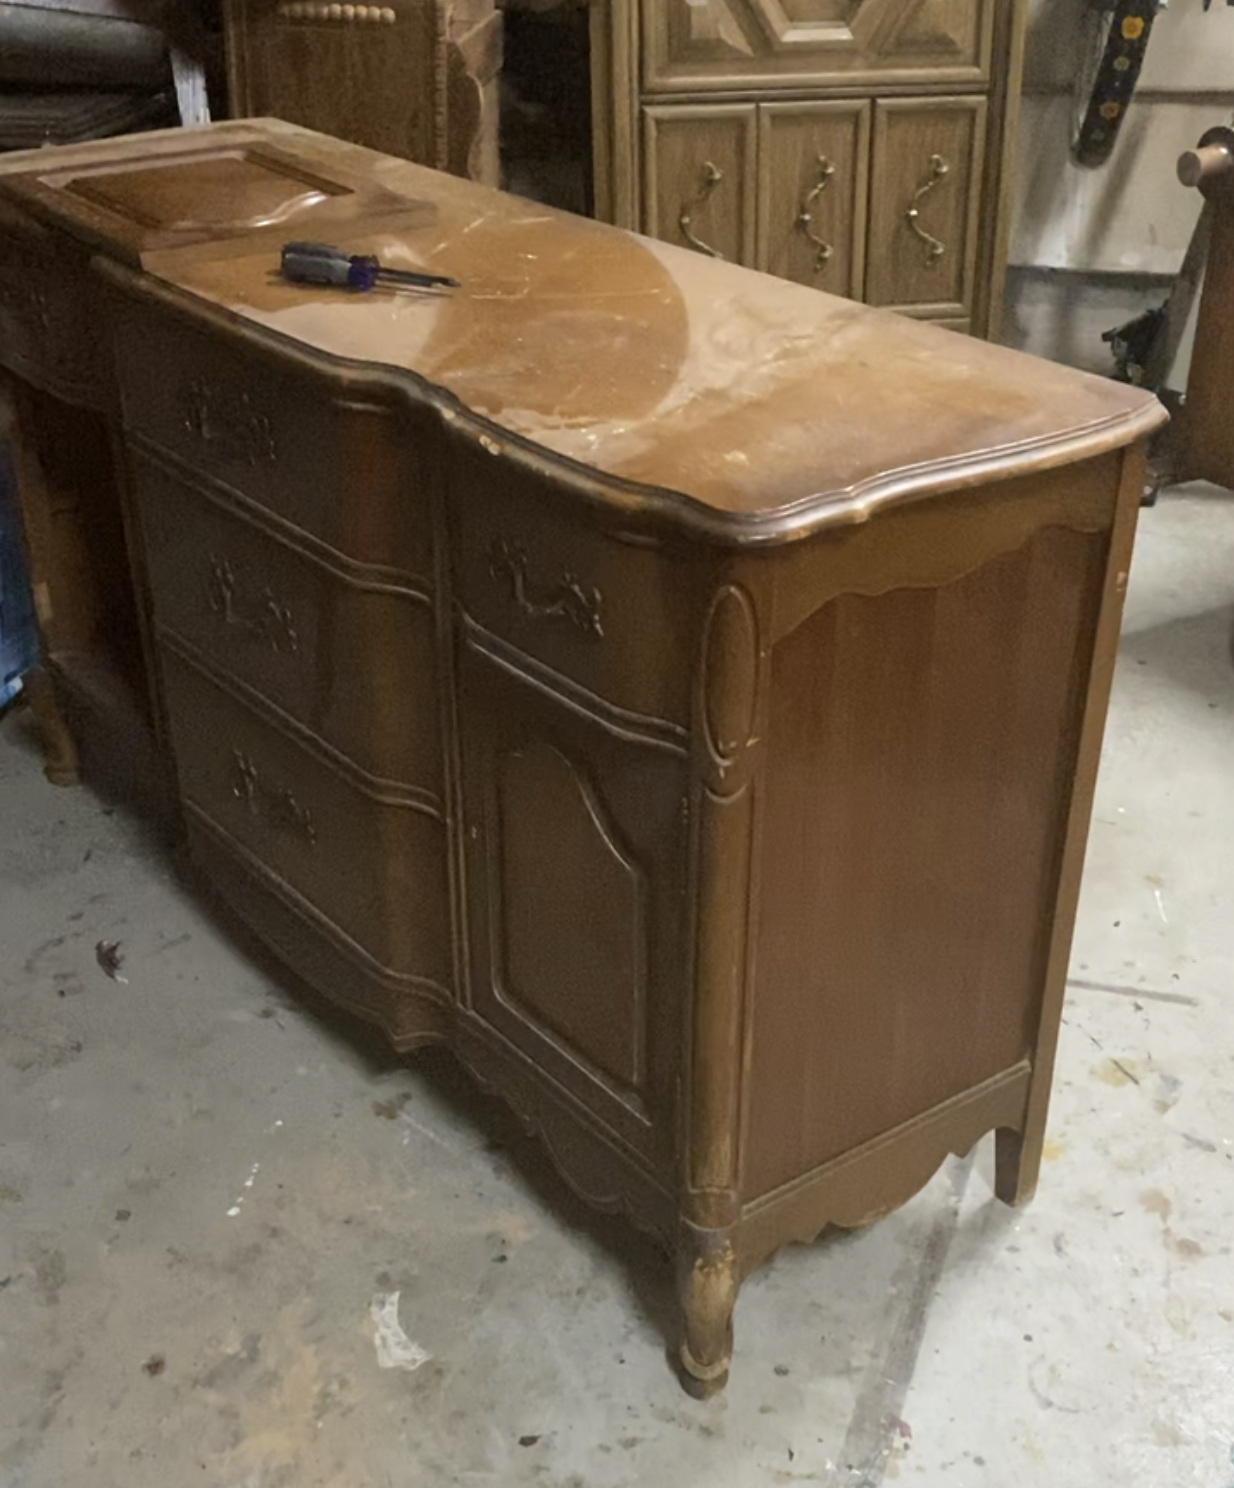
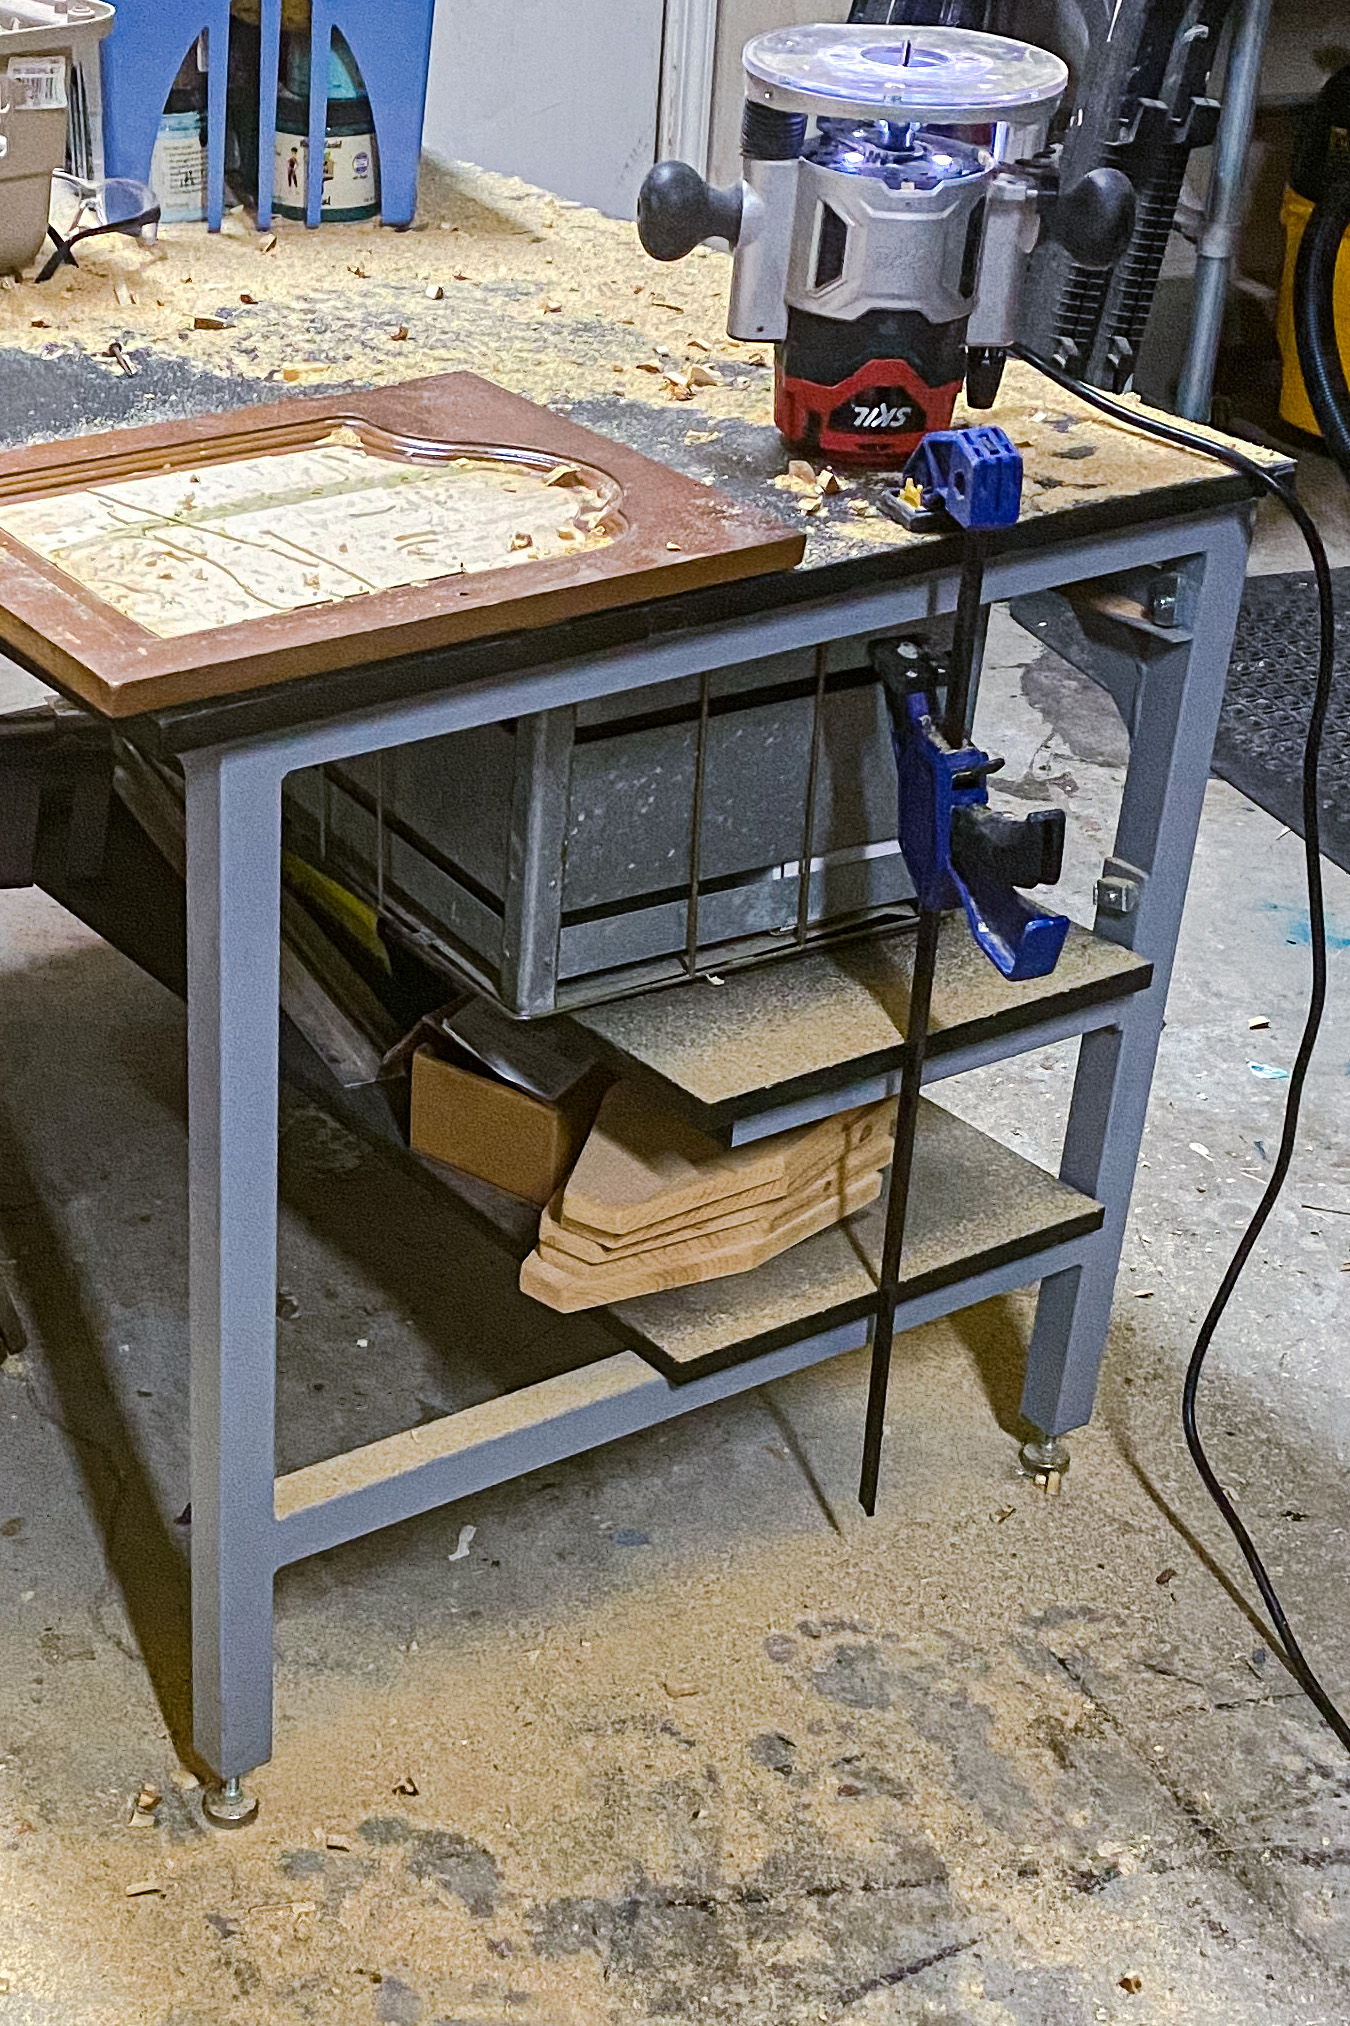
My piece was NOT super perfect for this project. I was able to use my plunge router with a straight bit to remove the raised panels on the doors to get the brick to fit in there. It made a huge mess, but it worked!!
Making a template to cut your brick
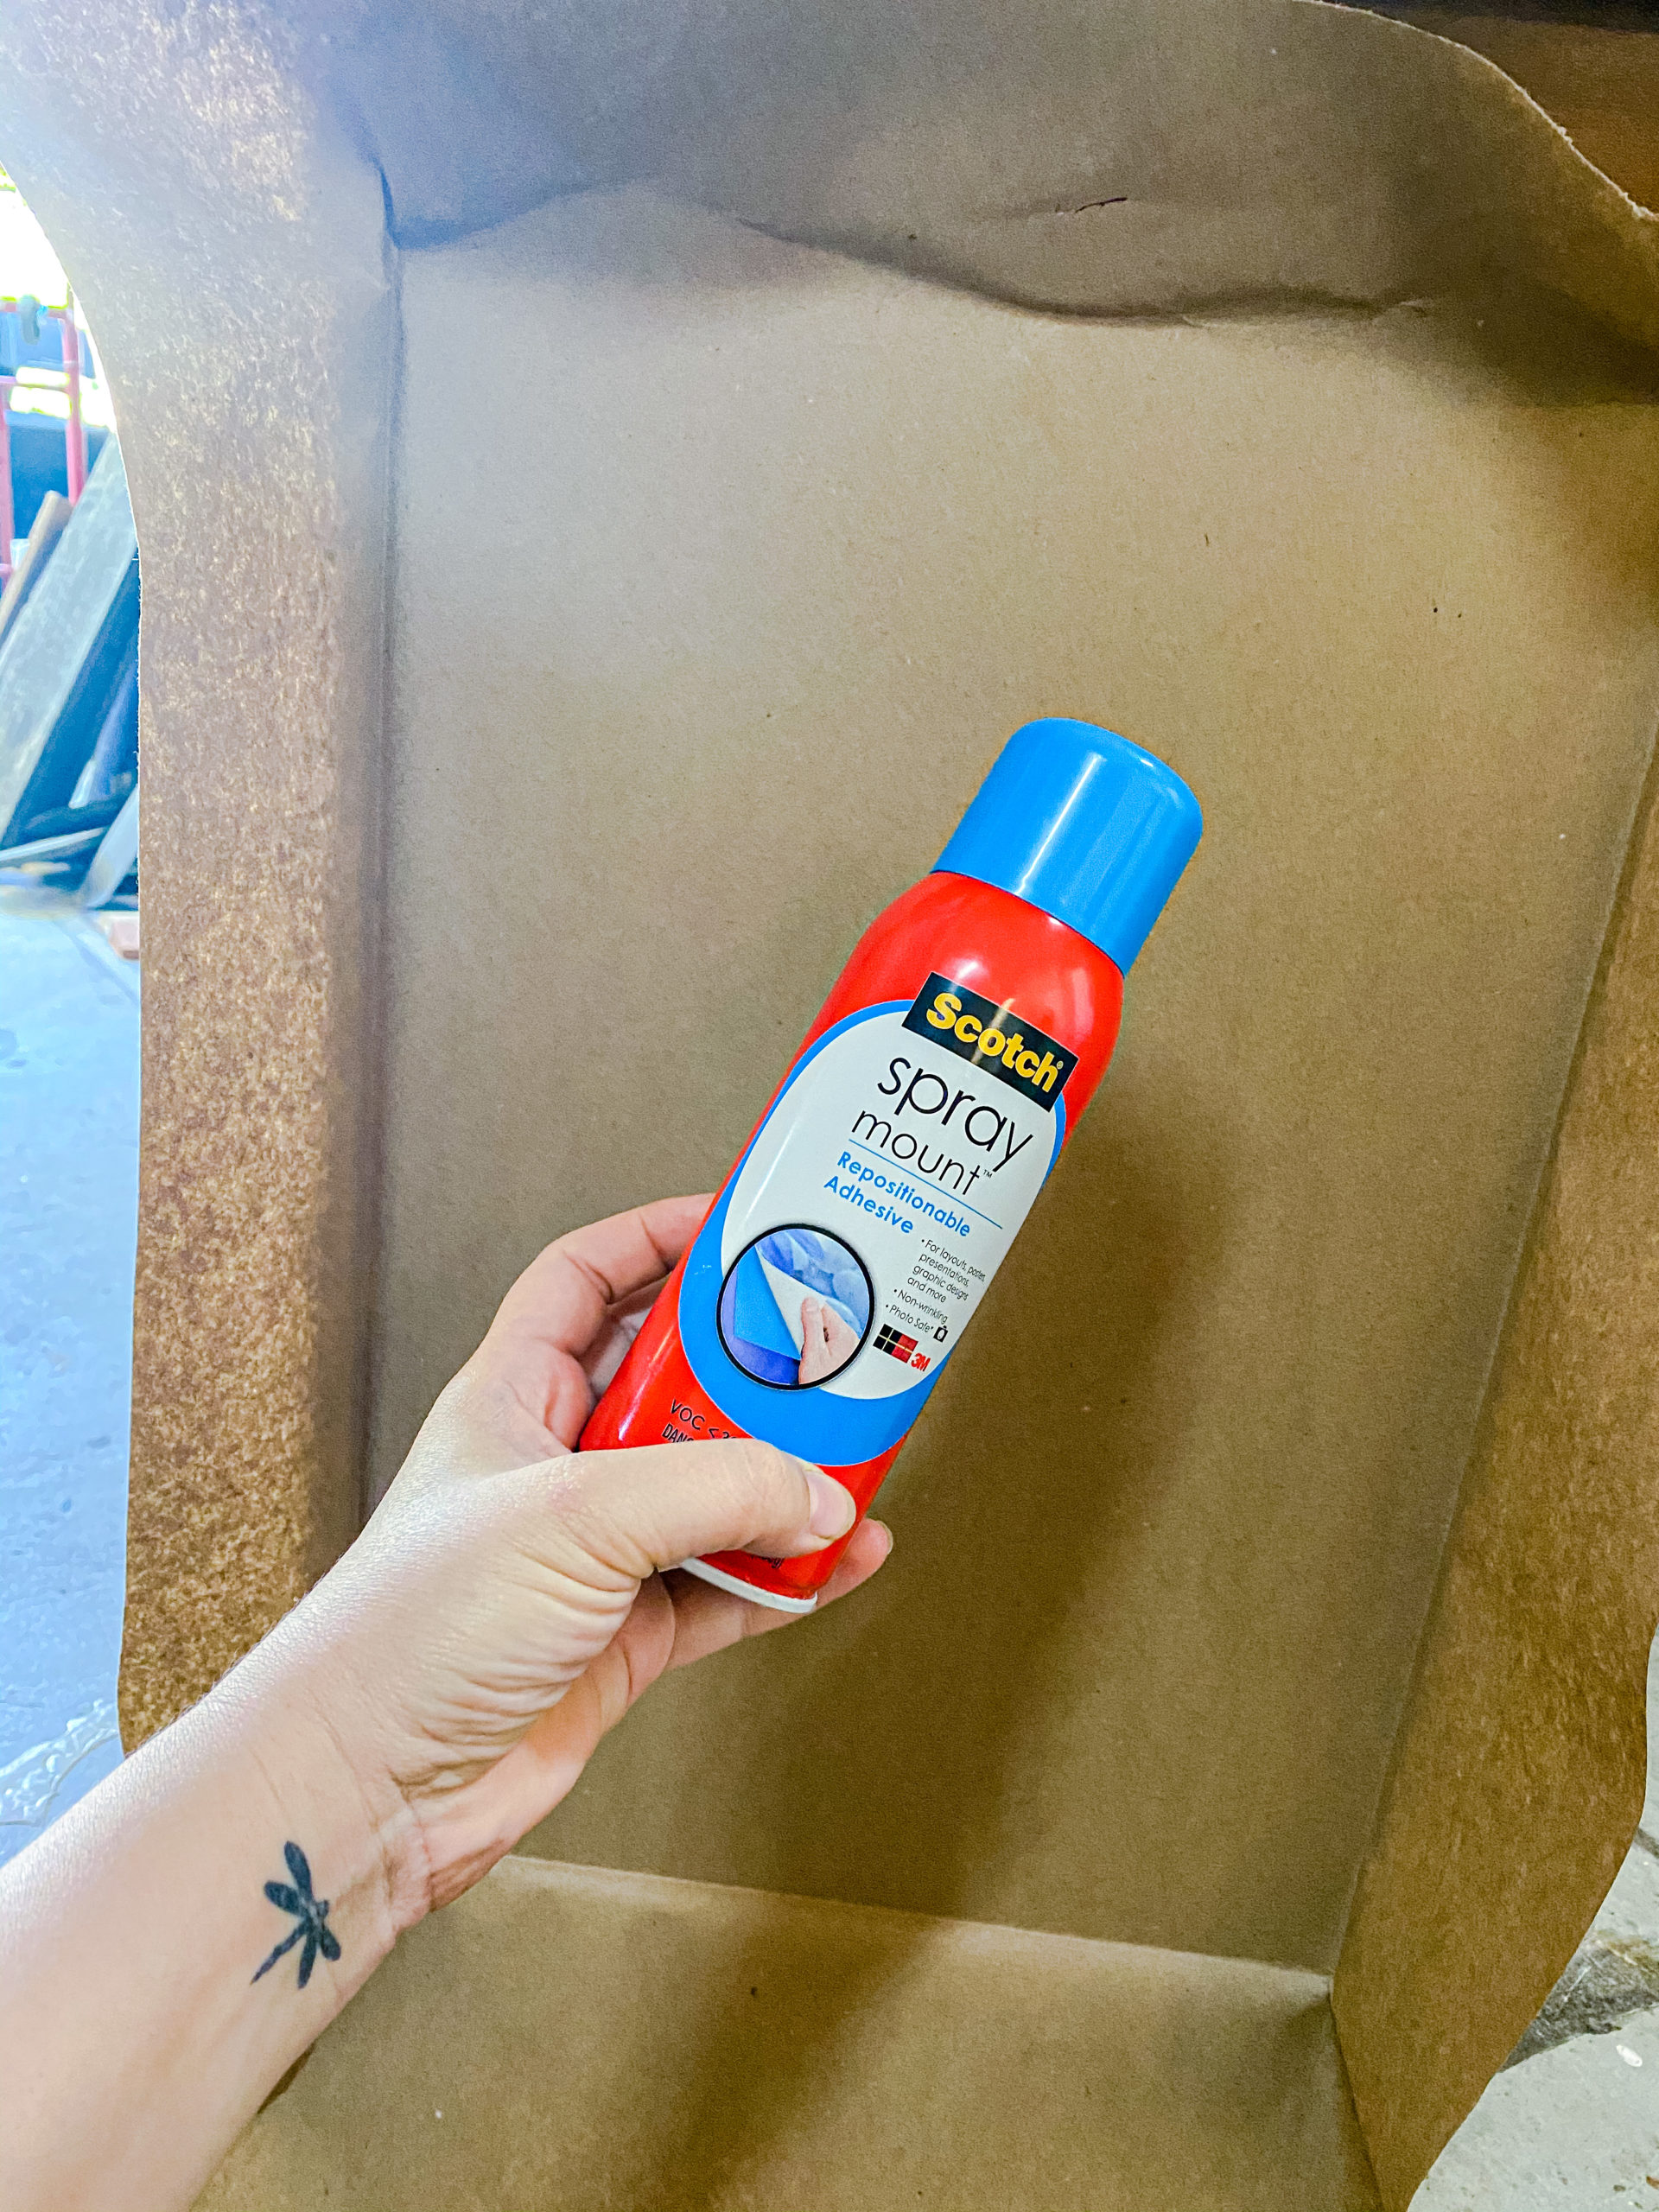
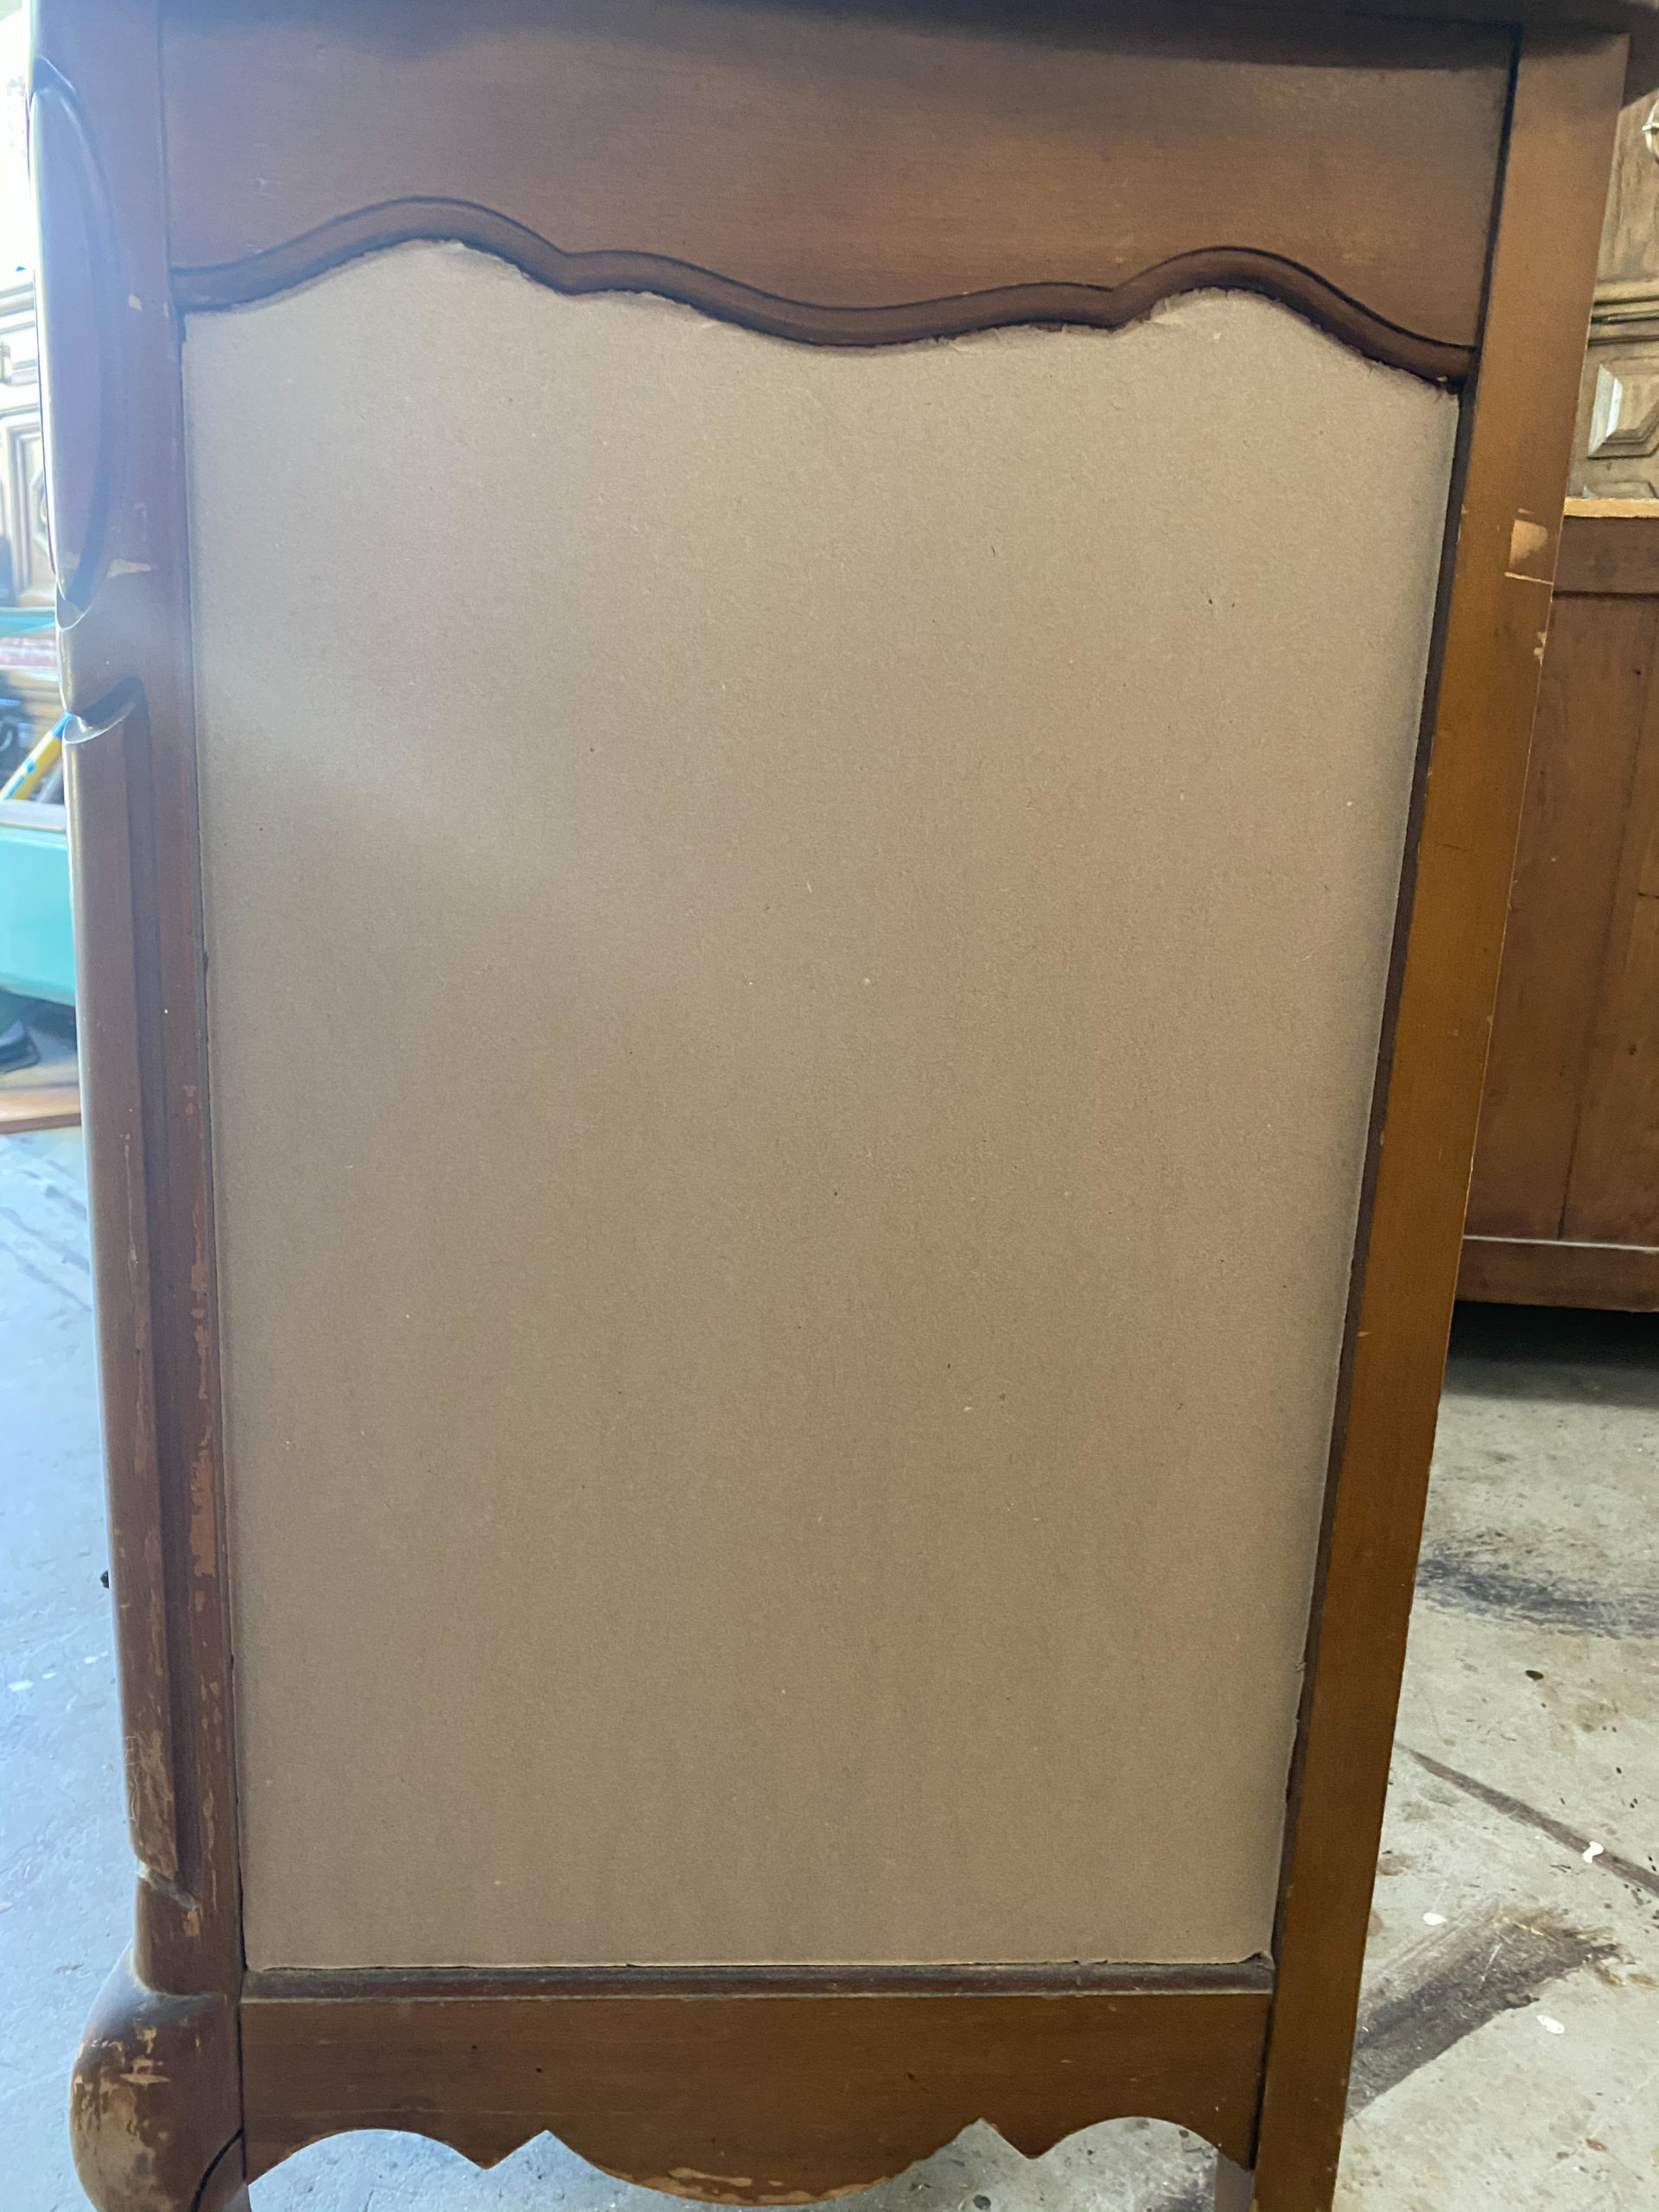
It would be really hard to lay your furniture on the brick panel to trace your cutout. It's pretty easy to use craft paper to make a paper copy of the area. Especially with this section being an inset, a paper template is the best way. I used a roll of craft paper that is about 24" wide, you could also tape together printer paper and trace cut to fit the shape. Where there is a will there is a way.
- 1Cut the paper a little longer than the space you are fitting it to.
- 2Spray repositionable adhesive onto the area you are templating.
- 3Start at one end and push the paper into the area. I found it helpful to lightly mist the paper while smoothing it out.
- 4Smooth the paper until it has no bubbles and is laid flatly onto the area
- 5Use your straight edge razor and trace the edges with the blade cutting out the shape from the paper.
- 6Lightly lift the paper template off of the wood. If it is significantly damp from water mist then wait for it to dry so you don't tear it.
Cutting your brick panel
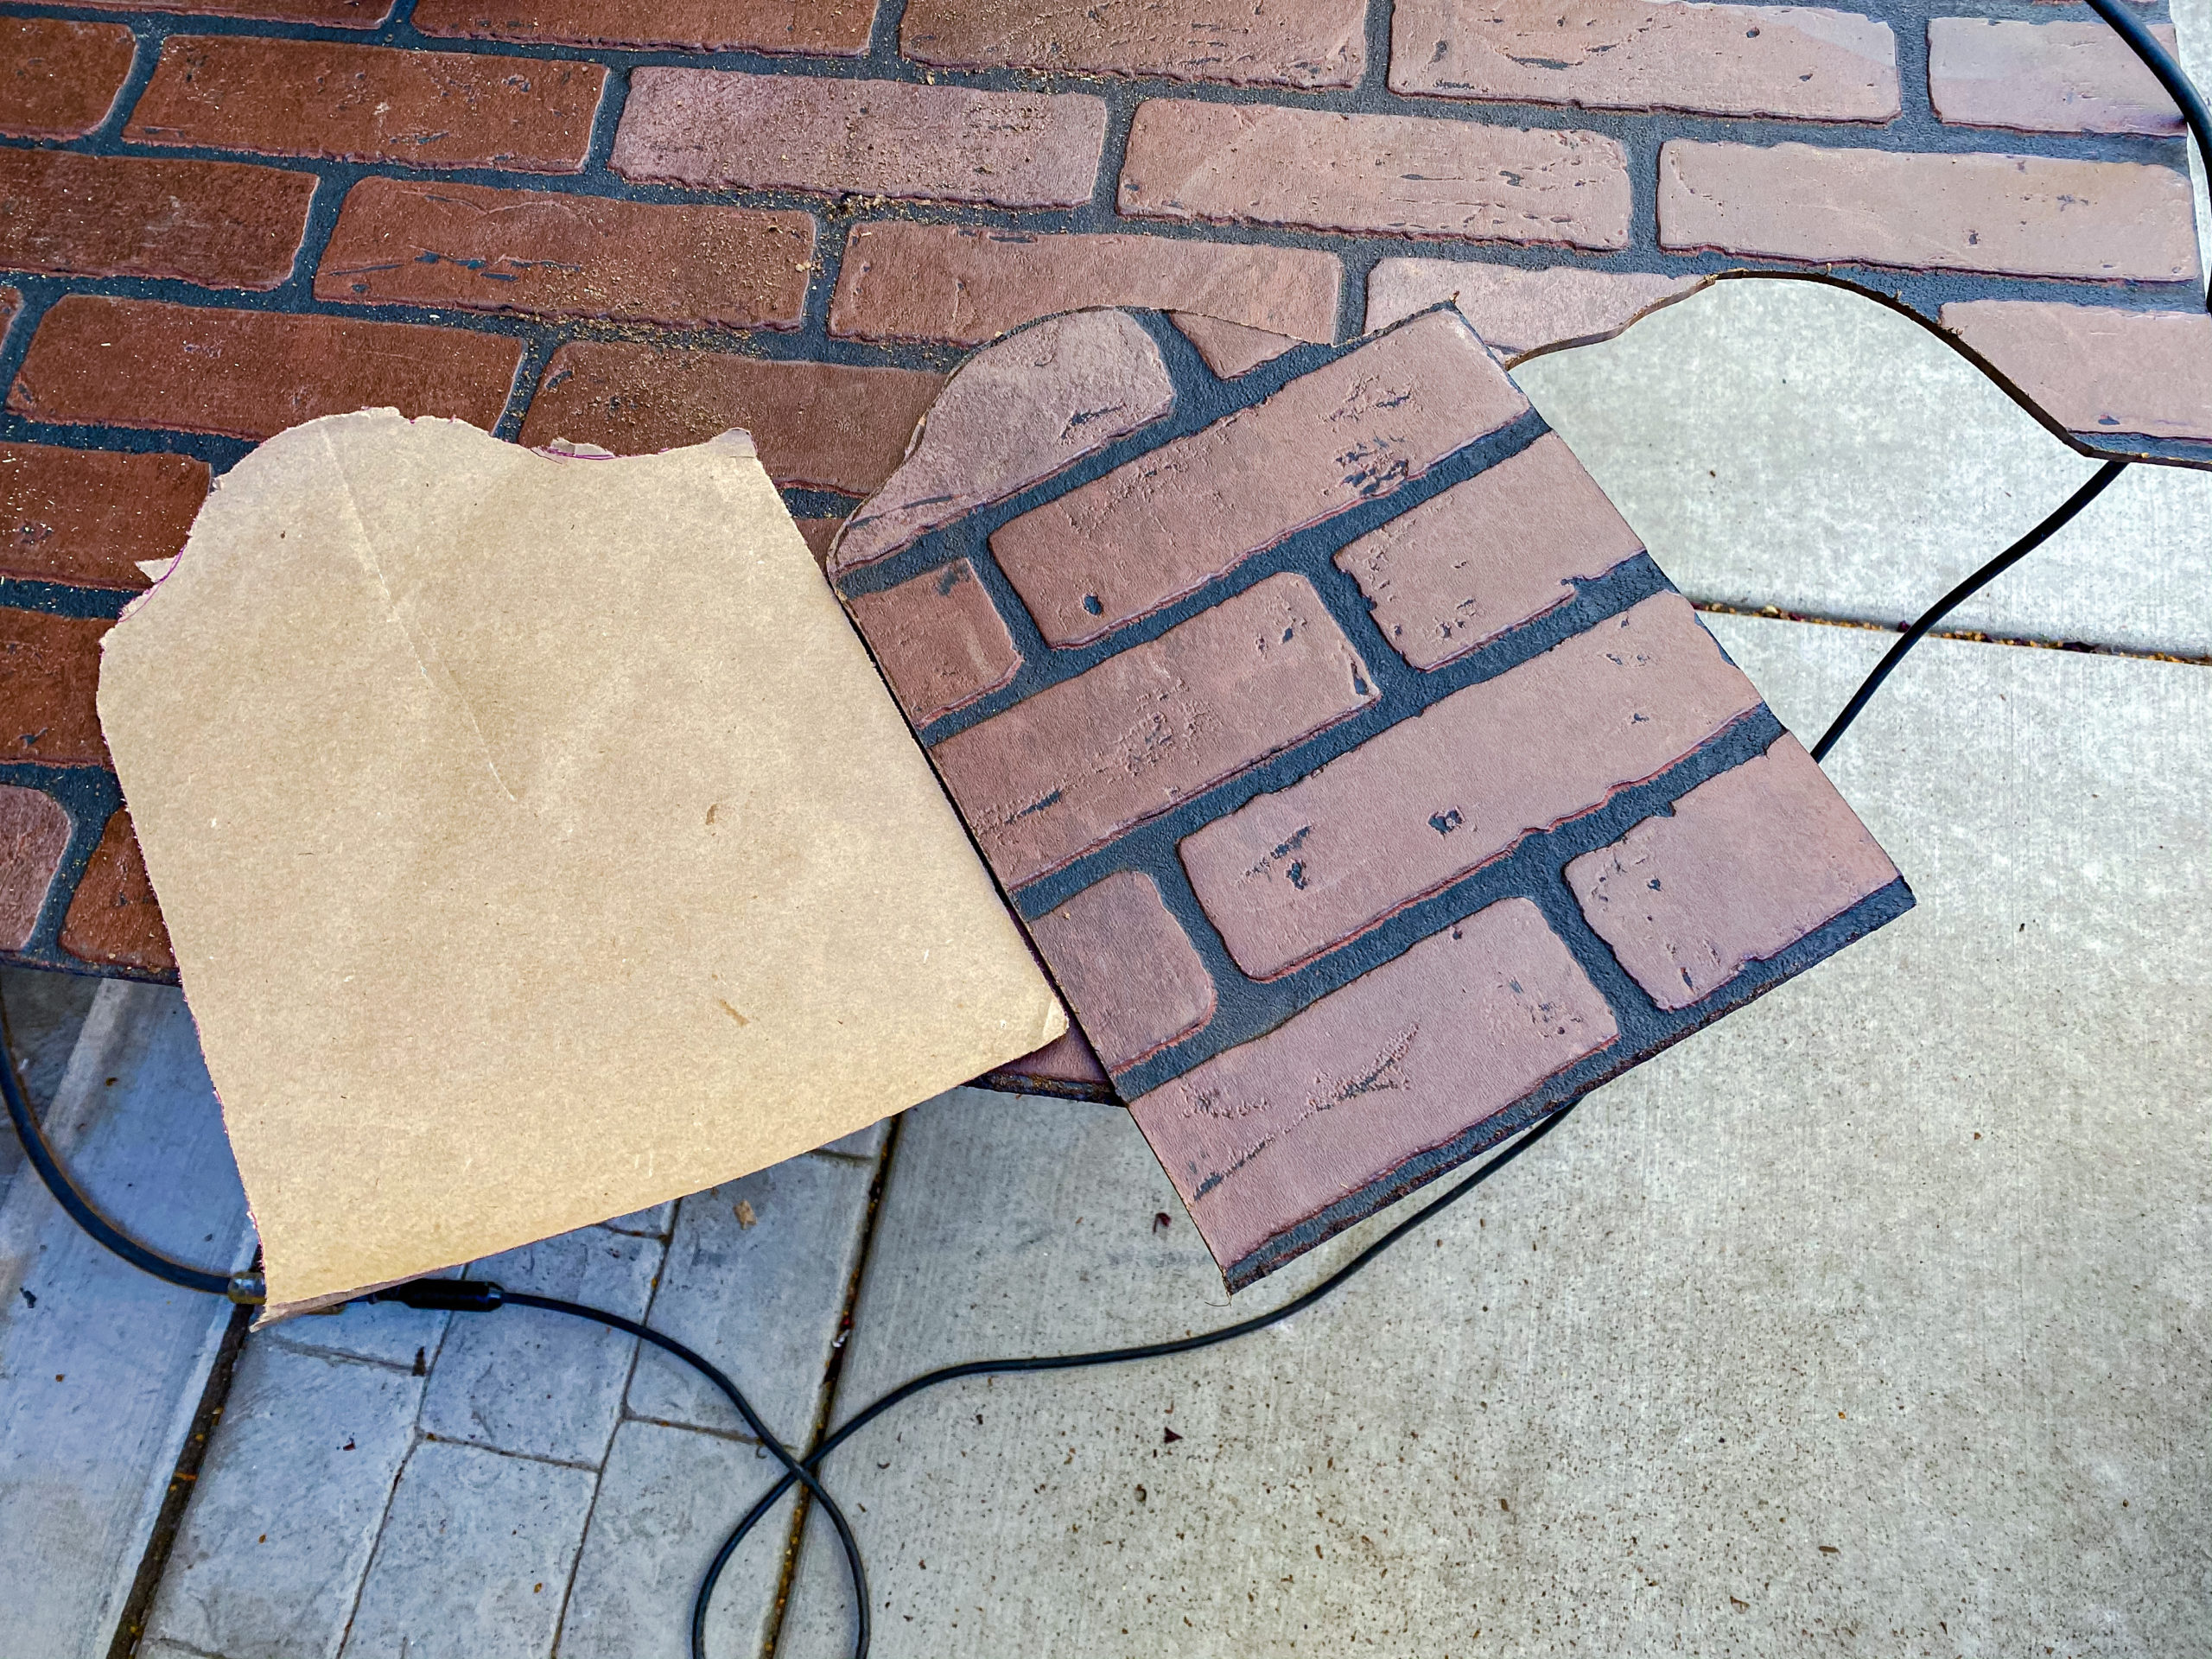
First off, a perfect cut is our goal. My cuts were super imperfect and it still worked perfectly. You may be better with the jigsaw than the average person, but if you aren't don't worry...grout caulking and plaster have your back.
- 1Lay out your brick panel on your saw horses or in my case a plastic table. You can probably the store you buy your panel from cut the large sheet in half for you. OF course my Lowe's didn't have an operational saw the day that I went in.
- 2Clamp your brick panel to its support table leaving any parts that your jig saw will need to go through with nothing under them.
- 3Lay your paper template onto the brick
- 4I chose to trace my paper with a sharpie so I could flip the paper and use it to cut the mirror image for the other side. You could also cut a template for each area and then use your repositionable adhesive tot glue the template to the brick.
- 5Once you have your template in place or traced get your goggles, your mask, and your jigsaw.
- 6Follow the cut line with your jigsaw, for me it is easiest to move slow paying attention to where the blade is headed as much more than where it is at the moment.
- 7Once your pieces are cut test them in the area they are going on and make sure they match up. If it is too big then you can trim more with your jigsaw, or sand the area a little until it fits.
- 8I did have to sand some areas at the top of the side panels, and I also had areas that I cut into a little more than I meant to. I sanded or later filled with grout. If you really cut in too far it may be easier to cut another piece than to patch.
panel placement
Remember when I said my piece was not super perfect? When I first dreamt it up I imagined that the cabinet fronts would be able to remove the raised center panel... but, it was actually a single pice that had been routered to show the raised look. I had to use my plunge router to and a straight bit to remove the wood from the center. I did this earlier on in the project before making my template or cutting the panels. I also was not perfect here. The important park is not cutting into the side or through the piece. You are just lowering the router bit to the surface, about .25" deep and removing the wood where your brick will go.
- 1Clean all dust and dirt from your piece and allow to dry.
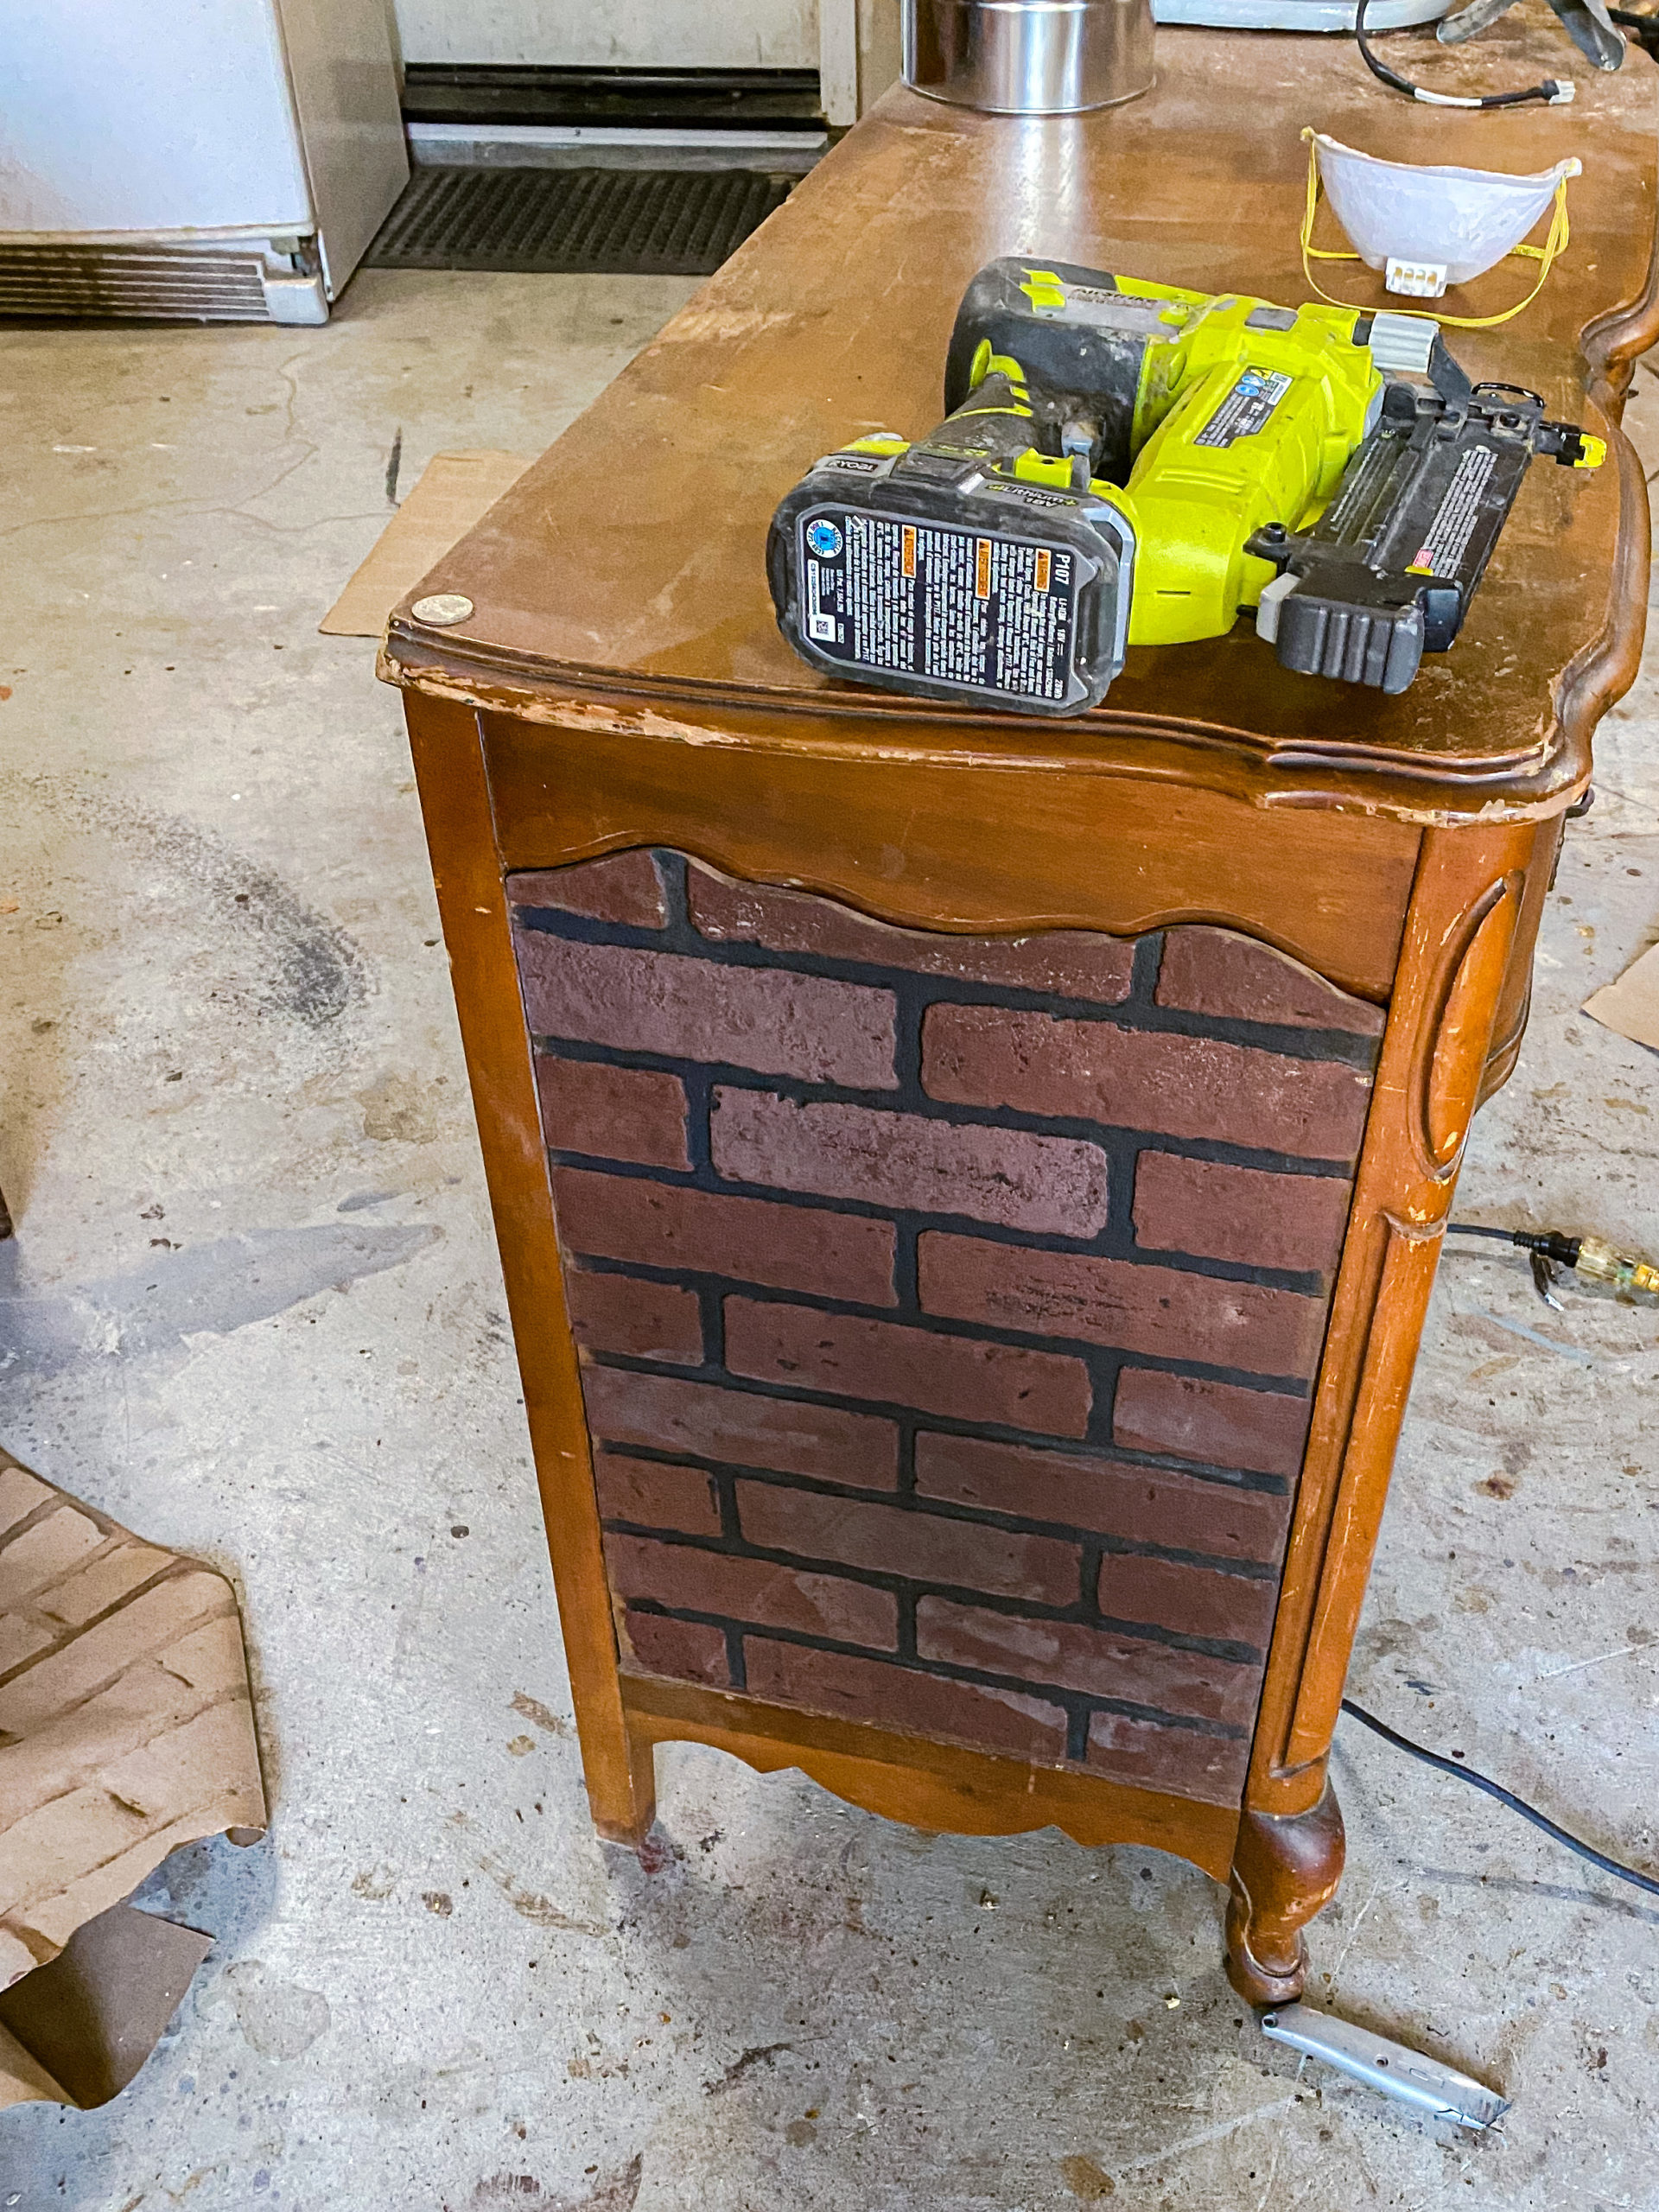
- 2I used liquid nails in a caulking gun to apply the glue to the back of the panel and then used clamps or small nails to hold the brick in place while it dried.
- 3When the adhesive dried I had large spaces to fill around the cabinet doors. I pushed wood filler into the gap getting rid of the decorative edging from the original look of the cabinet door. Put enough wood filler in to create a flatter transition.
- 4After the wood filler has a chance to dry, sand the wood filler creating a smoother transition.
- 5For the smaller gaps and to create a grouted look. Put your sanded grout tube into your caulking gun and feed the grout caulk into the entire perimeter. You can use your fingers and smooth it into area. The finished look should look similar to the grout lines on your brick panel.
- 6Allow all to dry.
Getting The Finished Brick Look
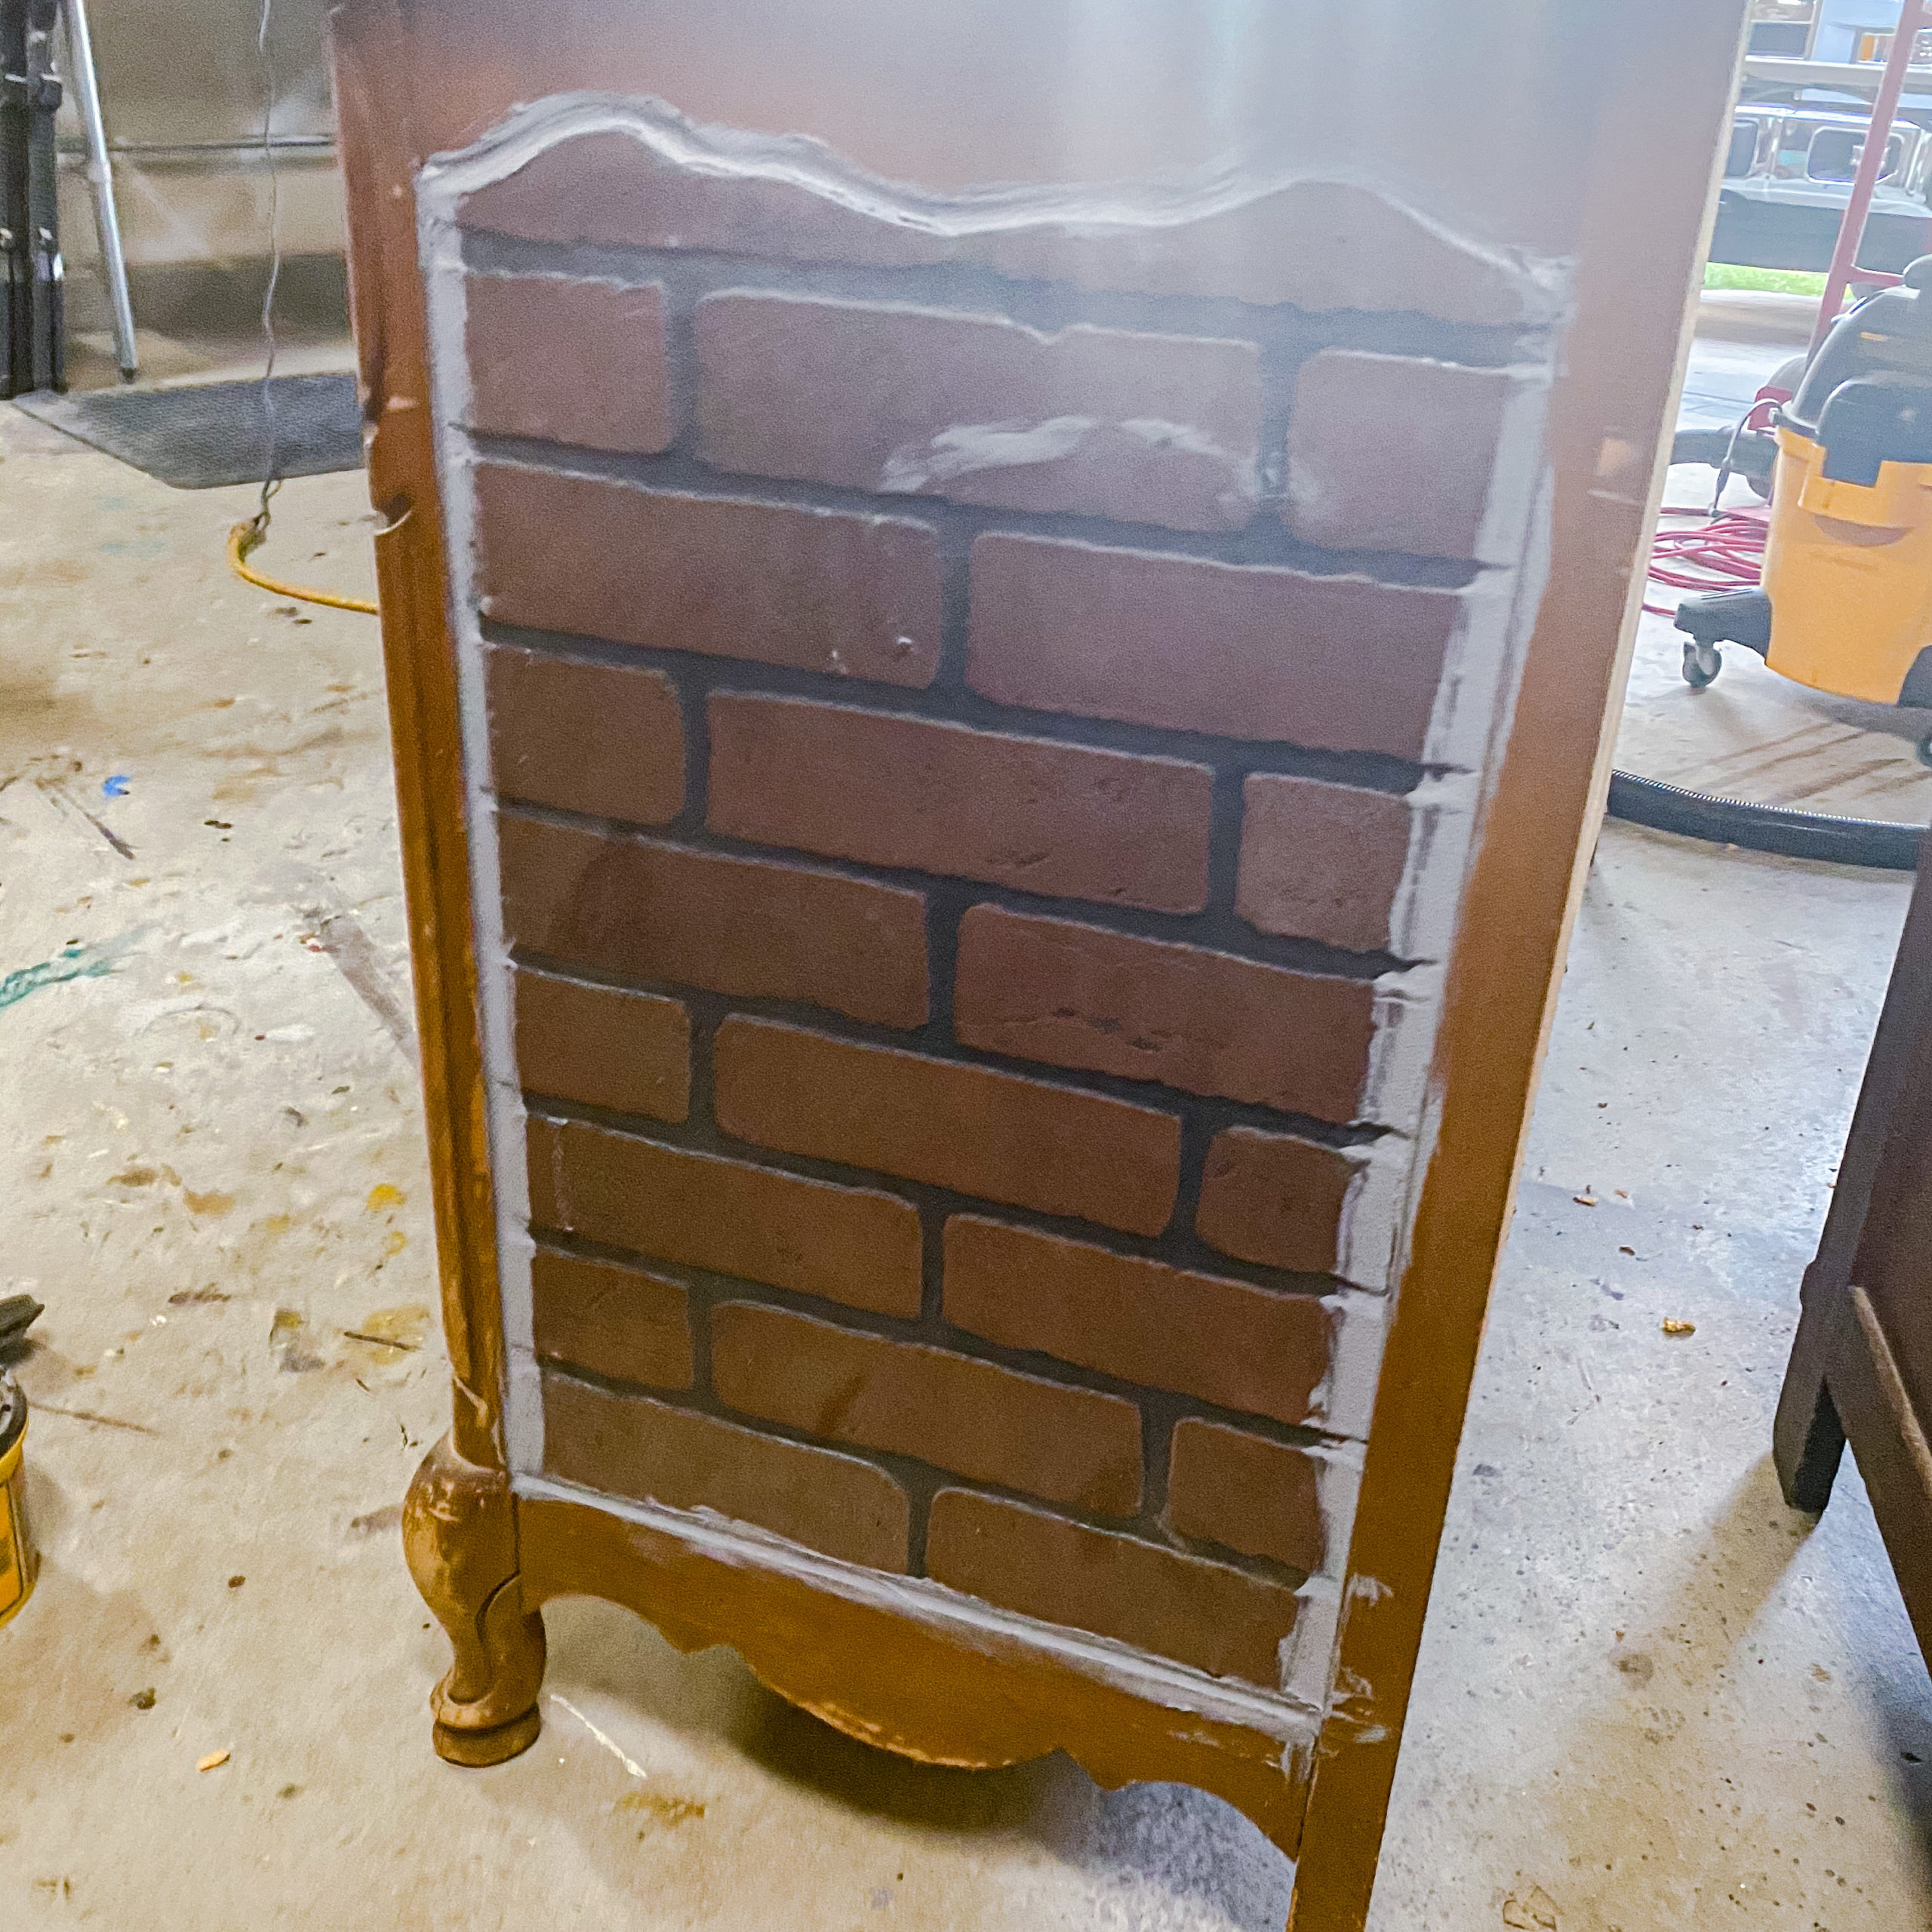
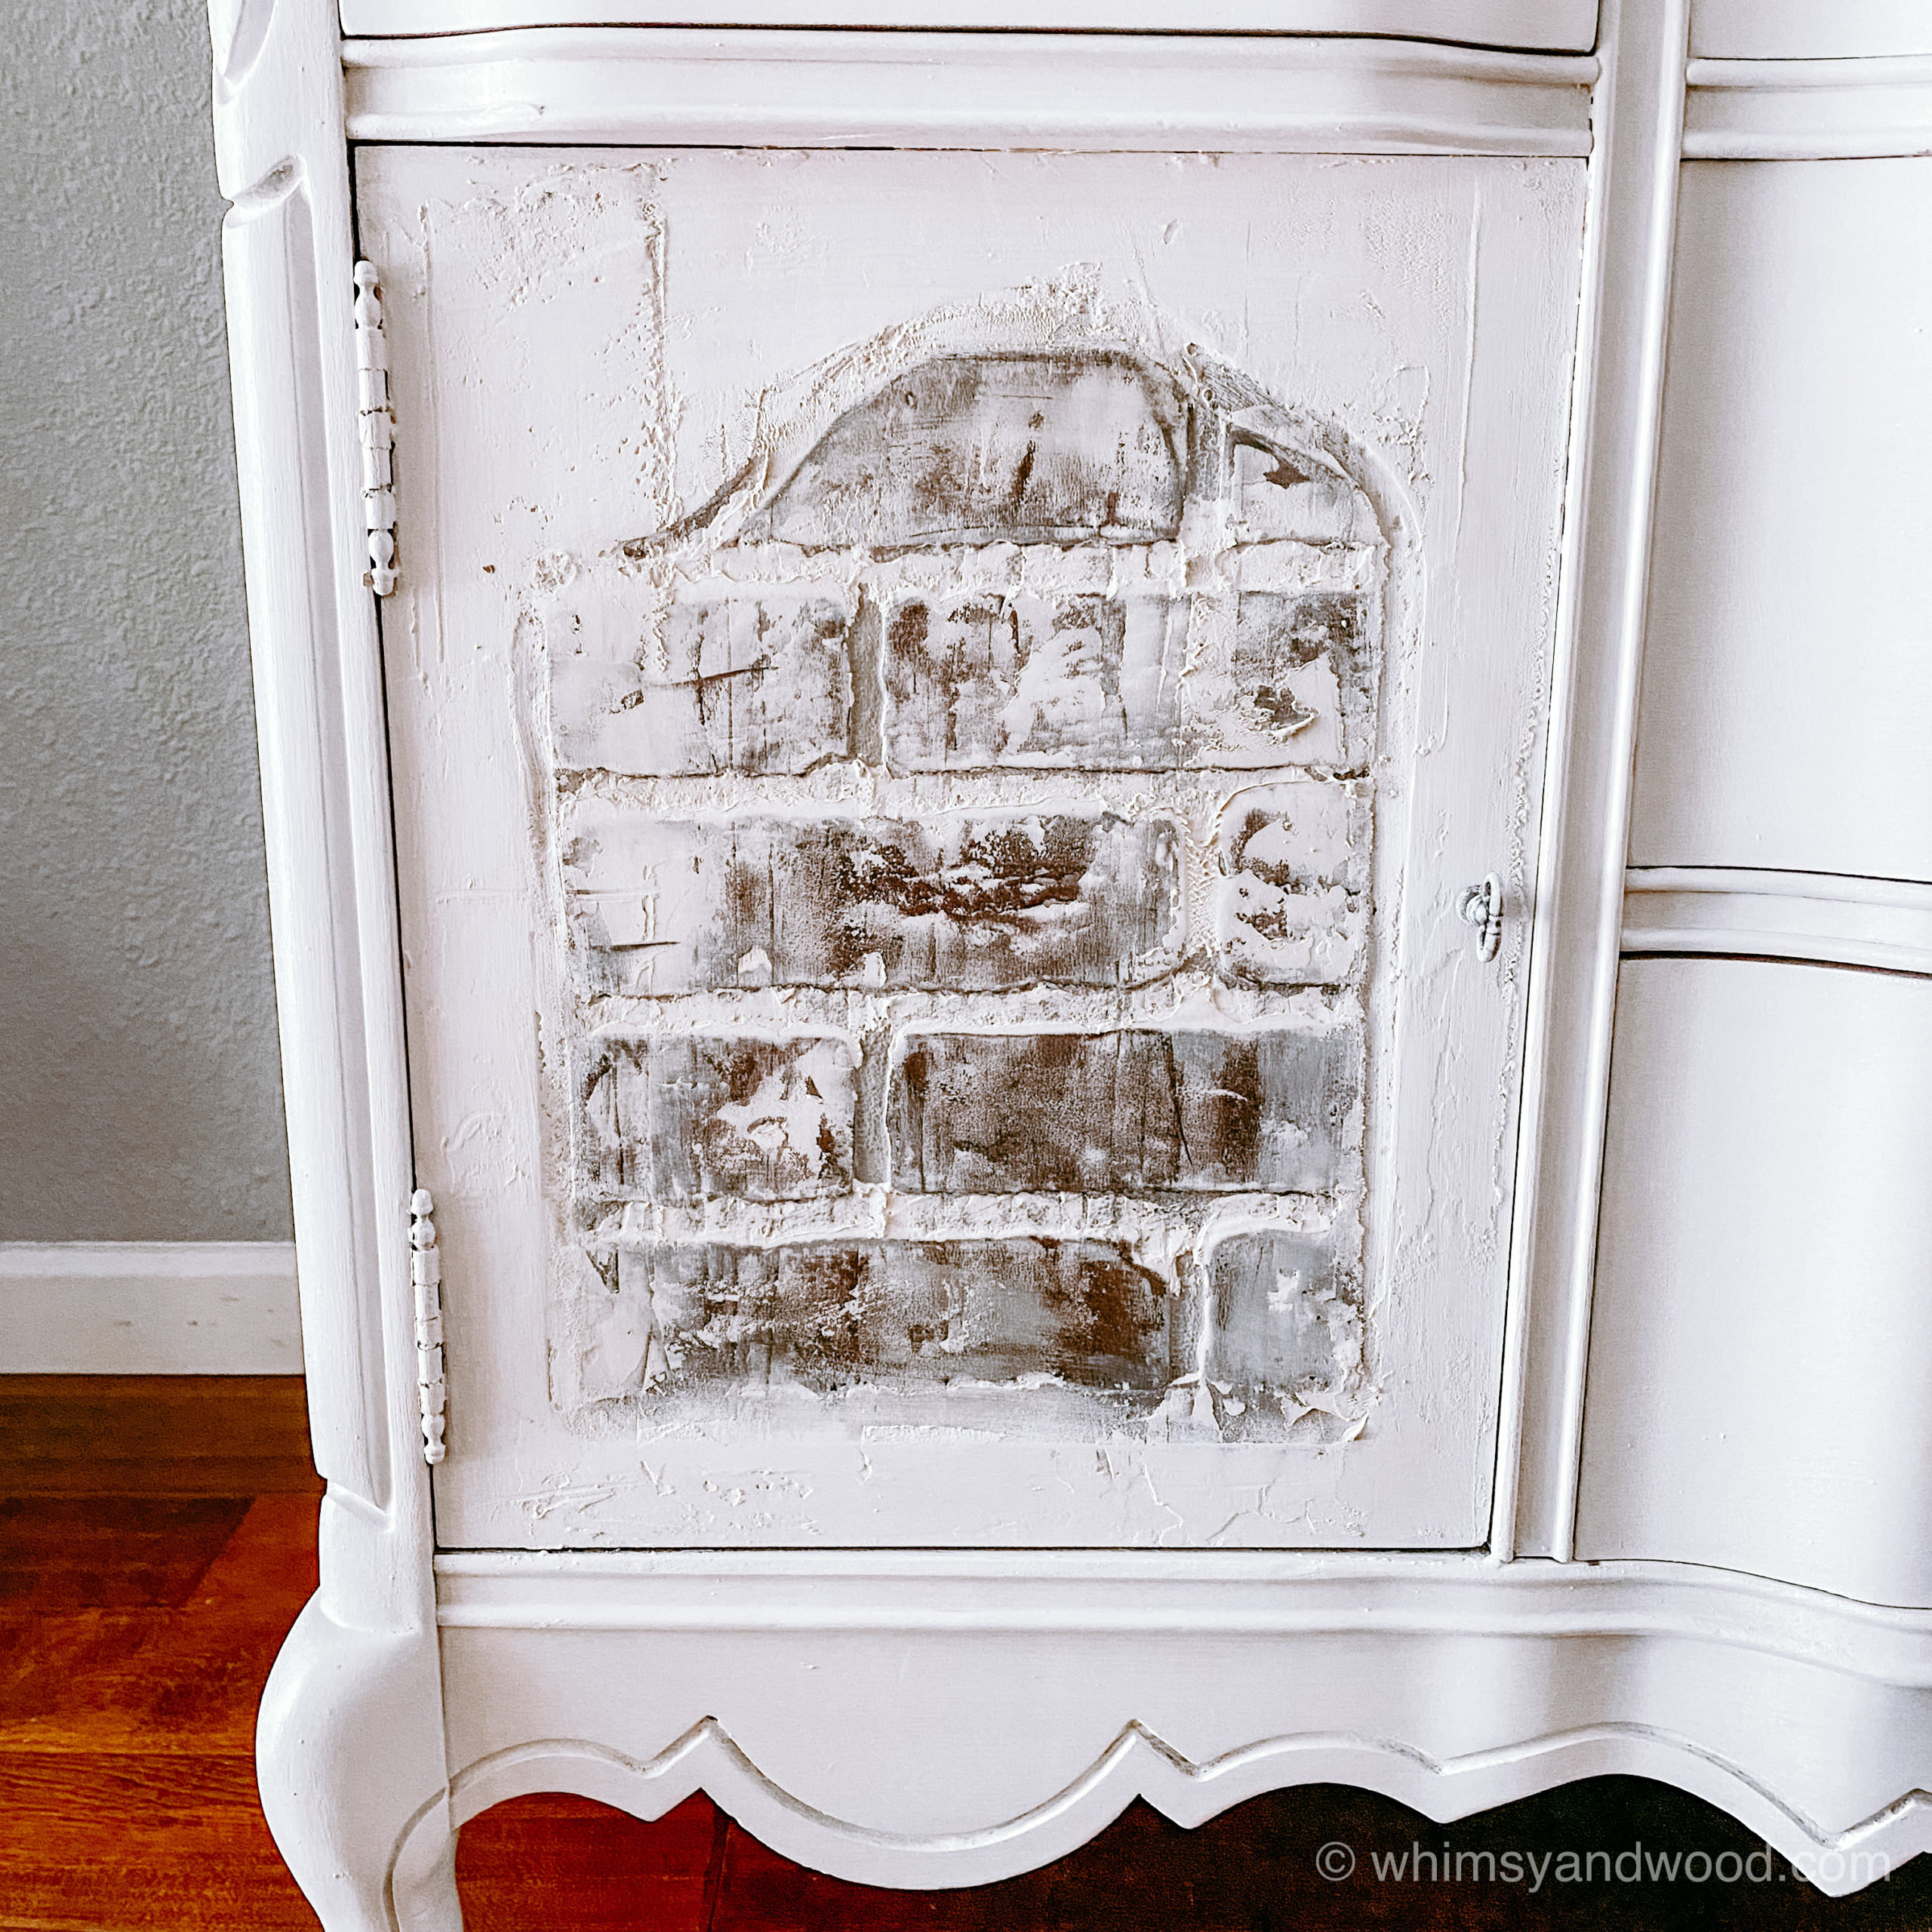
When you get to this point you are in the home stretch. With this look the paint and spackeling create the magic.
You can find many videos out there on German Schmear techniques. I have seen them and was able tot follow the general idea using the supplies I had on hand. You can use whichever variation works best with your on hand supplies or what you are comfortable with.
- 1Make sure your piece including the bricks are clean. Remember you have had repositionable glue on it at some point
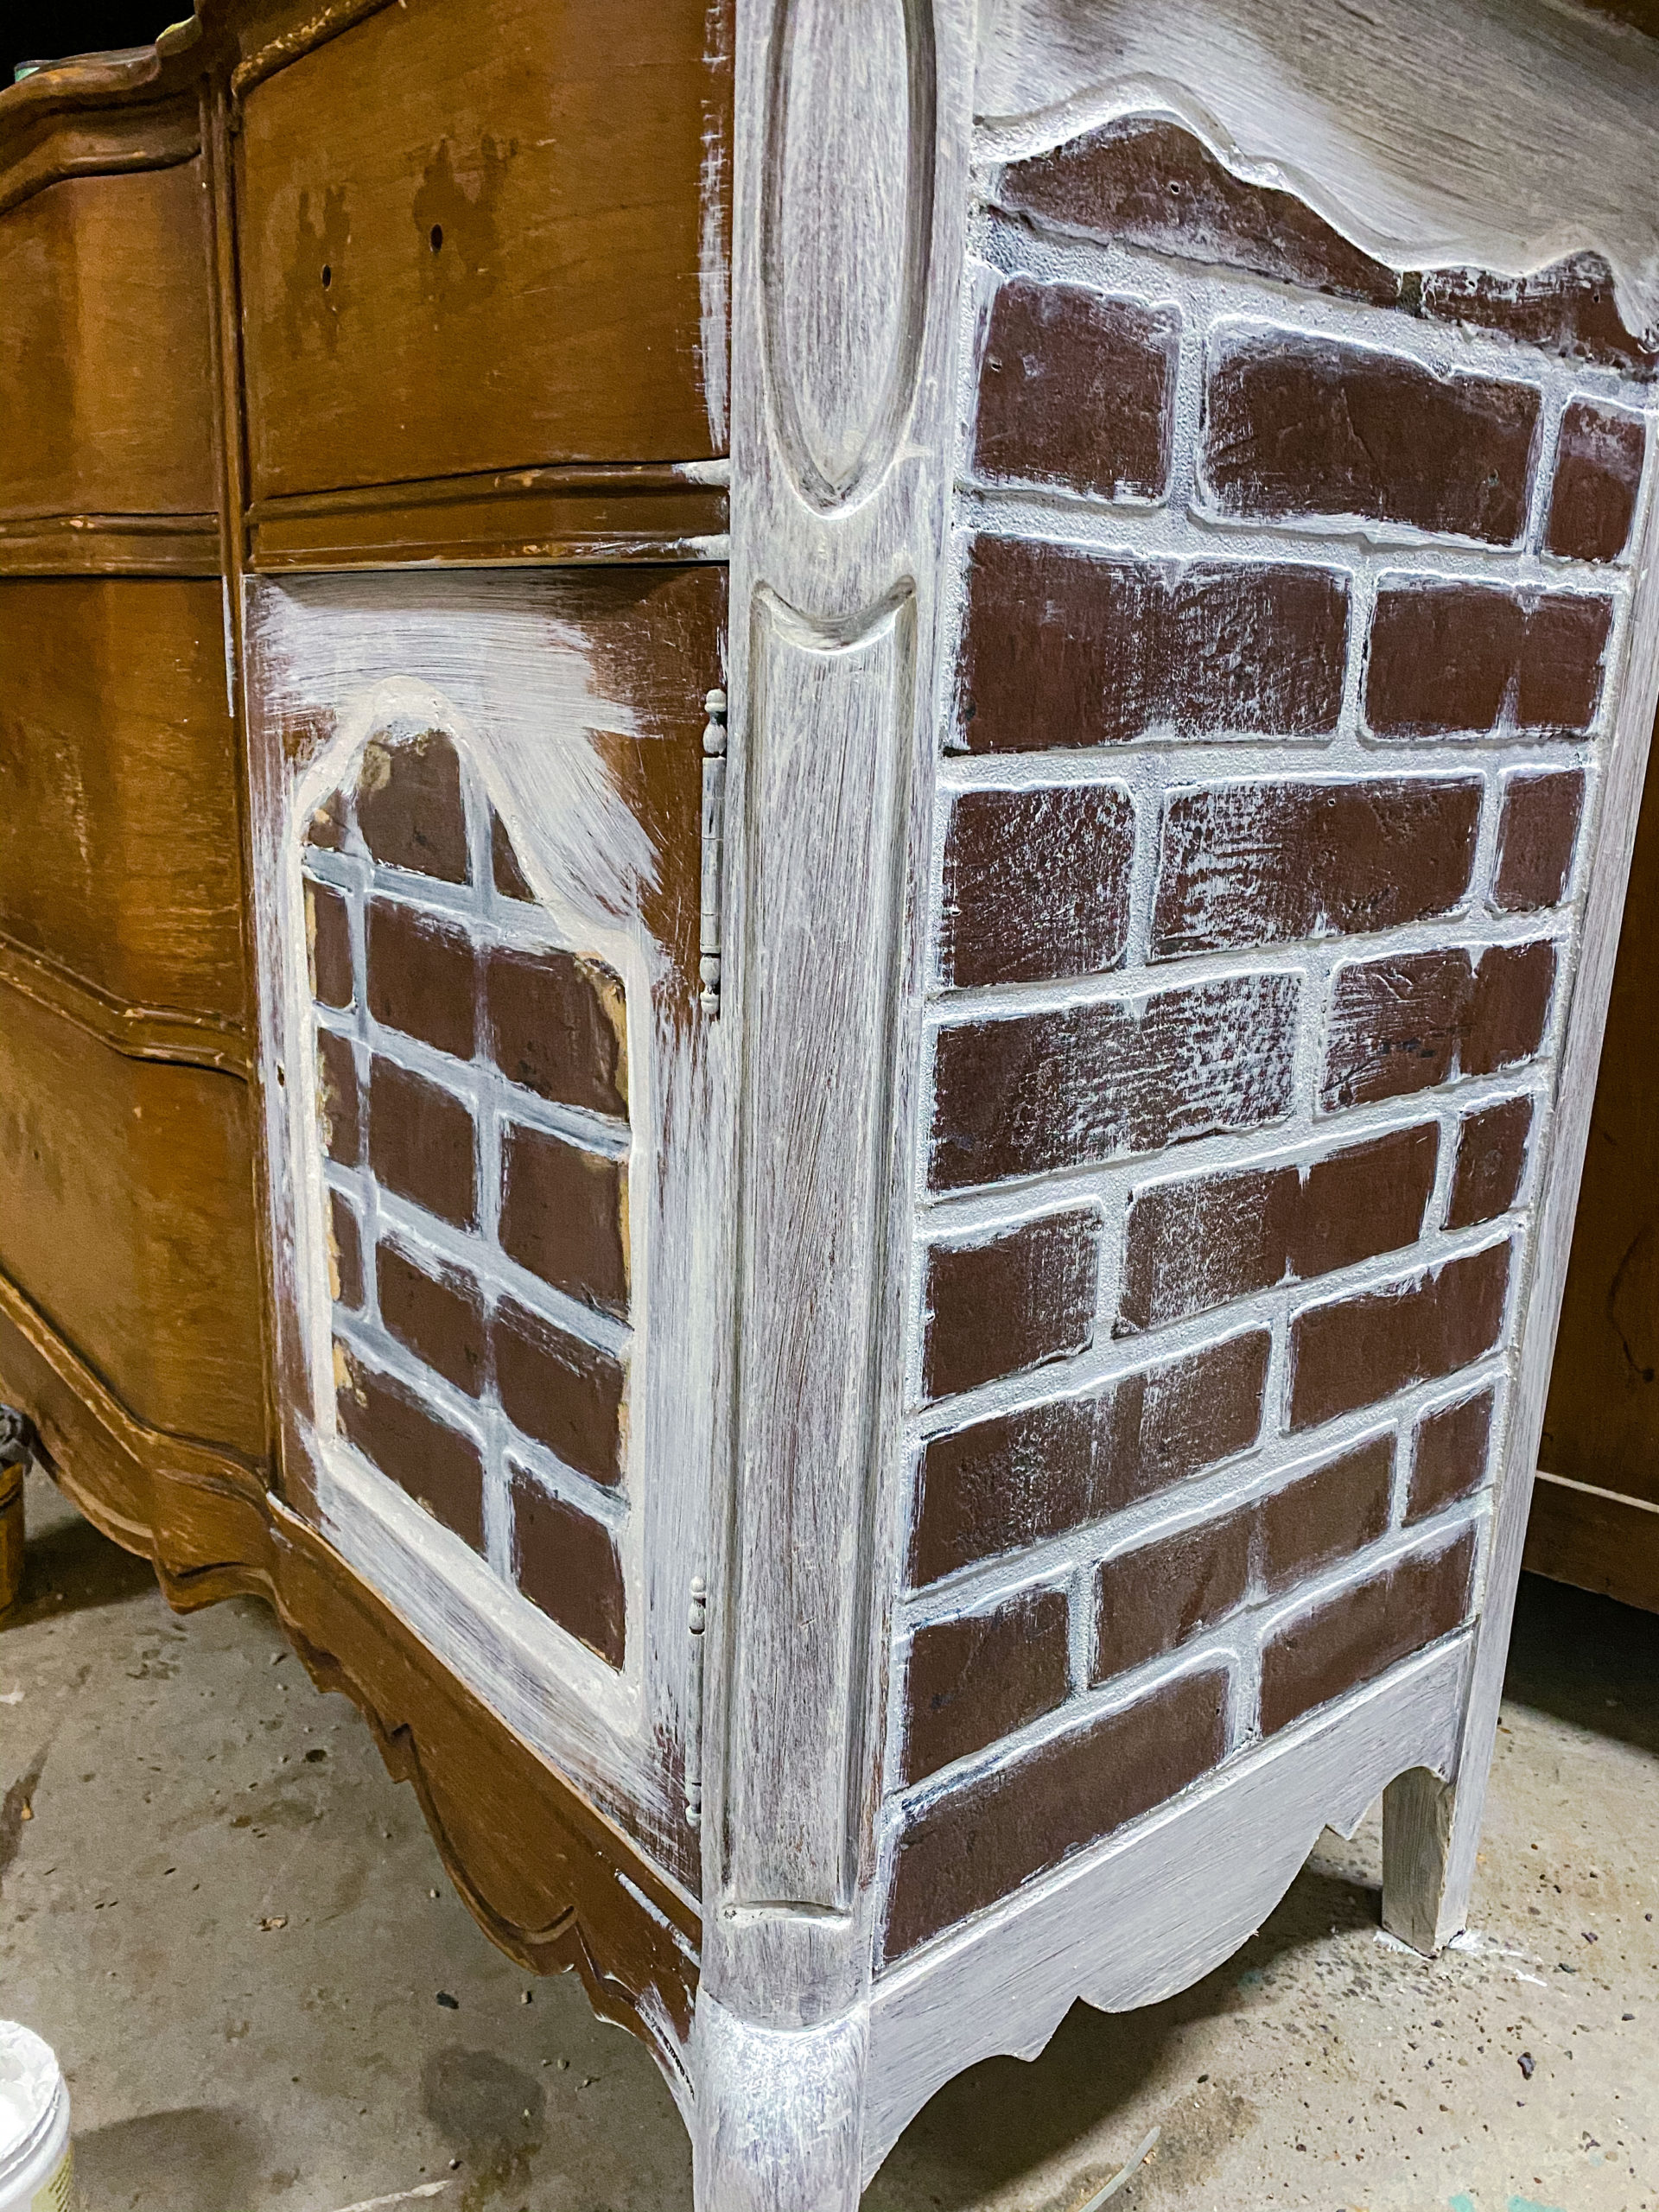
- 2Faux Brick panels can have different colors for the bricks and the grout lines. This panel had black grout lines. They were first painted white. The caulk I used in the last step was also gray, so I painted it white as well.
- 3Dry brushed a little gray paint and a little white paint onto the bricks to create some variation. I did make sure to keep a good amount of the red showing.
- 4Allow paint to dry.
- 5Next grab your spackling tub and your metal spatula
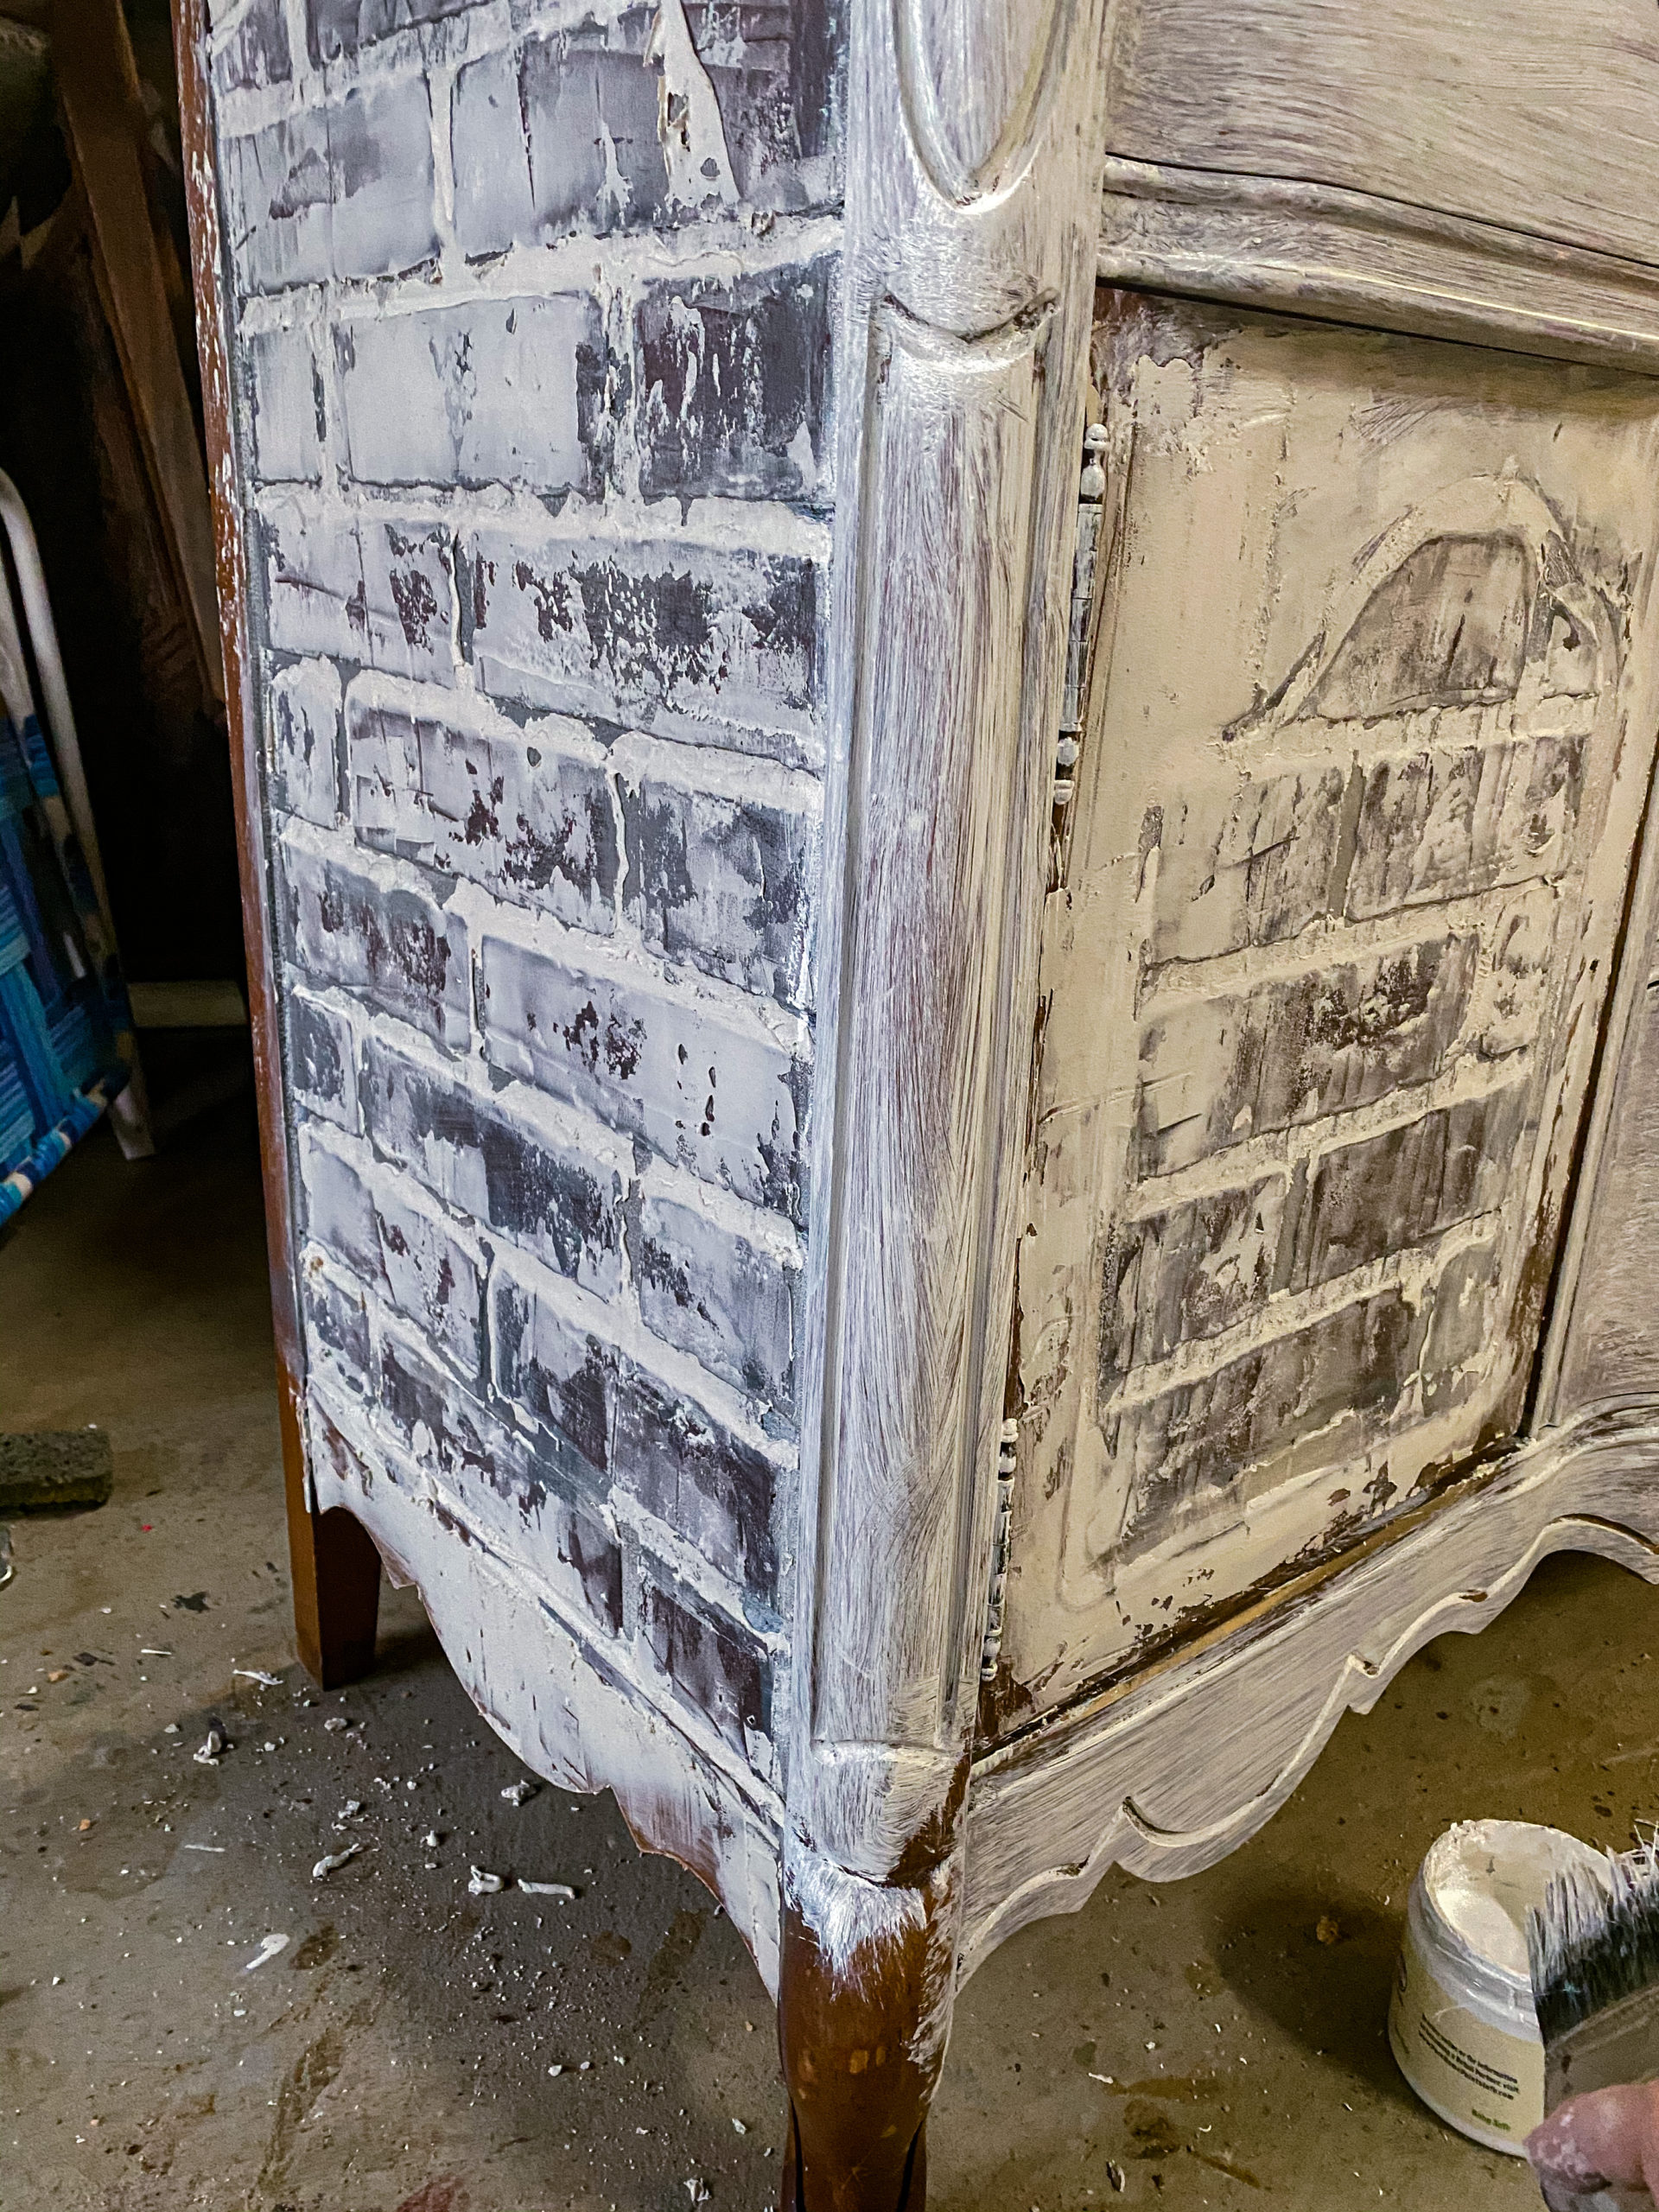
- 6Use your spatula to scoop out some product and smear it into the grout lines of your piece. Honestly just gob it into the grout lines without worrying too much.
- 7Now take your spatula and flatten the spackling you have built up in the grout lines. Smear, or should we say Schmear the spackling over the bricks. Use your spatula to move the product around until you like the look. It should not be too perfect. You want. it to have variation and have an industrial look.
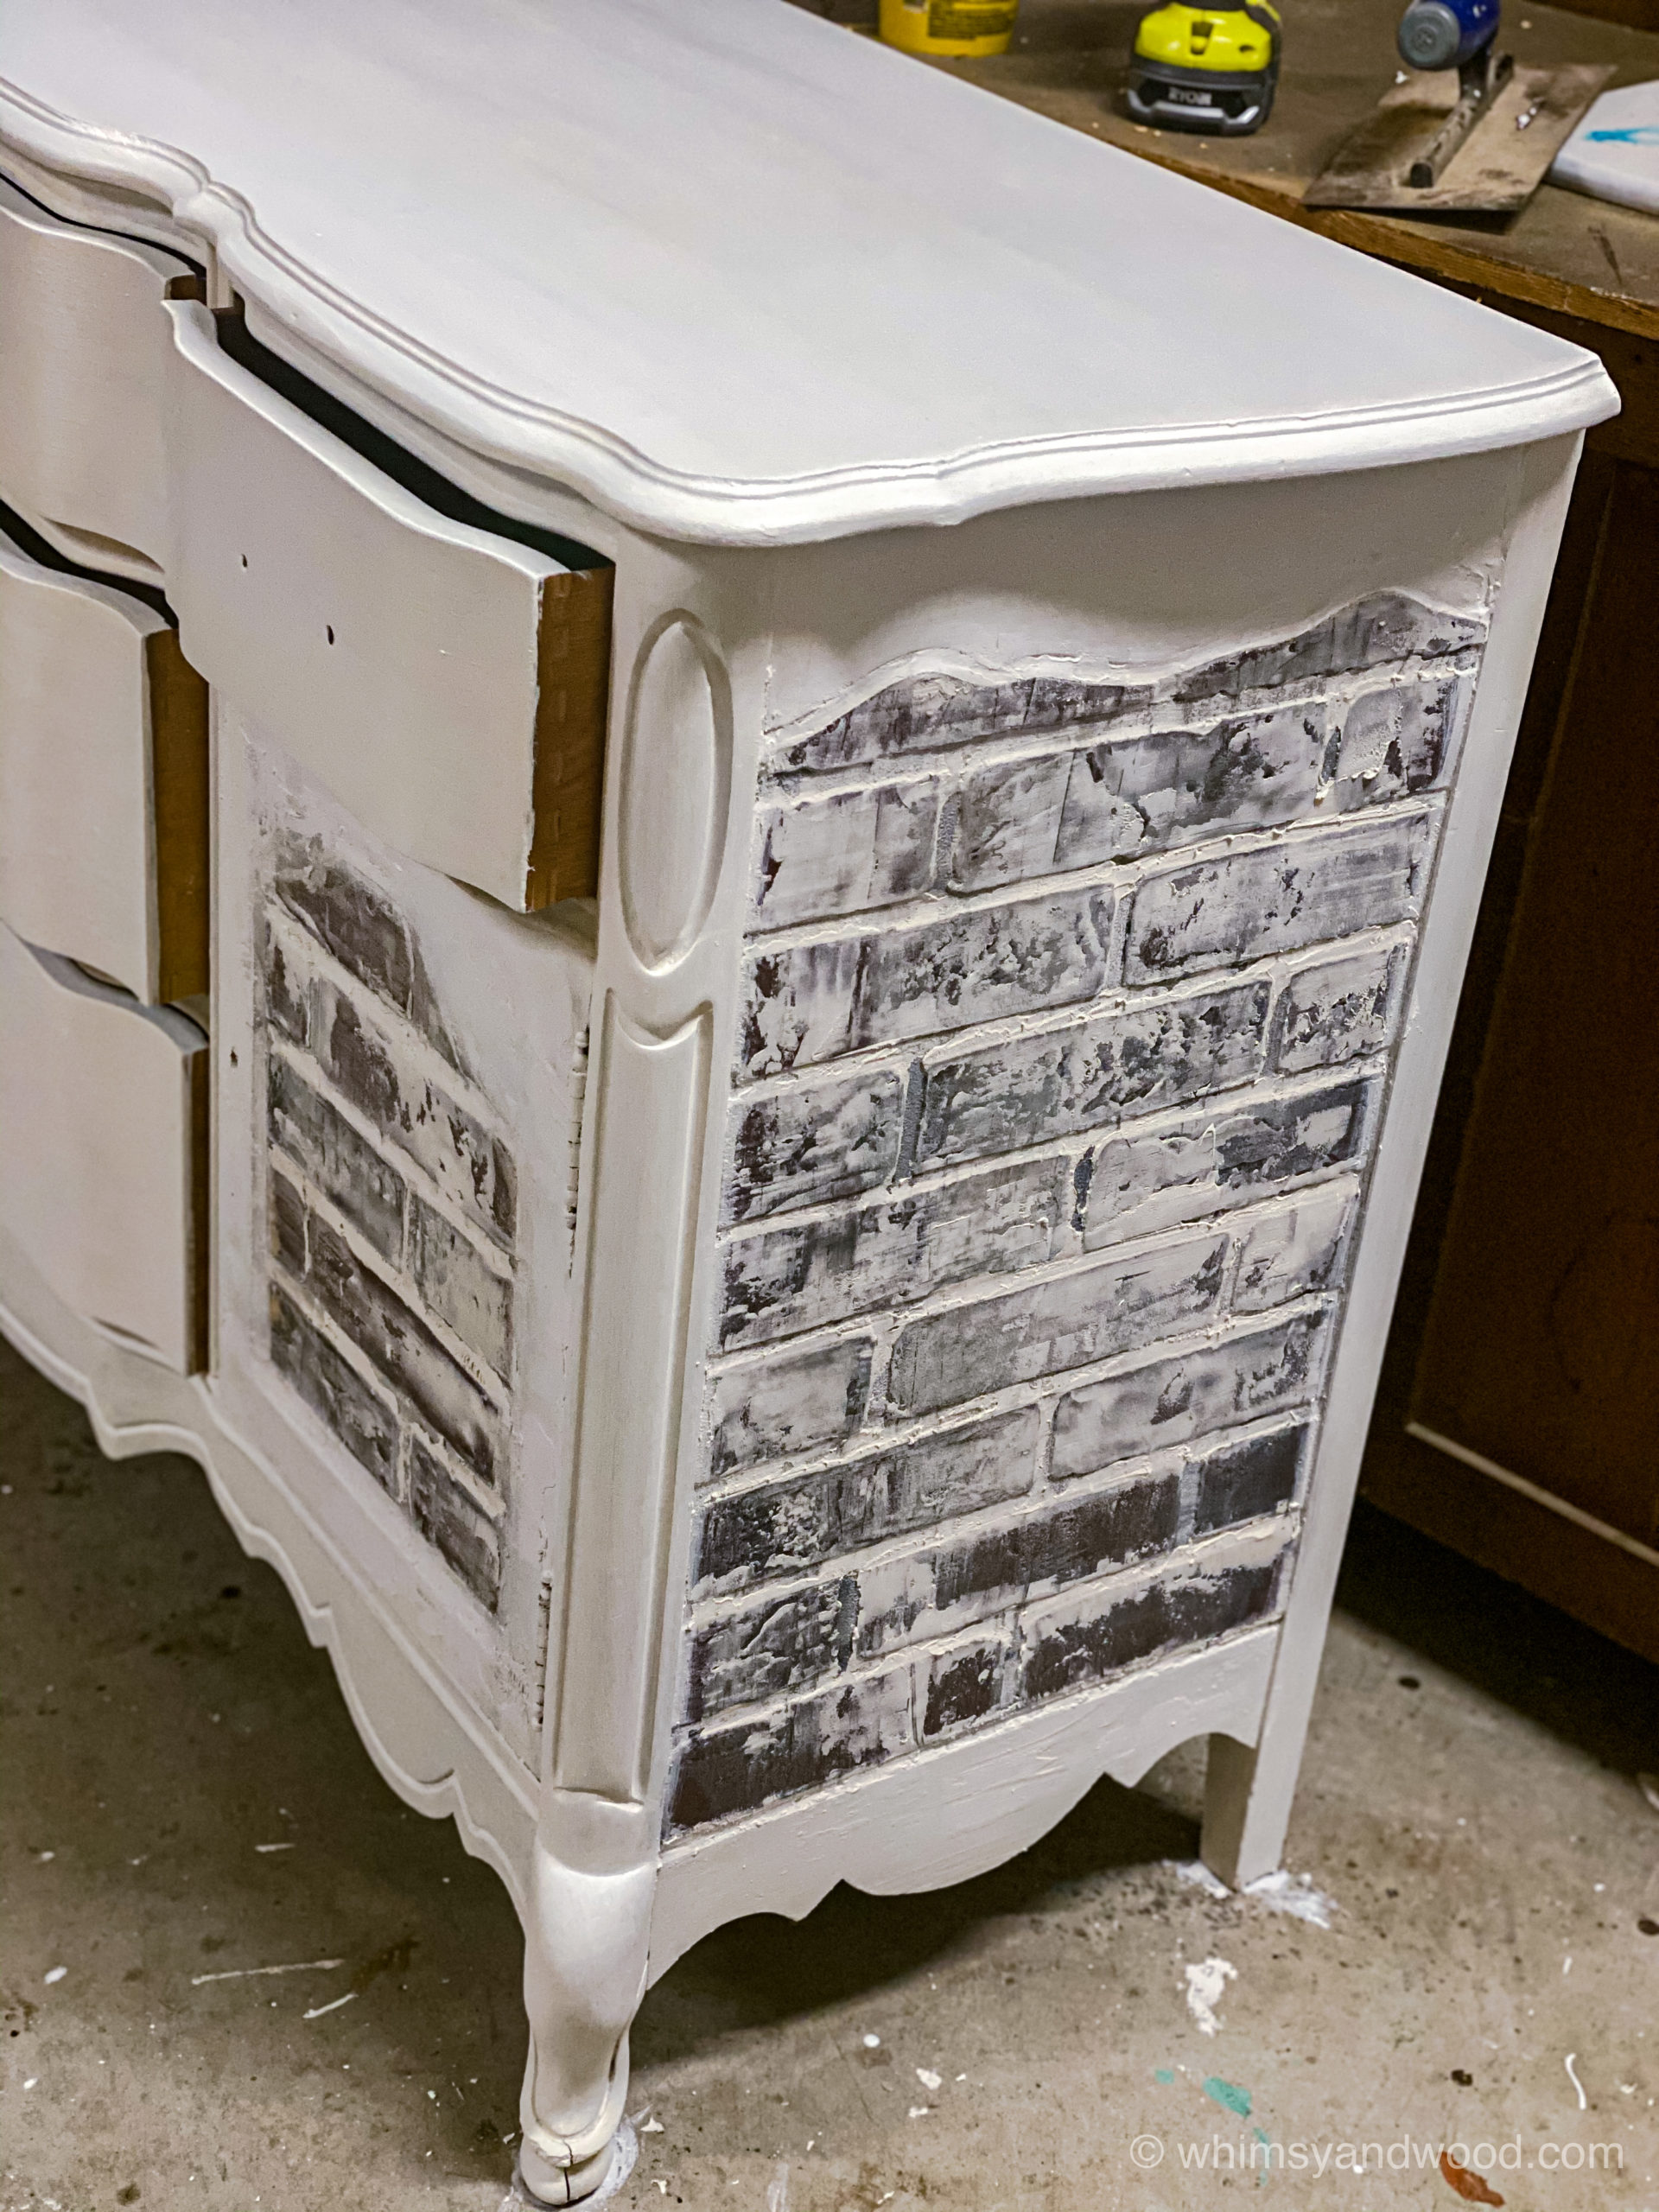
- 8You can choose to keep the areas around the brick clean and clear of the spackeling, or you can smear a layer of the spackeling onto the areas around the brick. That is what was done on this piece. The original plan was to have the drawers with a plastered look too, but as the piece evolved the combination of industrial and clean was a better fit for this piece. It helped keep the original character of the French Provincial style.
- 9Allow the spackeling to dry
- 10Paint your piece to create the look you want. At this point it should be painting everything except the bricks On this project Pure Home Paint Alabaster was used. It is a beautiful cool crisp white.
- 11After your paint dries go back over everything with a couple layers of your top coat. The top coat was applied to all painted areas and over the finished faux brick.
Make sure you are trusting yourself. Follow your crazy ideas because they are where your magic happens. Each piece you create is an expression of you and your magic.

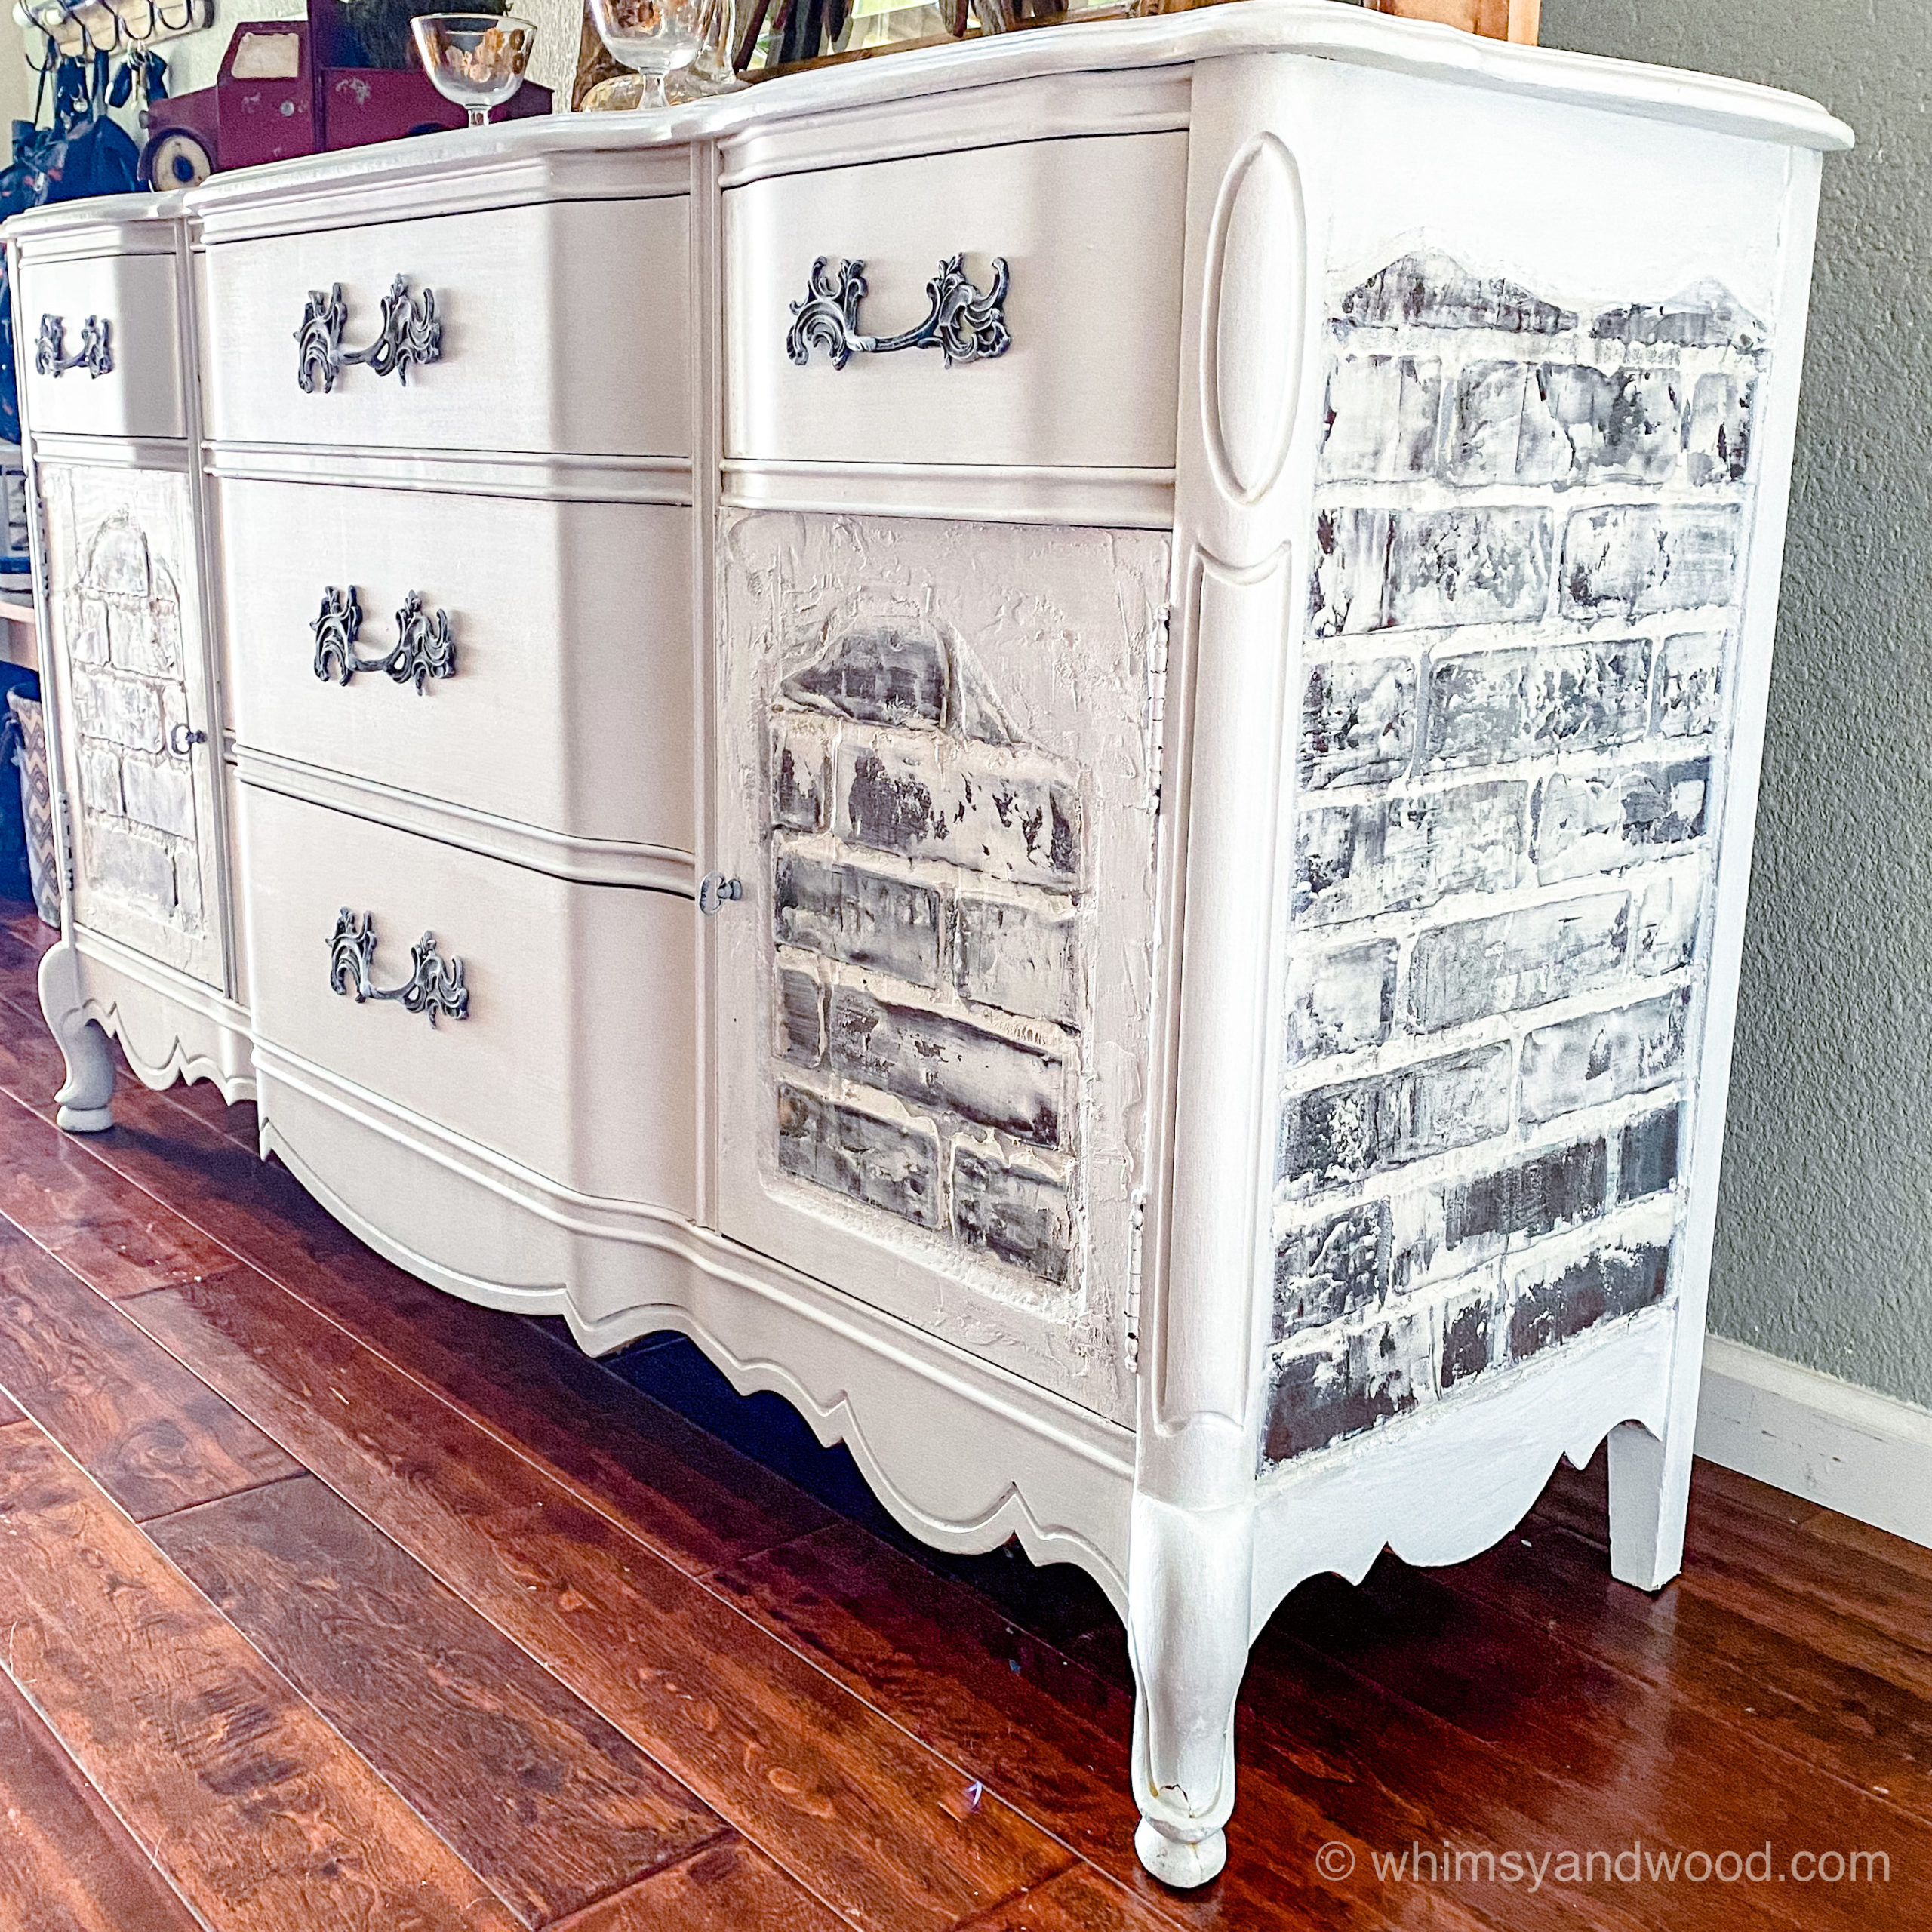
If you use this post to help you with your project using faux brick panels or anything else please come back and share them with everyone.
If you have any questions please know that others will too. Ask in the comments and I will answer as quickly as I can. Your questions help improve the information we share here and help others who attempt these projects.
Go make your magic!
Jen
Leave a Reply