Is it me, or is the classic Red Buffalo Check Plaid print everywhere you look?
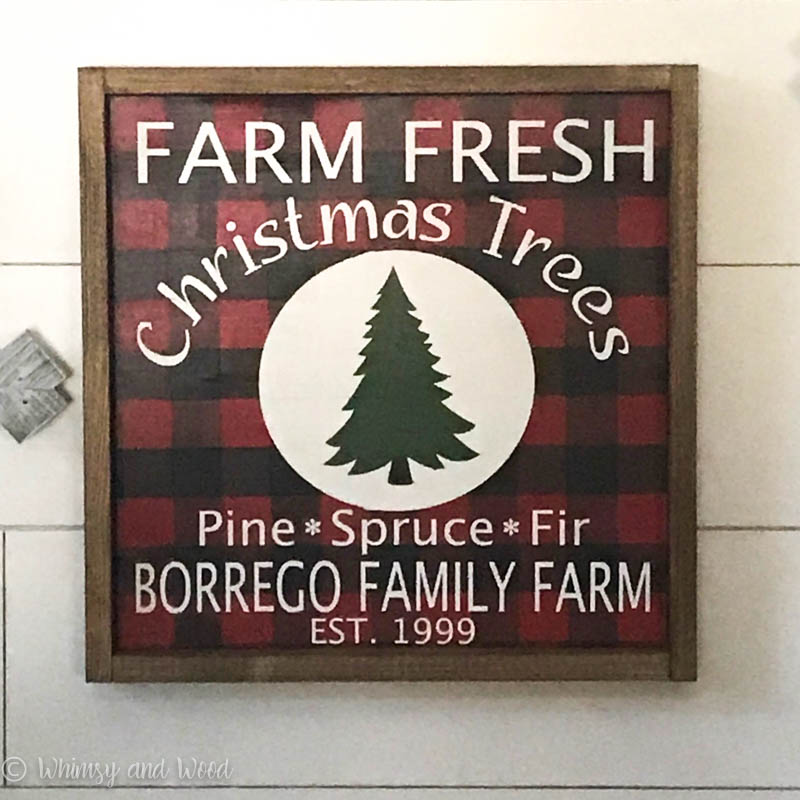
After seeing it splashed here and there. On ribbons, blankets, flannel shirts, and Christmas pj’s. I decided it would make a really cute family holiday sign.
I added a little video here so you can see how I made this buffalo check plaid background. Part of the trick is the rotating of the sign and painting in alternating directions. The brush marks help give it the fabric buffalo check plaid look. It may be a little less work to go buy some fabric and screen print your sign on it…but, you know me, I am all about the paint.
Supplies Used
Links will take you to items for sale in our shop, or to affiliate links of companies we order from. Affiliate’s pay us a small commission
Kristi Keuhl Pure Home Paints
Clingon! Paint Brush (Any paint brush will do)
Frog Tape (choose the size that will make the size stripes you want.
How to Paint a Buffalo Check Plaid Background
Step 1
- Paint your base color on the entire board. On this sign, we were going with a red buffalo check plaid. You can use alternate colors. Start with the lightest or brightest and build from there. For this example with Razorback Red, it is a bright primary red. Get a good solid coverage with this color.
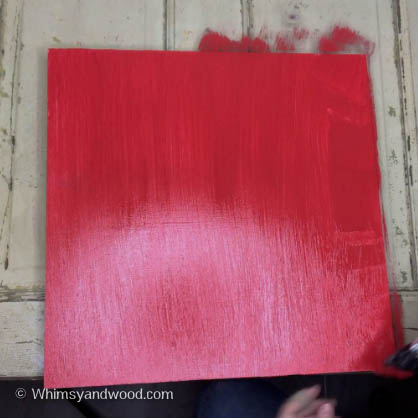
Step 2
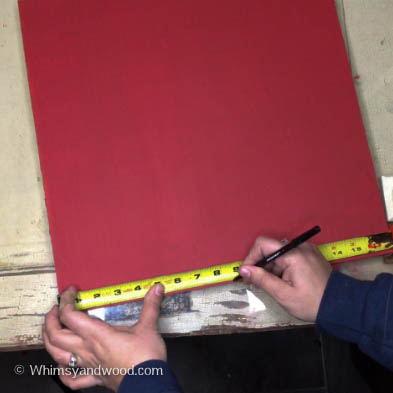
Measure and mark the center of the board at the top and bottom of the sign.
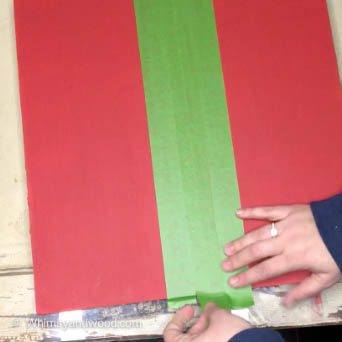
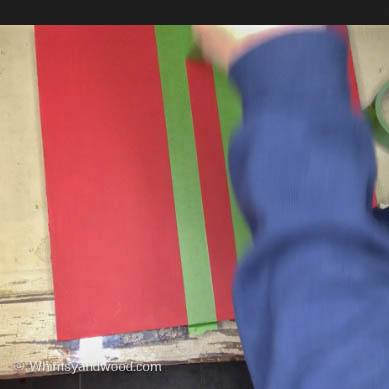
- Stretch your first piece of tape, centered on those marks. This first piece is just a placeholder. Get it centered and straight & it will provide the guideline for all of your lines to be straight.
- Line up a piece of tape to the right and to the left of this first tape piece and smooth flat.
- Once those are in place peel the original, centered tape & move it to the opposite side of your left tape line. Line it up & smooth it down
- Placeholder lined up, add your next line to the left of your placeholder tape. Continue until you reach the end of the project board. Then peel up your placeholder and repeat all steps on the right-hand side. Only lining up your placeholder to the right of your first tape line.
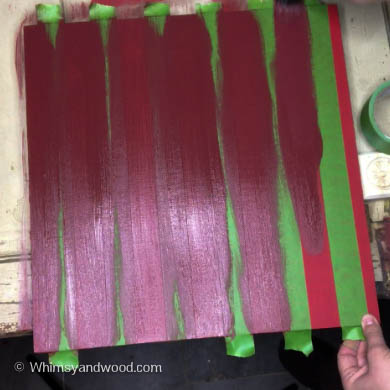
- Once all tape is in place & smoothed down, paint your first accent color. For this color, I used Cranberry Bliss. You could easily take your original red color and add a little black to it.
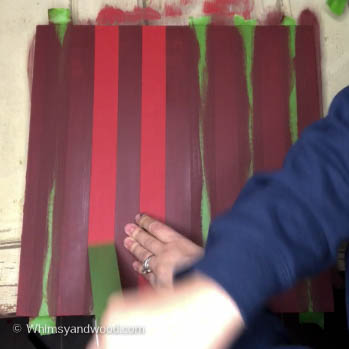
- Paint, allow to dry & peel up your tape lines.
Step 3
- Rotate your board 1 turn. your vertical lines should now be horizontal.
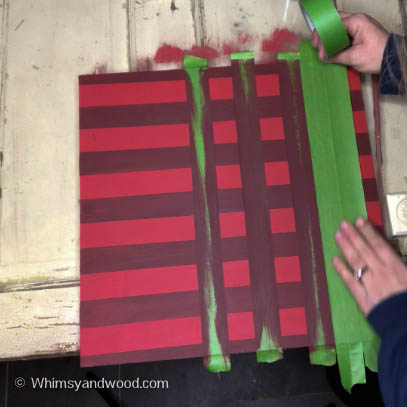
- Follow the steps 1-5 above. DO NOT FOLLOW STEP 6 from above!!! We will be leaving this 2nd set of tape lines in place.
- In our video, we add a little more black to the Cranberry Bliss. This is not necessary. You can add it or leave it out. Buffalo Check plaid is traditionally only 3 colors total.
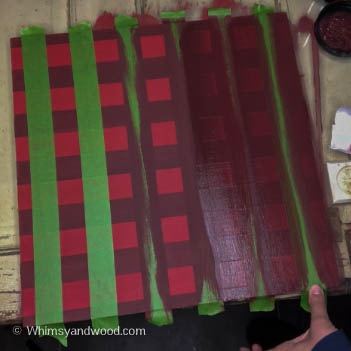
Step 4
- Turn your project board 1 turn again.
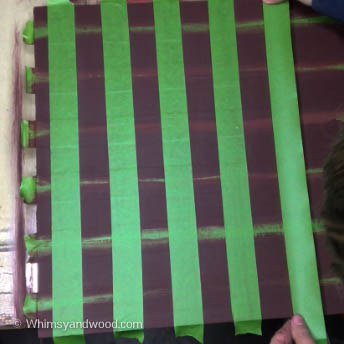
- Remember, you are leaving your tape in place from step 3.
- Next is to add tape lines to left and right of center just like in our original step one. You can do this using the taped placeholder again. I skipped the placeholder tape and used the edges of my original lines to carefully set up the next lines.
- You will have a grid horizontal & vertical tape lines.
- Next paint the open spaces using Derby or any black paint you choose.
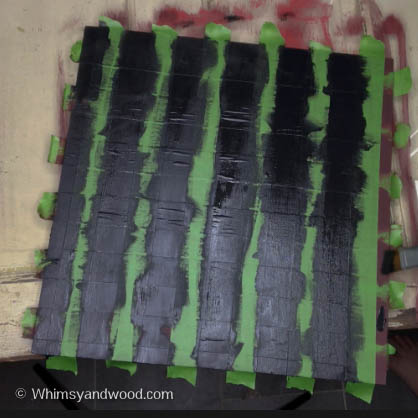
- Remember to paint in long lines. Using only one direction for your final pull. This helps to create a little bit of a fabric look as we are turning the board and have the lines crossing from previous steps.
Finishing up
- Allow your project board to dry, at least a little;)
- Pull up all tape lines
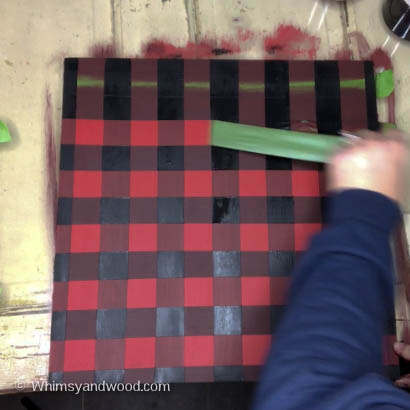
- Tada! you have a Buffalo Check Plaid Background.
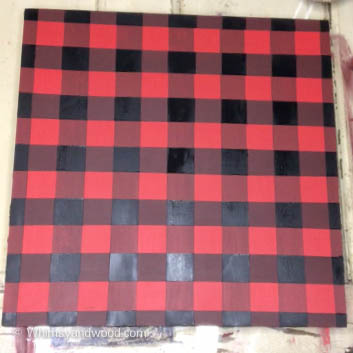
It is a bit of work to get this background, but it really is such a fun piece!
I sanded the painted buffalo check plaid background & then painted my sign over the plaid. By the end of the process, I probably could have made 3 signs for the time it took.
 No Ragrets, I love how the background and this sign turned out!

Had so much fun doing this! Working on a cypress rocker with fan-shaped slats. Hoping that the plaid will work out even if there are spaces between the slats. Did a practice board. Love it! Thank you!
Pam, You will have to show me your finished project! I have only used this on flat signs so far. I would love to see!
Thank you so much for the great tutorial. Good detail and informative pictures. I am a huge fan of Buffalo plaid and gingham. This is a wonderful addition to my decorative tool box!
I am so glad you found it helpful!
did you use vinyl letters or vinyl stencil and did you use a medium first before painting letters and did you seal your work? Beautiful work! Thanks, ava
Hi Ava, I do create vinyl stencils. There are many ways you can approach this sign. I did not seal my base until I finished the entire project. When completed I sealed with Pure Home Paints Matte Top Coat. It is available in my here in my shop. Have you ever used Pure Home Paints products?
I love this you are amazing. Thank you so much for sharing.
Thank you Carlee, I am so glad it was helpful to you!
Thanks for the video. You make it look so easy! I’ll be beginning my first try on a slab of wood from our log cabin (we installed a new window so we had a big piece all attached). It’s going to be the base for my business sign. Going to use green and a bark brown. Wish me luck!
Awesome! It really is simple, just a little tedious. For me, it is so worth the work. Thanks for visiting!
Will I do this? Yes. But I might just buy a piece of fabric, staple it on the board, and add HTV. I would either need to buy paint or fabric…
I tried this for the first time and I was so bummed because the blue tape took off my paint for one of the colors! I’m not sure what to do. I’m going to try again!!
Laura, That is a bummer! Normally if your paint is dry and the base under the paint is clean that will not happen.
Every paint brand and type is different. I use a Chalk type acrylic which allows me to do the next layer pretty quickly behind the first. When I used a latex brand, I would wait the recommended hour and then tape.
You will also find various types of painters tape. Some say delicate, thay may be a better fit for you. In general, I do not have paint lift.
Ok awesome! I’m not giving up 🙂 I appreciate your response!! Your sign was beautiful!
That is one thing I’m doing is just taking the tape off in between steps and just letting it get GOOD and DRY (overnight for each color) tape comes right off on the next step with no problems. It is taking a little longer but the results are worth it! No touching up!
This tutorial is fantastic! …and pictures for each step! Love it! Doing this for “Dirty Santa” this year…. I think everyone is going to be fighting over the porch sign 🙂
I can’t!!!!! I try and I fail every single time!!!!!!!
Every time i try it looks weird.
I think I am trying to use the wrong colors! I watch, I do what I see on tutorials, and it comes out like horrible. But I have a color scheme, so I just want to make that work. I seem to have a mental block or something. 🙁
Hi Sharnell, What problems are you running into? What colors are you using?
This is by far the best tutorial for painting buffalo plaid that I have fortune! You get the exact look of buffalo plaid as if you used a stencil! Some of the others have missed a step somehow and the whole thing just looks slightly “off”. This is PERFECT! Thank you!!!
Now…..to go find a board……and my paints……where did I put my tape?