I have a few pieces that can use an update with paint!
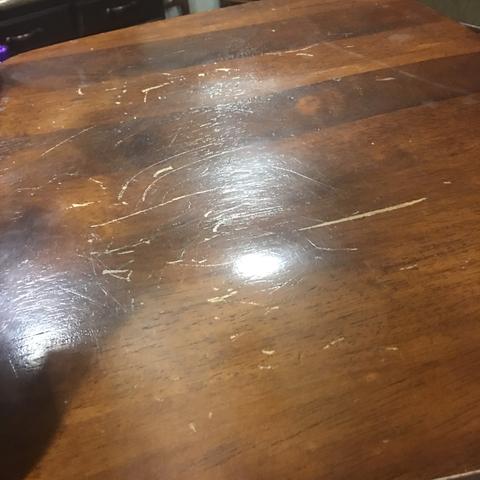
Where to start my new update with paint. We have a basic solid wood, round table with 4 chairs that sits between our Kitchen & living room. It is not vintage, it is used and abused and is looking pretty worn. It is solid wood & has a dark stain that is very close to the color of our floors. I like to joke that it looks like it just grows right out of our floor.
I often dream of refinishing it! Ever since someone gave my daughter Brooke “Miss Me” jeans a few years back. If you are not familiar with these jeans the pockets are covered in rhinestones, rhinestones on the butt are a terrible idea for wiggly kids on wooden chairs. With kids, pets, life, and two businesses there is always something else that needs to be done, so the table waits. I bet you can relate! This table wasn’t in jeopardy of dying if I ignore it.
Every Christmas we move the table from it’s normal space, into my studio to make room for our Christmas tree. This particular year when the time came to move it back I told my husband to wait because I was ready to clean and paint it. I could swear I could hear his mind saying can’t we just move it now rather than wait 3 weeks to realize you don’t have time? He was right… it did sit and wait for a few weeks into the new year. Insert some quote about intentions…& remember making it wait gave me opportunities to feed my kids and stuff…
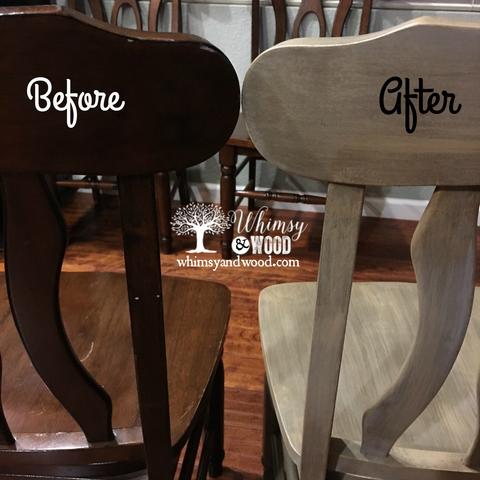
My Basic Table Before the Update With Paint
Post contains affiliate links for your convenience. If you follow the link & then make a purchase, I will make a small commission.
Table is a basic dark brown stained wood, ordered from JC Penney about 9 years ago. The only “maker’s mark” reads, Hecho en Mexico. The table is well used & still in solid condition. Every project begins by scrubbing it with vinegar and water. I need to add to the weekly chore list, Have kids clean the chairs…
I wanted to update with a paint finish that blended the kitchen and the living room together better since I did my Living room wall updates this year. Not sure what to call my house style. Maybe Industrial, Country/Farmhouse, Elegance…if that is a thing?
I always love the famed Restoration Hardware driftwood look so I chose colors from our paint line to create a similar finish. Using our Pure Home Paints in the neutral colors of Stone, Swiss Miss, and Cashmere.
Creating our Restoration Hardware Finish
I began with 2 layers of Stone. This created just a basic base color of neutral gray.
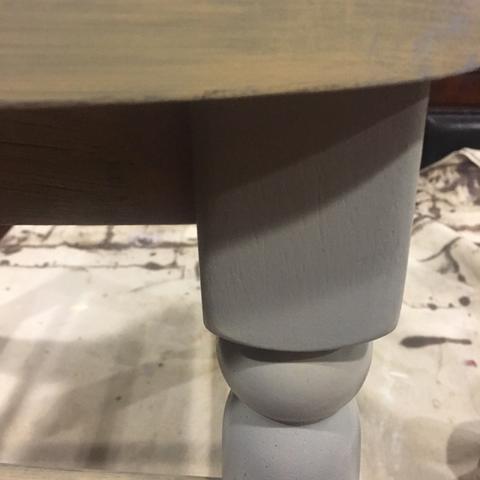
Next I took a paint brush that some people might think I should have thrown away long ago & used it to dry brush a good layer of Swiss Miss all over the Stone. Generally when painting with our PHP products we use a damp brush. When dry brushing, you make sure your brush is as dry as you can get it. I use my old worn brushes that have splayed bristles and likely old dry white paint in them. The Swiss Miss layer I chose to brush on with only some Stone showing through.
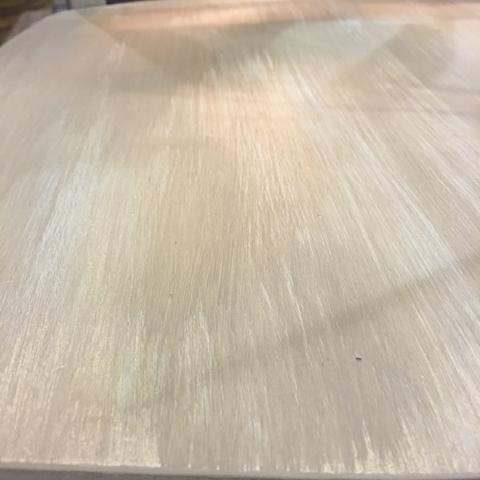
Swiss Miss over Stone
Once completely dry, I followed with Cashmere over the 2 colors. The Cashmere is a warm deep beige. Lighter than the other colors in, but a little darker than the other whites in my space. Some spaces I kept the brush very dry, and in others a little wetter to blend, more than leave a heavy stroke.
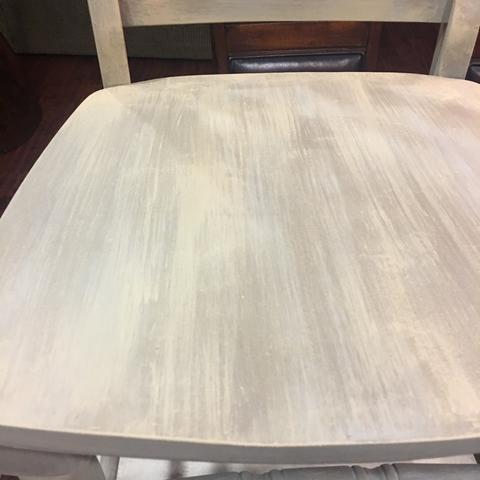
Cashmere highlights brushed over Stone & Swiss Miss
Once all was dry we used our matte top coat to seal it all & protect the new painted finish.
Prepping the Table Top for Stain
The table top is solid wood planks with a dark finish. You can use our Pure Home Stains right over the old stain finish. This method may darkened the existing stain. To create a lighter pure color and show the wood grain better you will sand off the old finish. Use a 100 grit sand paper, follow with a 120 grit, I use my random orbital sander. It came off pretty quick leaving a beautiful bare wood. We have several gorgeous stain colors that can be used as is, or can be mixed to deepen a color. I chose to use our Chestnut Stain. You can brush on the stain with a damp brush, or wipe on with a damp sponge. Our stains have no odor, they are 100% non toxic & can be used indoors. They also do not require any wiping off. You wipe on & can add layers until you reach the depth of color that you want! Also… the top coat is in the stain. I love having an all in one product like this.
Isn’t it amazing how well you can update with paint?
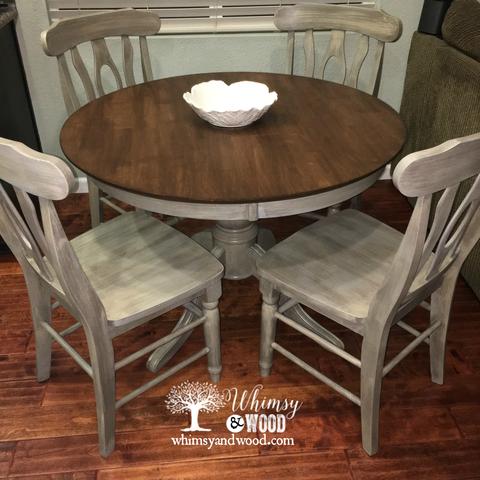
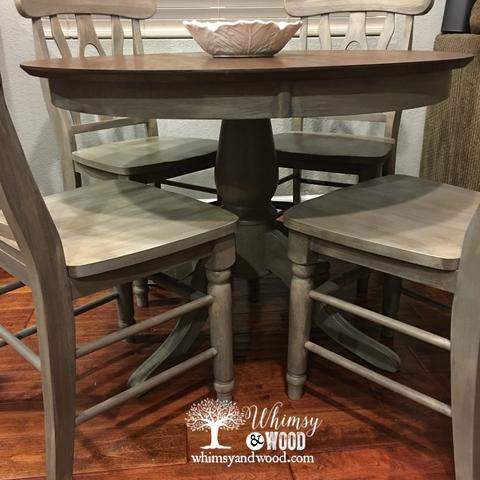
Here are the final pictures. I love how it looks in this space! Definitely more Restoration Hardware than Hecho en Mexico.
Leave a Reply